Overview of Non-Persistent Maintain Applications
|
How to: |
The benefits of a non-persistent application are the following:
- Connection is only needed at launch and Reporting Server update.
- Fewer agents are needed on the Reporting Server.
The disadvantages of a non-persistent application are the following:
- Application is restarted every time you return to the Reporting Server.
- All database keys must be retained on the form.
- Maintain Data commands are not available for events.
Note: In a non-persistent application:
- Interaction between forms and Maintain Data code must be done using JavaScript events.
- A connect task is needed to perform the Maintain Data code.
- An action field is needed to determine how to branch inside the Maintain Data code.
Procedure: How to Create the Application
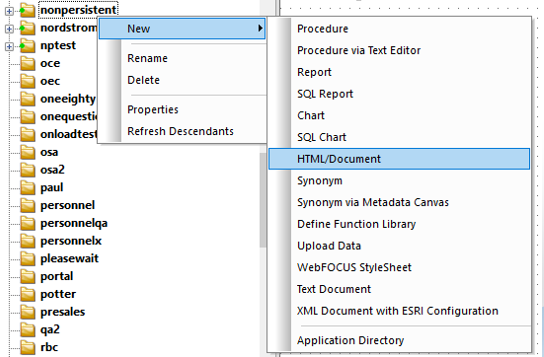
- From the Environments Tree
panel, right-click an application folder, point to New, and
click HTML/Document, as shown in the following image.
If needed, create the domain first.
The HTML/Document Wizard opens.
- Click Next.
The Templates, Settings, and Themes dialog box opens.
- Click Finish.
Procedure: How to Add the Maintain Data
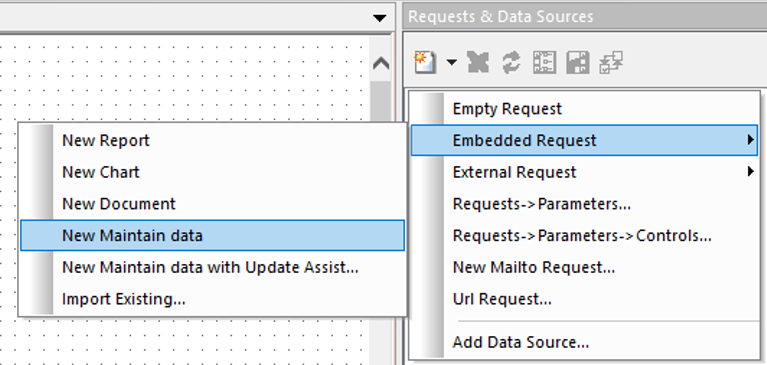
- From the Requests & Data Sources panel,
click the down arrow next to the New icon, select
Embedded Request, and then select New Maintain data, as shown in the following image.
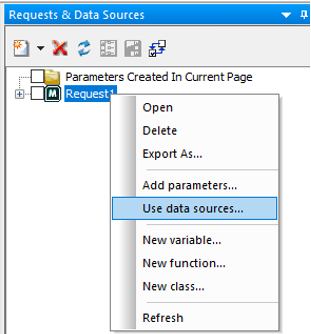
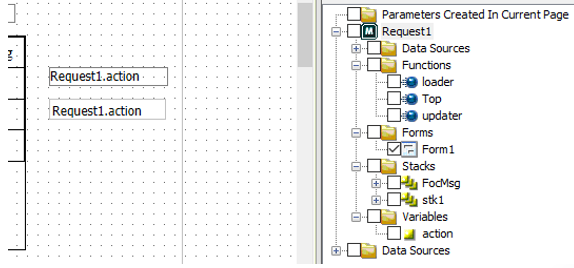
 By default, for an Embedded Request, Request1 is created.
 - Right-click the
Request1
parameter and select
Use data sources, as shown in the following image.
- From the Data Sources in Procedure dialog box, select New.
- Browse to the location of your Maintain Data data sources and select the one to use, in this case, the movies file, as shown
in the following image.

- Click OK.
Procedure: How to Create the Stack
In the .mnt tab, add a loaddata case in the Maintain Data code to load the stack, as shown in the following image.
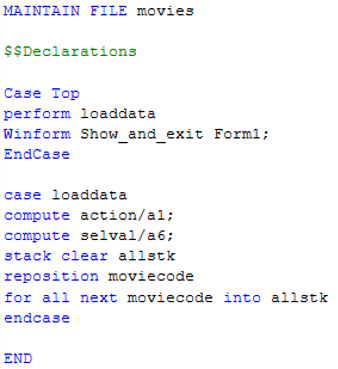
Note: The Winform Show_and_exit Form1 command makes the application non-persistent.
Procedure: How to Create the Form
- Click the htmlpage1 tab.
- From the Requests & Data Sources panel, expand Request1 and the Forms folder.
- Drag Form1 onto the canvas, as shown in the following image.
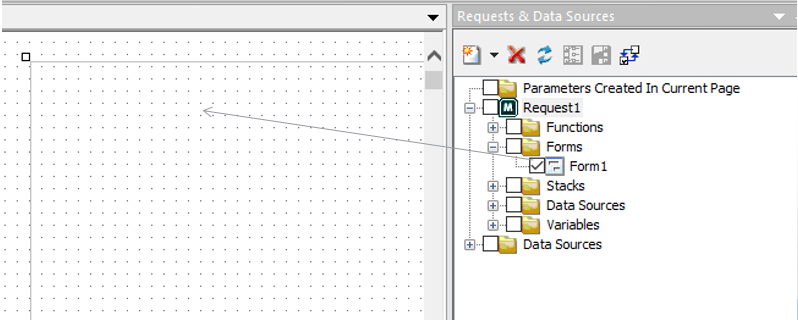
- When prompted to create a multipage control, click No.
Procedure: How to Display the Stack
- From the Requests & Data Sources panel, expand the Stacks folder.
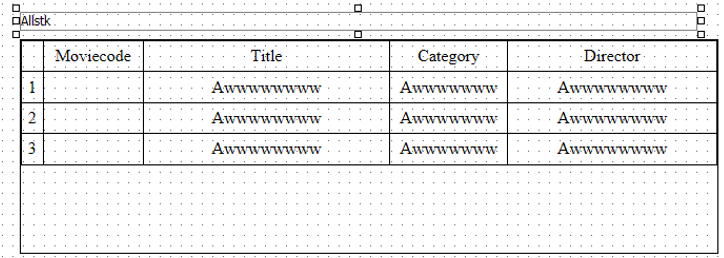
- Right-click allstk and drag it onto the form, as shown in the following image.
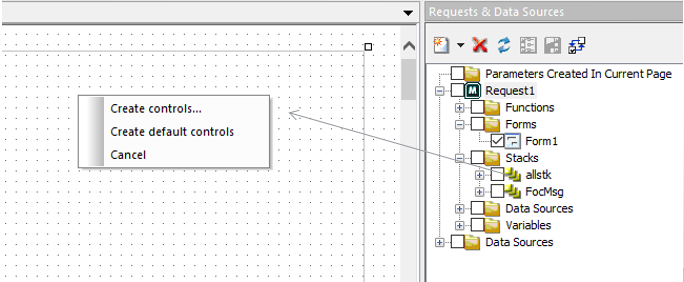
- Select Create controls.
Note: If you accidentally left-click allstk and fields are created, click the undo icon, and make sure to right-click the stack before you drag it onto the form.
- On the Parameters dialog box, select the first four fields, as shown in the following image.
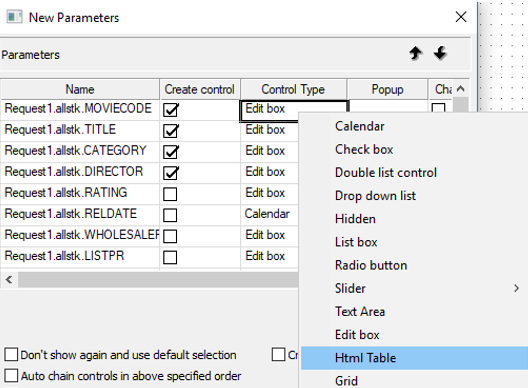
- Right-click the Edit box value in the Control Type column on row 1 and select Html Table.
- Click OK.
- Highlight the
Allstk
label, as shown in the following image, and delete the label.
Procedure: How to Add the Connect Task
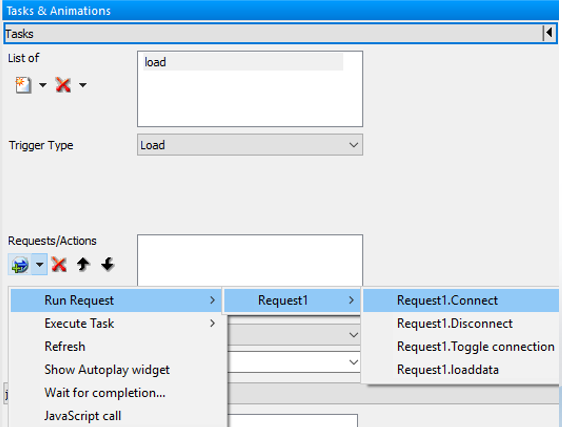
- Open the Tasks & Animations panel.
- Add the load task.
- In the Requests/Actions section, click the arrow for Requests selections, select Run Request, then select Request1, and then select Request1.Connect, as shown in the following image.
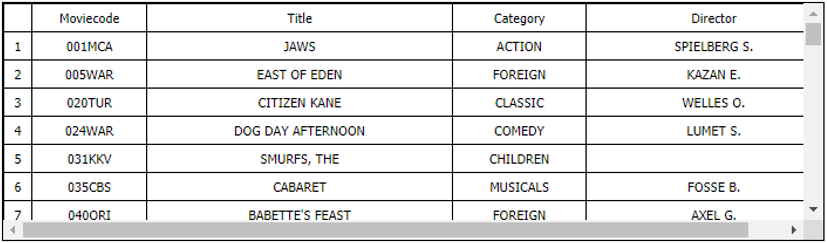
- Run the application.
The output is:
Procedure: How to Add a Hyperlink
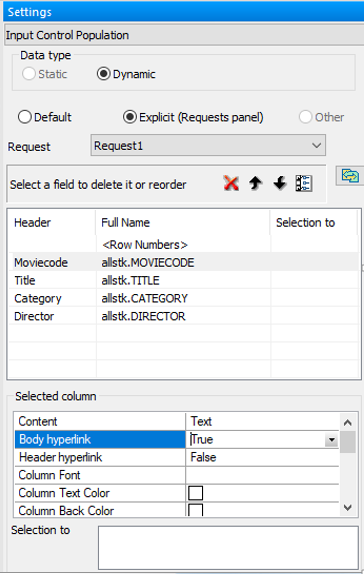
- Click the HTML table and open the Settings panel.
-
Select
Moviecode
and change the Body
hyperlink
property to True, as shown in the following image.
Procedure: How to Add the Variables
- From the Requests & Data Sources panel, expand the Variables folder.
- Drag selval and then action onto the form. By default, they are named edit1 and edit2.
- Rename edit1 and edit2 to selval and action, as shown in the following image.
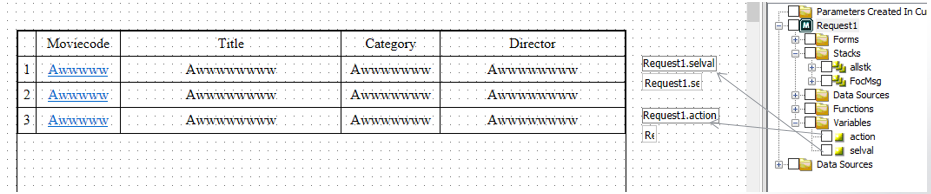
To do so:
- Open the Properties panel.
- Click selval and change the Unique Identifier from edit1 to selval.
- Click action and change the Unique Identifier from edit2 to action.
These are used to store and pass back values to Maintain Data. You can make them not visible (visible No) later.
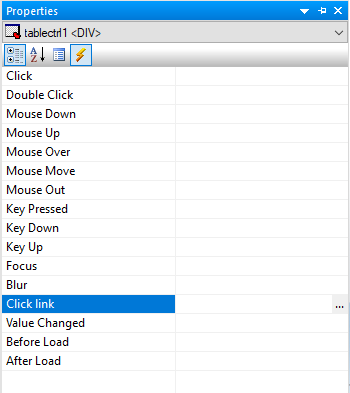
Procedure: How to Add the Event
When you click the link, you want to return to the Maintain Data code, retrieve the record, and display it.
- Click the HTML table and open the Properties panel.
- Click the lightning
bolt
and double-click Click
link, as shown in the following image.
- Since there are no Maintain Data tasks in a non-persistent Maintain Data application, you need to use
JavaScript.
- Store the selected value in selval.
- Set action to 'G', as shown in the following code, to branch
in the Maintain Data code.
selval.value=IbComposer_getClickedCellValue(ctrl);
action.value= 'G';
- Open the Tasks & Animations panel and drag the load task into the event, as shown in the following image.
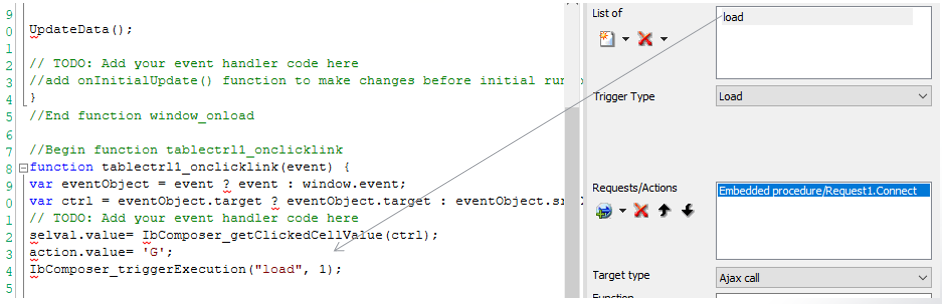
Note: This requires a reconnect to Maintain Data every time.
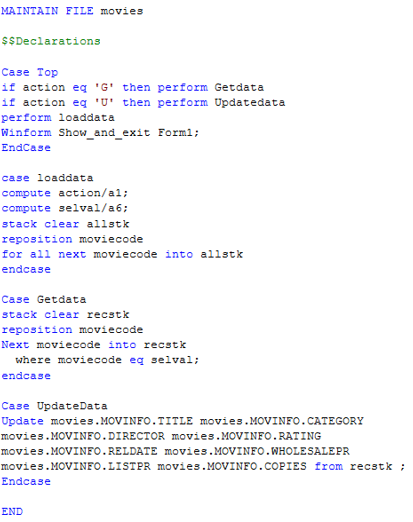
Procedure: How to Update the Code
- Click the .mnt tab to type more code.
-
Add an IF statement for
when action
equals
'G' and a Getdata case, as shown in the following image.
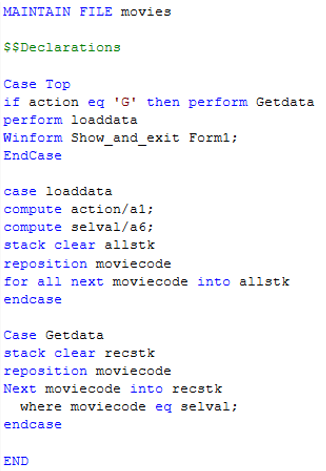
- Save the code.
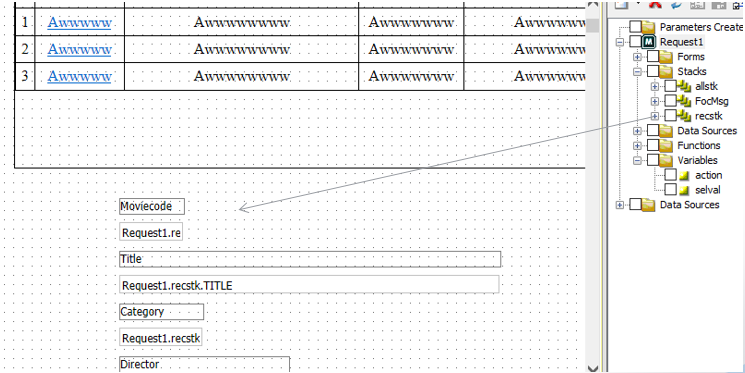
Procedure: How to Add Fields to the Form
- Display the HTML form.
- From the Request & Data Sources panel, expand the Stacks folder and drag
recstk
onto the form.
Left-click and drag for
default fields, as shown in the following image.
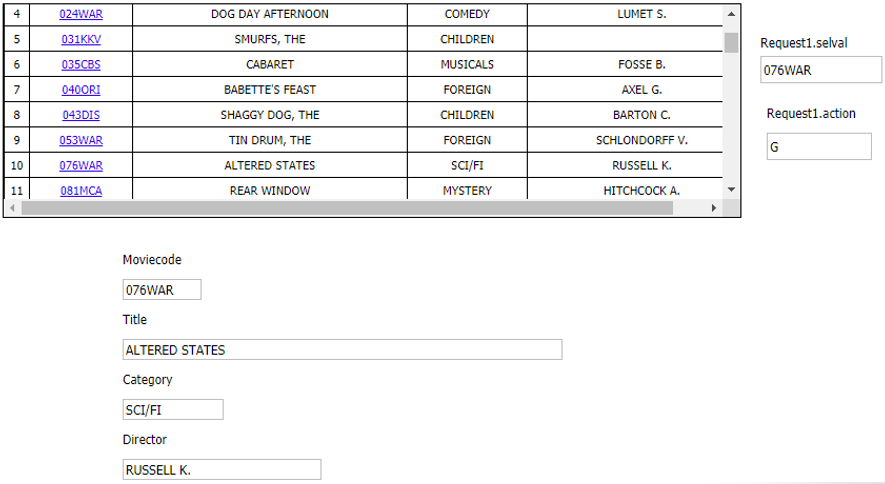
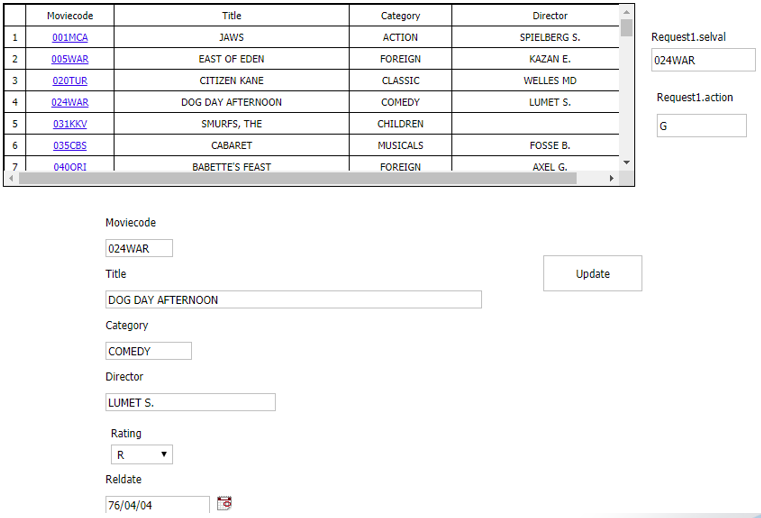
- Save the code and run the application.
- Select a row in the HTML table.
The output is:
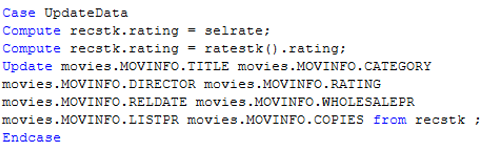
-
Open the Maintain Data code
and add an
UpdateData
case with a test for action equal to 'U', as shown in the following image.
The edit boxes and stacks get sent back to the code.
- Save the code.
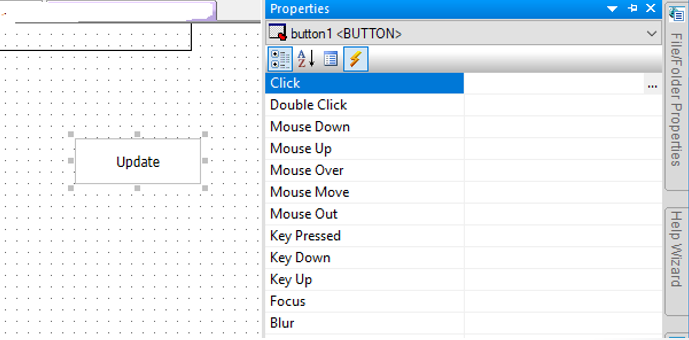
- Draw a button on the form and change the text to Update.
- Open the Properties panel.
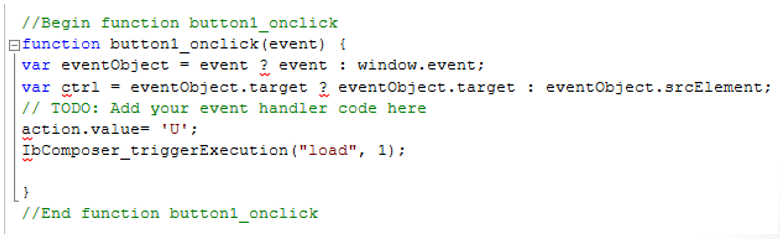
- Click the lightning bolt and double-click the Click event, as shown in the following image.
-
In the JavaScript,
update the action field, as shown in the following image.
- Reconnect to the Maintain Data code.
- Save the code and run the application.
Note: Add and Delete are handled the same way.
Procedure: How to Add Other Objects
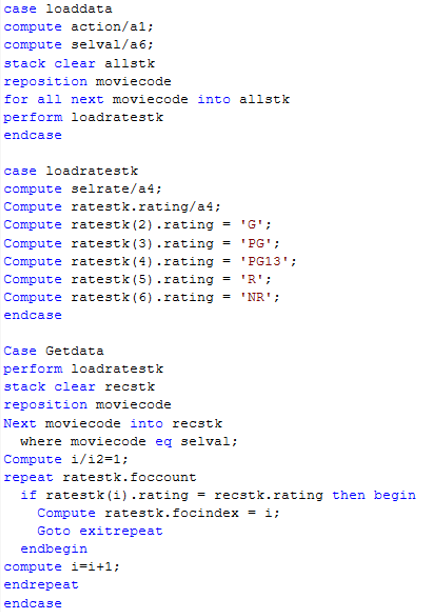
- Add the loadratestk case to display all valid ratings.
- Perform the load from both loaddata and Getdata.
- Add code into Getdata to autoscroll to the selected value, as shown in the following image.
- From the Requests & Data Sources panel, right-click ratestk/rating, drag
it onto the form next to the rating field, and select Create controls, as shown in the following image.

- Right-click the Edit box
value in the Control Type column, select New control, and then select Drop down list, as shown in the following image.
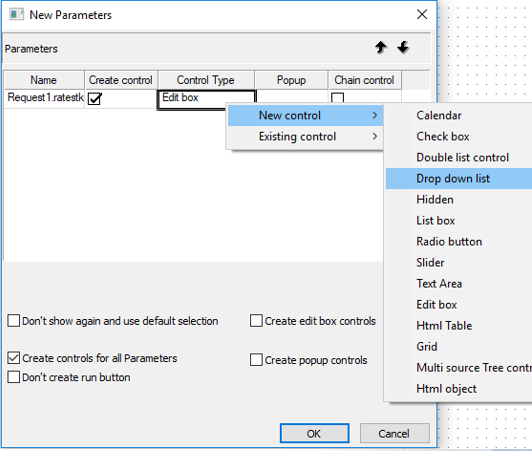
- Click OK.
- Delete the rating field and header.
- Drag the new drop box into that space.
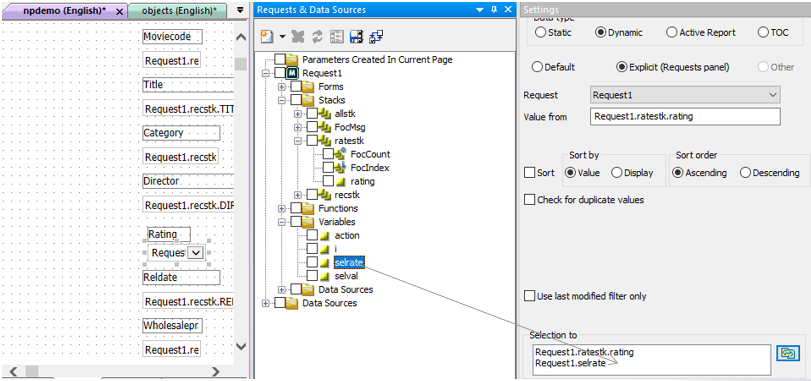
- Select the new drop box.
- Open the Request & Data Sources panel and the Settings panel.
-
Drag
selrate
from the Variables folder into
the Selection to area, as shown in the following image.
Procedure: How to Retrieve the Values
- Using the
selrate
or stack().field, edit the Maintain Data code to collect the value from the drop box, as shown in the following image. This
works for drop boxes, list boxes, and radio buttons.
- Save the code and run the application.
The output is:
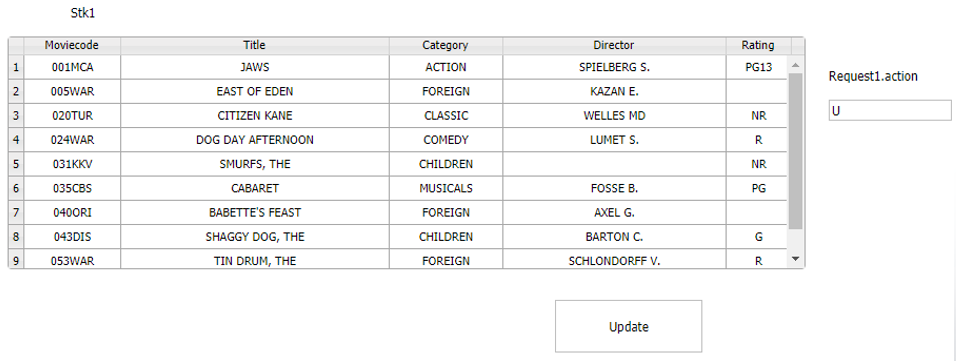
Procedure: How to Add a Grid
Using the -IWC.updateGridData("stk"); command, non-persistent Maintain Data applications can use the grid to update multiple rows and columns.
- Create a new HTML page.
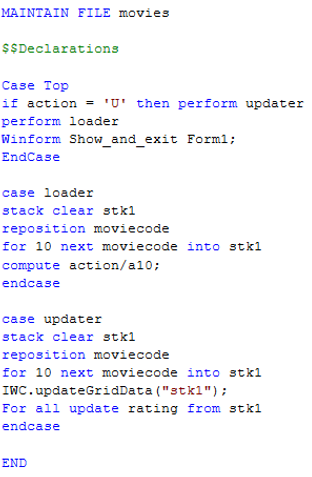
- Create a new embedded Maintain Data request, using the movies data source.
- Add the code, as shown in the following image.
- Drag the form onto the canvas.
- Right-click stk1, drag it onto the form, and select Create controls.
- Leave the first five fields selected and change the Control Type to Grid, as shown in the following image.
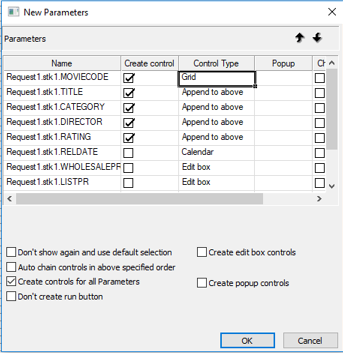
- Click OK.
- Open the Tasks & Animations panel.
- Click the arrow in the Requests/Actions section, select Run Request, then select Request1, and then select Request1.Connect, as shown in the following image.
- Expand the Variables folder.
- Drag action onto the form.
- Open the Properties panel.
- Rename edit1 to action by clicking action and changing the Unique Identifier from edit1 to action, as shown in the following image.
- Draw a button on the form and change the text to Update.
-
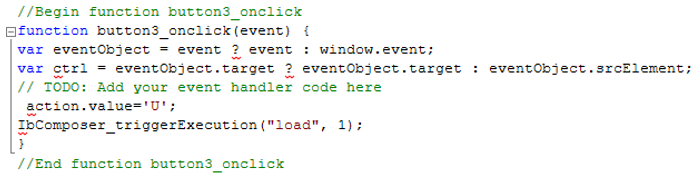
Open the Properties panel, click the lightning bolt, and double-click Click, as shown in the following image.

-
Set the
action.value
to 'U', as shown in the following image.
- Save the code and run the application.
The output is: