Launching the Report Wizard

How to:

The Report Wizard allows you to create a new report procedure or SQL report procedure, and open an existing report.

To open the Report Wizard:

The Report Wizard opens, as shown in the following image.

Report Wizard

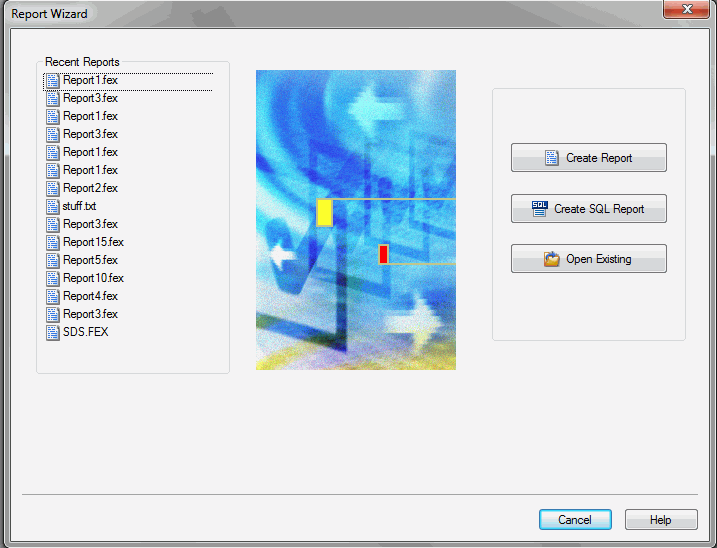
From the Report Wizard, you can create a new report or SQL report procedure or open a recent procedure.

Procedure: How to Create a Report Using the Report Wizard

After you launch the Report Wizard, you can begin to create your report procedure.

Note: If you choose to create a new report using the shortcut menu in the Environments Tree panel, you will skip the first screen of the Report Wizard. You will not have to specify whether you are creating a report or SQL report. You will instead be brought to the Select Data Source window, with the location for your report already selected.

  1. Click Create Report.

    The Report Wizard - Select Procedure Location window opens.

  2. Navigate to where you want to create the new report and click Next.

    The Select Data Source window opens.

  3. Choose an application folder in the application folder tree, and select a Master File in the Master files list. You can select the Use Qualified Path check box if you only want to display the data sources in the application folder and generate a qualified file name reference.
  4. Click Finish.

    The Report canvas and the Procedure View panel open.

  5. Double-click fields in the Object Inspector, or drag them on to the canvas to add them to the report.
  6. Format your report by using the options on the Report, Format, Data, Layout, Images, View, Field, and Appearance tabs.

    Tip: The Field and Appearance tabs appear when you select a data column on the Report canvas.

  7. To save your report, click Save on the Quick Access Toolbar, or click Save or Save As from the Hamburger menu.
  8. To run your report, click Run on the Quick Access Toolbar, or click Run from the Hamburger menu.

Procedure: How to Create an SQL Report From an External .sql File

After you launch the Report Wizard, you can begin to create your SQL report procedure. This enables you to browse and select external procedures that exist in the domain.

Note: If you choose to create a new SQL report using the shortcut menu in the Environments Tree panel, you will skip the first screen of the Report Wizard. You will not have to specify whether you are creating a report or SQL report. You will instead be brought to the SQL Report Wizard - Welcome window.

  1. Click Create SQL Report.

    The Report Wizard - Choose location for the new SQL Report window opens.

  2. Select a location for your SQL report and click Next.

    The SQL Report Wizard - Welcome window opens.

  3. Click the Included from an external ‘.sql’ file option.
  4. Click Next.

    The SQL Report Wizard - Data access information window opens.

  5. In the Select the SQL database engine area, select a database from the drop-down list. The drop-down list changes depending on your server configuration.
  6. In the Select connection area, choose a connection from the drop-down list generated from the engine you selected.
  7. Click Next.

    The SQL Report Wizard - Include external SQL file window opens.

  8. Click Browse to select an external SQL file name or type the external SQL file name in the field.

    Optionally, you can run with limited records by clicking Run SQL. By default, the Run with limited records check box is selected so you can test your procedure with a read limit if the engine supports it. There is a field box next to the check box in which you can enter the number of records to be read. The default limit is 100.

  9. Click Next. The SQL Report Wizard - Summary of SQL options window opens. Review your options and click Next, which opens the Report Wizard - SQL Data Source window.
  10. Navigate to where you want to create the new procedure.
  11. In the Enter a Procedure Name field, type a name for the SQL report.

    Note: Typing a procedure name is not required to create a new report. If you do not type a procedure name in the Enter a Procedure Name field, a default procedure name will be provided until you save the procedure.

  12. Click Finish.

    The Report canvas and the Procedure View panel open. You can now add data to your report and format the data using the tabs on the ribbon.

Procedure: How to Pass SQL Commands to the RDBMS Using SQL Passthru

After you launch the Report Wizard, you can begin to create your SQL report procedure by typing SQL commands that will be passed on to the RDBMS with the SQL Passthru feature.

Note: If you choose to create a new SQL report using the shortcut menu in the Environments Tree panel, you will skip the first screen of the Report Wizard. You will not have to specify whether you are creating a report or SQL report. You will instead be brought to the Report Wizard - Choose location for the new SQL Report window, with the location for your report already selected.

  1. Click Create SQL Report.

    The Report Wizard - Choose location for the new SQL Report window opens.

  2. Select a location for your SQL report and click Next.

    The SQL Report Wizard - Welcome window opens.

  3. Click Type SQL statements in the report request.
  4. Click Next.

    The SQL Report Wizard - Data access information window opens.

  5. In the Select the SQL database engine area, select a database from the drop-down list. The drop-down list changes depending on your server configuration.
  6. In the Select the connection area, choose a connection from the drop-down list generated from the engine you selected.
  7. Click Next.

    The SQL Report Wizard - Enter SQL statements window opens.

  8. In the field box, type the SQL statements you want to pass to the RDBMS.

    Optionally, you can run with limited records by clicking Run SQL. By default, the Run with limited records check box is selected, so you can test your procedure with a read limit if the engine supports it. There is a field box next to the check box in which you can enter the number of records to be read. The default limit is 100.

  9. Click Next.

    The SQL Report Wizard - Summary of SQL options window opens.

  10. Review your options and click Next.

    The Report Wizard - SQL Data Source window opens.

  11. Navigate to where you want to create the new procedure.
  12. In the Enter a Procedure Name field, type a name for the SQL report.

    Note: Typing a procedure name is not required to create a new report. If you do not type a procedure name in the Enter a Procedure Name field, a default procedure name will be provided until you save the procedure.

  13. Click Finish.

    The Report canvas and the Procedure View panel open. You can now add data to your report and format the data using the tabs on the ribbon.

Procedure: How to Import SQL Commands From an Existing .sql File

You can import commands from existing .sql files. This enables you to modify SQL code after importing it from an external file to the procedure being built. You can modify the request using bits of the code.

Note: If you choose to create a new SQL report using the shortcut menu in the Environments Tree panel, you will skip the first screen of the Report Wizard. You will not have to specify whether you are creating a report or SQL report. You will instead be brought to the Report Wizard - Choose location for the new SQL Report window, with the location for your report already selected.

  1. Click Create SQL Report.

    The Report Wizard - Choose location for the new SQL Report window opens.

  2. Select a location for your SQL report and click Next.

    The SQL Report Wizard - Welcome window opens.

  3. Click Import from an existing ‘.sql’ file and click Next.

    The SQL Report - Data access information window opens.

  4. In the Select SQL database engine area, select a database from the drop-down list. The drop-down list changes depending on your server configuration.
  5. In the Select the connection area, choose a connection from the drop-down list generated from the engine you selected.
  6. Click Next.

    The SQL Report Wizard - Import external SQL file window opens.

  7. Type the SQL file name that you want to import or click Browse to select it.

    Optionally, you can run with limited records by clicking Run SQL. By default, the Run with limited records check box is selected, so you can test your procedure with a read limit if the engine supports it. There is a field box next to the check box in which you can enter the number of records to be read. The default limit is 100. You can edit these options here or in the next step.

  8. Click Next.

    The SQL Report Wizard - Enter SQL statements window opens.

  9. In the field box, type the SQL statements you want to pass to the RDBMS.
  10. Click Next.

    The SQL Report Wizard - Summary of SQL options window opens.

  11. Review your options and click Next.

    The Report Wizard - SQL Data Source window opens.

  12. Navigate to where you want to create the new procedure.
  13. In the Enter a Procedure Name field, type a name for the SQL report.

    Note: Typing a procedure name is not required to create a new report. If you do not type a procedure name in the Enter a Procedure Name field, a default procedure name will be provided until you save the procedure.

  14. Click Finish.

    The Report canvas and the Procedure View panel open. You can now add data to your report and format the data using the tabs on the ribbon.