| My Account Profile
|
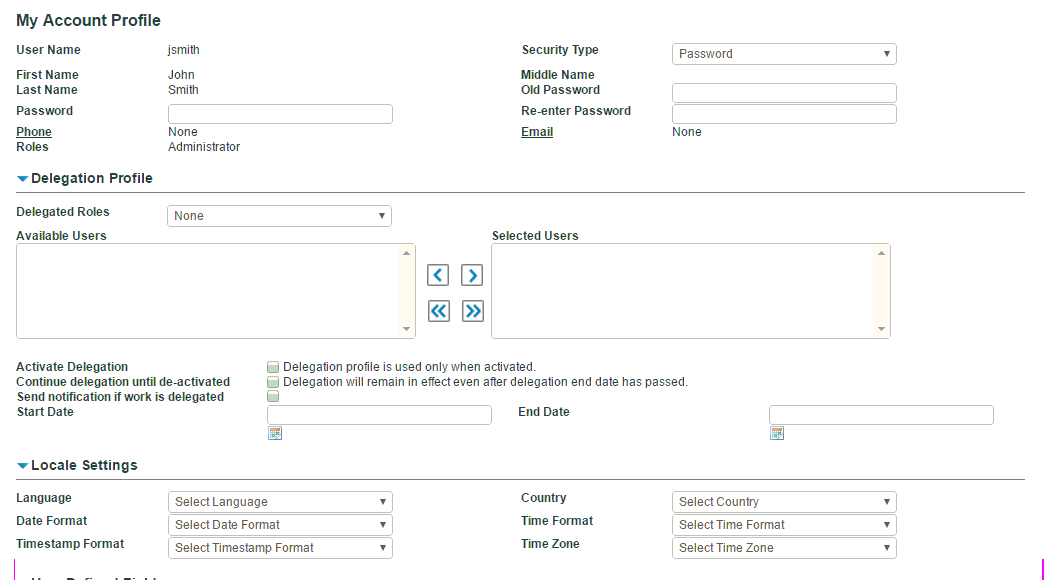
Displays your name, contact details, and role. You can change your password from here. Password policies may be configured by your administrator. If single sign-on is set up, you cannot see or modify the password. You can add new phone numbers and emails here.
Notes:
- Changes to your profile can be done here. However, if you have privileges to maintain user accounts, you can update your profile from the User Accounts screen as well.
- Changes made to the account profile are effective only when you log in again.
- The email address provided is used for work item notification if a work item is assigned to you.
|
| Delegation Profile
|
- You can choose to enable your delegation profile and specify how delegation should work.
- Delegation is a part of customization and will not appear automatically to all users.
|
| Locale Settings
|
|
| User Defined Fields
Show Record Attribute Help?
|
This value controls whether the repository attribute Help should be shown when you are editing records. You can enter
Yes or
No. If
Yes is specified and the cursor is moved on an attribute while editing records, a Help icon is displayed.
|
 on the upper-right corner of the main UI and then select
Profile.
on the upper-right corner of the main UI and then select
Profile.