Copyright © Cloud Software Group, Inc. All Rights Reserved


Chapter 8 JDBC Palette : Query Designer

Query Designer
Wizard
The Query Designer is a GUI tool for building SQL queries, testing syntax, and previewing results before running the process. You can use the Query Designer in one of the following ways:
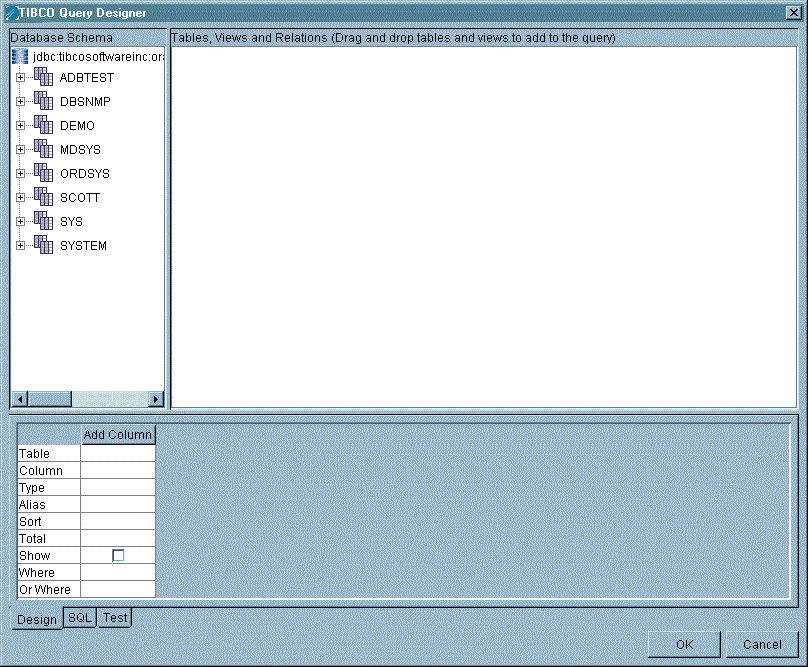
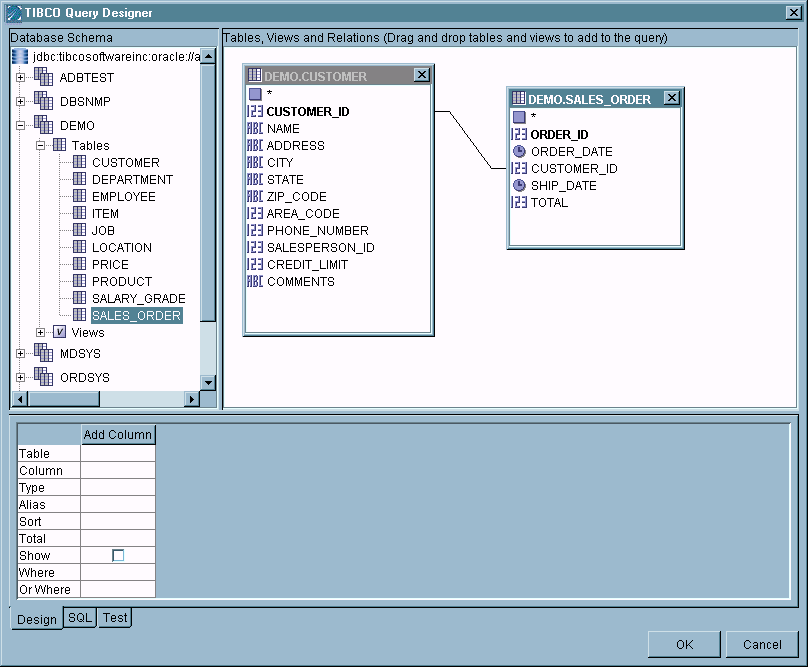
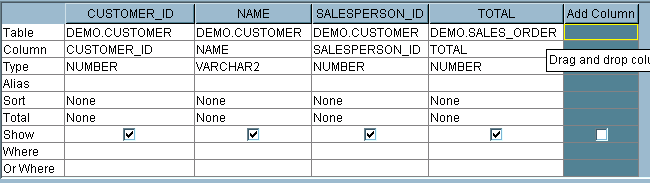
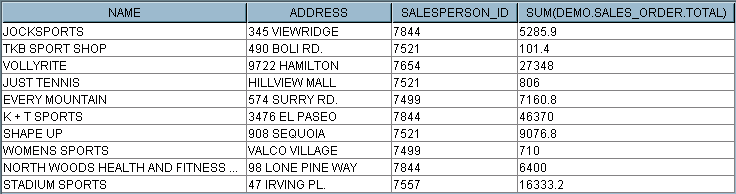
In the JDBC Query activity, you must first specify a JDBC Connection shared configuration resource to connect to a database. Once the database connection is specified in the JDBC Query activity, you can click the Build Using Wizard button to create a query using the Query Designer wizard. Figure 18 illustrates the Query Designer.
Figure 18 The Query Designer wizard
The Query Designer window has the following elements:
You can use the Design tab of the Query Designer to automatically generate queries. You can then click on the SQL tab of the Query Designer to manually edit the query, if you want. To manually edit the query, click the Customize check box on the SQL tab. On the SQL tab, you can drag and drop columns into the statement.
To use the Query Designer to generate a query, perform this procedure:
1.
For example:
This example demonstrates building a query that retrieves names of customers that also have placed orders. After dragging the CUSTOMER and SALES_ORDER tables from the Database Schema panel to the Table Diagram panel, a join is automatically displayed between the CUSTOMER_ID column in each table. You can also manually add joins by dragging the cursor from one join column to the other.
Clicking the SQL tab in the SQL panel shows the automatically generated syntax:
 
   SELECT *
   FROM DEMO.CUSTOMER, DEMO.SALES_ORDER
   WHERE (DEMO.CUSTOMER.CUSTOMER_ID = DEMO.SALES_ORDER.CUSTOMER_ID)
 
By default, all table columns are included in the query. To constrain query syntax, click the Design tab in the SQL panel. You can drag individual columns from the Table Diagram panel to the Add Column area of this tab to refine the query. The Add Column entry is a placeholder only, and does not affect the output. It is meant to be the area where you can drag columns from the tables to add to the query.
The following example shows the results of dragging the CUSTOMER_ID, NAME, TOTAL, and SALESPERSON_ID columns to the SQL tab:
Clicking the SQL tab to view the modified syntax shows the query now selects only from the set of columns:
 
   SELECT DEMO.CUSTOMER.CUSTOMER_ID, DEMO.CUSTOMER.NAME,       DEMO.CUSTOMER.SALESPERSON_ID, DEMO.SALES_ORDER.TOTAL
      FROM DEMO.CUSTOMER, DEMO.SALES_ORDER
      WHERE (DEMO.CUSTOMER.CUSTOMER_ID = DEMO.SALES_ORDER.CUSTOMER_ID)
 
2.
For the TOTAL column, click in the Total field and select Sum from the list. The other columns are automatically updated to select the Group By value required for this function.
For the CUSTOMER_ID column, click the Show check box to clear it. This column is necessary for the query, but can be hidden in the output.
Clicking the SQL tab to view the syntax shows the SUM function and GROUP BY clause has been added to the SQL:
 
   SELECT DEMO.CUSTOMER.NAME, DEMO.CUSTOMER.SALESPERSON_ID,       SUM(DEMO.SALES_ORDER.TOTAL)
      FROM DEMO.CUSTOMER, DEMO.SALES_ORDER
      WHERE (DEMO.CUSTOMER.CUSTOMER_ID =
      GROUP BY DEMO.CUSTOMER.CUSTOMER_ID, DEMO.CUSTOMER.NAME,       DEMO.CUSTOMER.SALESPERSON_ID
Other criteria can be applied using the Sort, Criteria, and Or fields.
3.
A dialog displays either a success message, or a database error code and message.
4.
A representative number of rows, specified by the Maximum Rows value, is returned.
5.
The SQL syntax is automatically entered in the SQL Statement field of the Database task.
The following usage restrictions apply to the Query Designer:

Copyright © Cloud Software Group, Inc. All Rights Reserved