Deploying an Application
You can deploy an application in TIBCO Business Studio™ for BusinessWorks™.
Prerequisites
Procedure
-
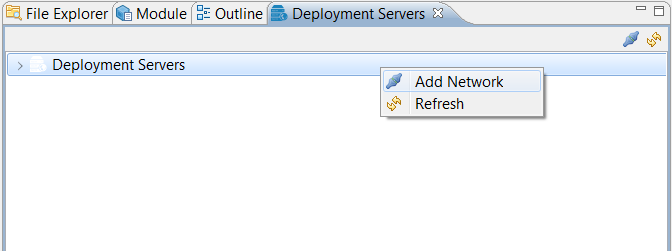
Connect to a deployment server.
- In the Deployment Servers pane, right-click Deployment Servers and select Add Network.
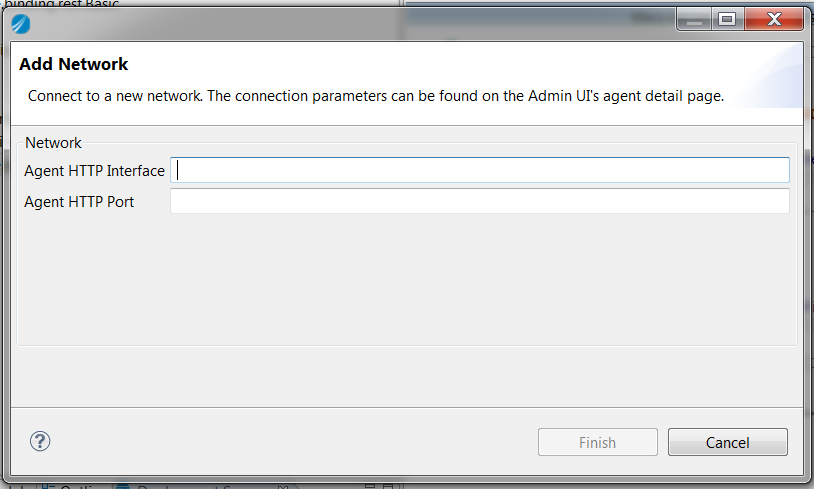
- In the Add Network dialog, specify the HTTP interface and port for the network. The default HTTP interface is the name of the bwagent. The default port is 8079. The defaults might have been changed by your administrator.
Note: The Deployment Servers pane contains information related to a single bwagent. Unlike the Admin UI, this pane does not have information about the other bwagents and hence cannot be used to perform operations on other bwagents. For example, you cannot create an AppNode in another bwagent within the existing domain. -
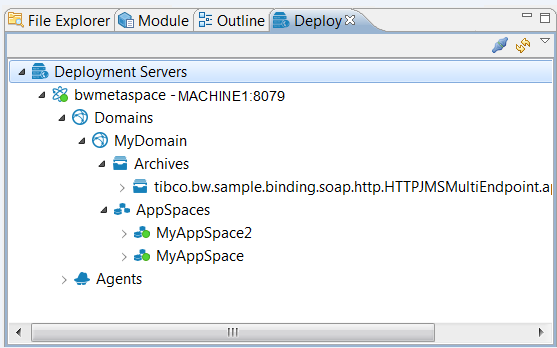
Deploy and start your application. There are several ways to deploy:
- Drag an application project into an AppSpace in the Deployment Servers pane and drop it.
- Drag an archive file from the Project Explorer, from Mac Finder, or from Windows File Explorer into an AppSpace in the Deployment Servers pane.
- Drag an archive file from the Archives folder (in the Deployment Servers pane ) into an AppSpace and drop it.
- Right-click the application and choose Deploy Application When the arget platform is updated, export the EAR file and deploy it to the selected platform. Options such as
-
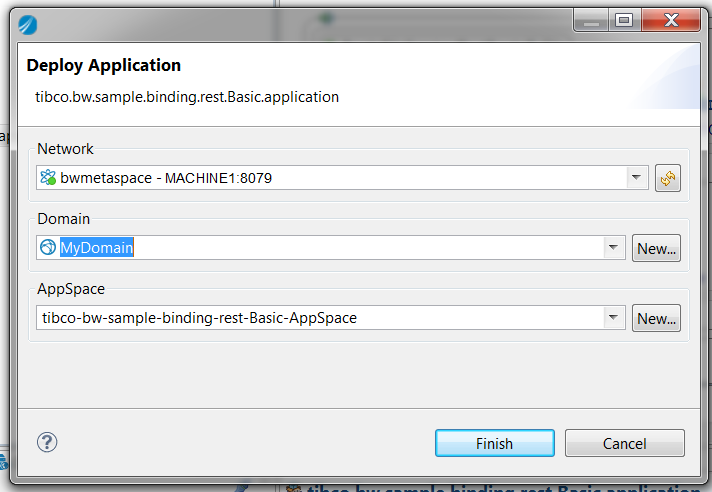
In the
Deploy Application dialog box, choose:
- Network: The network to deploy to.
- Domain: The domain to upload to. If there are no domains in the network, a default value is provided. Click New to create a new domain.
- AppSpace: The AppSpace to deploy to. The default AppSpace name is based on the application name. Click New to create a new AppSpace in the selected domain.
If an AppNode does not exist, an AppNode is created. The AppNode is computed from the AppSpace name and an HTTP management port value is assigned.
The application is deployed. -
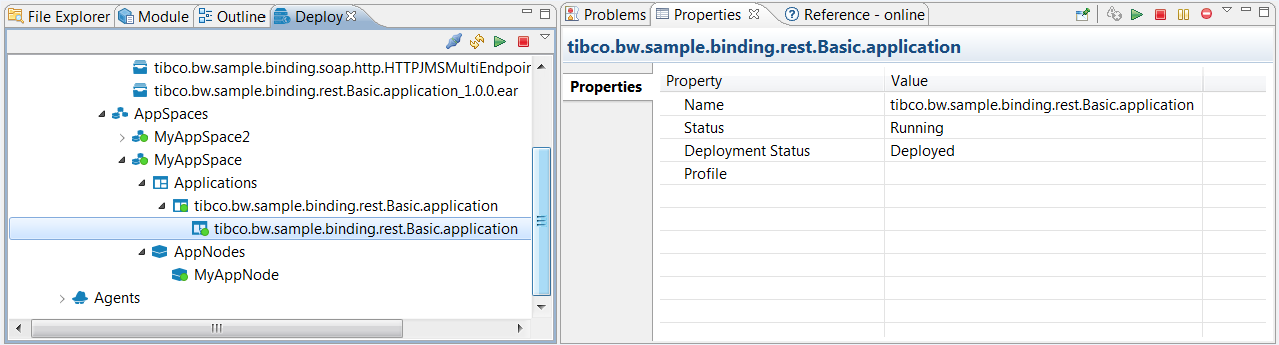
Right-click the application in the
Deployment Servers window and choose to
Start it. Select it in the
Deployment Servers pane to view the status in the Properties pane:
Copyright © Cloud Software Group, Inc. All rights reserved.