Notification Action Configuration
The notification action configuration is follows:
Add Action
- Click Add Action.
- Edit the following action attributes:
- Select Notification Parameter tab
- Select the protocol
- Enter end point URI. The following table shows supported protocols with syntax and example
End Point Type URI Syntax Example JMS Queue jms:queue:<queue name> jms:queue:jeopardy.notification JMS Topic jms:topic:<topic name> jms:topic:jeopardy.notification Tibbr tibbr://<hostname:port> tibbr://xyz.tibbr.com SMTP smtp://<hostname:port> smtp://smtp.xyz.com:25 SMTPS smtps://<hostname:port> smtps://smtp.xyz.com:465 File file://<filepath> file:///opt/notification - Select message type for the notification. The following table shows protocol and supported out message type
The following table shows the supported out message type:
-
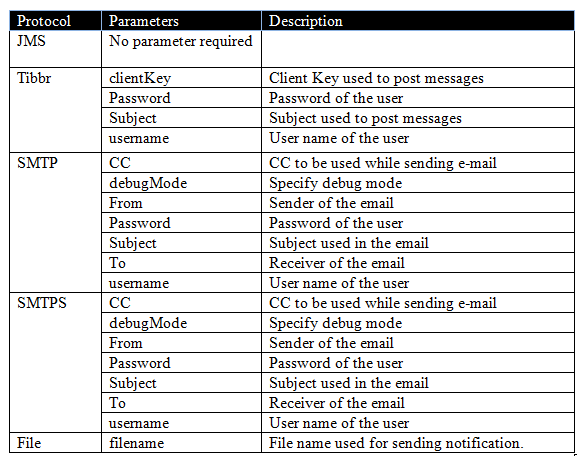
Edit the parameters information for the selected protocol. The following table shows the protocol and the respective parameters configuration required:
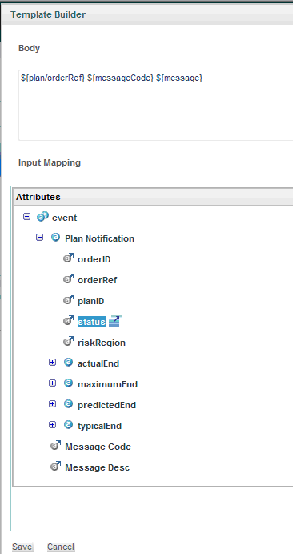
- Edit Template to configure plainStringOutMessage content using Template Builder. Click the icon mentioned in the following image in the Template tab to open the Template Builder screen:
- The following is the Template Builder screen which has all the notifications parameters listed to configure a template for notification messages.
- Click Save to save the template content in action.
- Click Test Action to verify the action created is valid. If there is no error, the Test Connection Successful message is displayed.


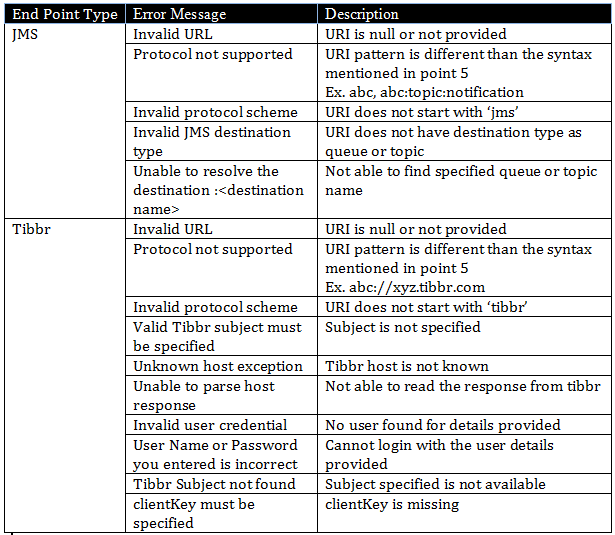
If there is any error respective error message is displayed. The following table shows error messages, which are displayed:

Copyright © Cloud Software Group, Inc. All rights reserved.