Creating a WAR File with the Reference Details
Procedure
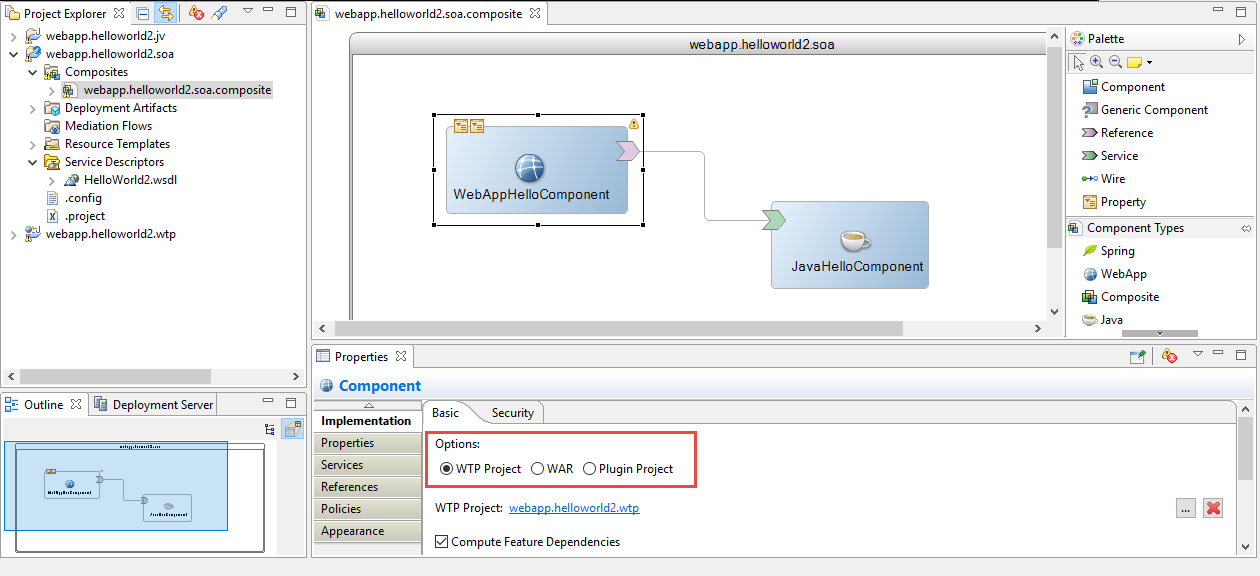
- Create a WTP or dynamic project for the WAR project.
-
Generate the interface JAR files (using JAXB or XMLBeans) using the WSDL.
- Select the WSDL file associated with the WebApp component.
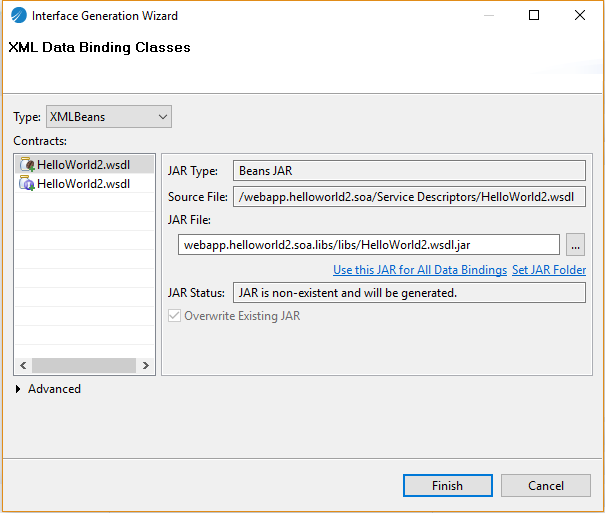
- Right-click and select Generate XML Data Bindings. The XML Data Binding Classes dialog is displayed. For more information about the fields in the XML Data Binding Classes dialog box, see XML Data Binding Classes Dialog.
- Select the Type as JAXB or XMLBeans. The default is XMLBeans.
- Note the location of the JAR file in the JAR File field.
- Click Finish.
- Add the JAR file mentioned in the location in step 2d to the WEB-INF/lib folder of the WTP project.
-
Create the reference in the servlet file using the
@Reference annotation (Java resources >
src >
<name>.wtp). For example, for the
<TIBCO_HOME>/amx/<version>/samples/webapp/helloworld2 sample, copy the code as documented below.
- From:
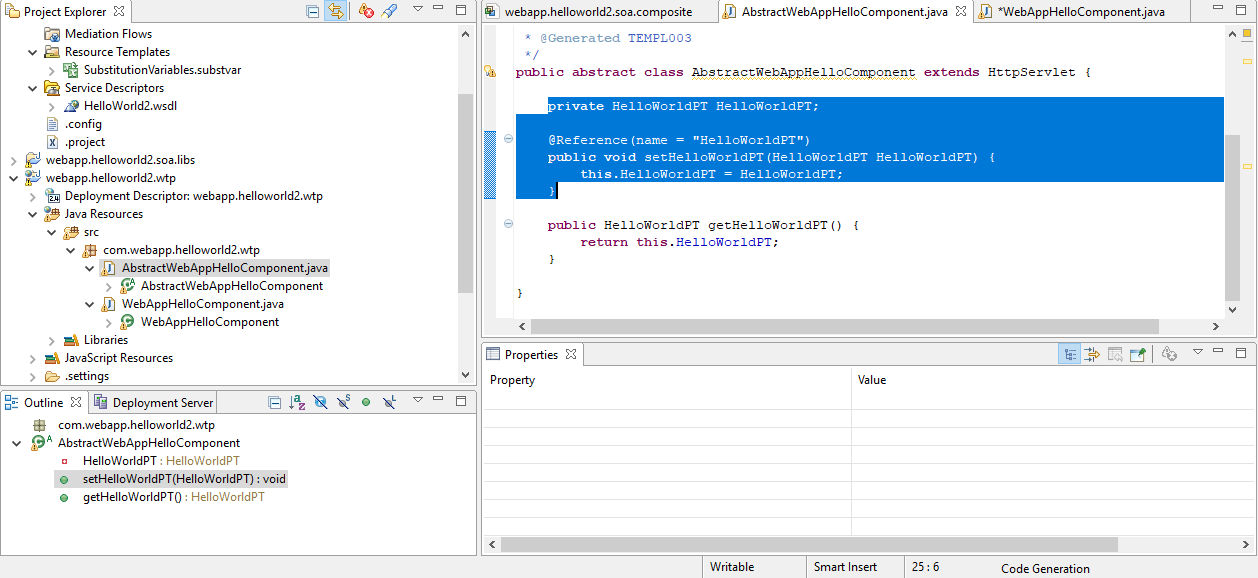
Java resources > src > com.webapp.helloworld2.wtp > AbstractWebAppHelloComponent.java
- Copy code:
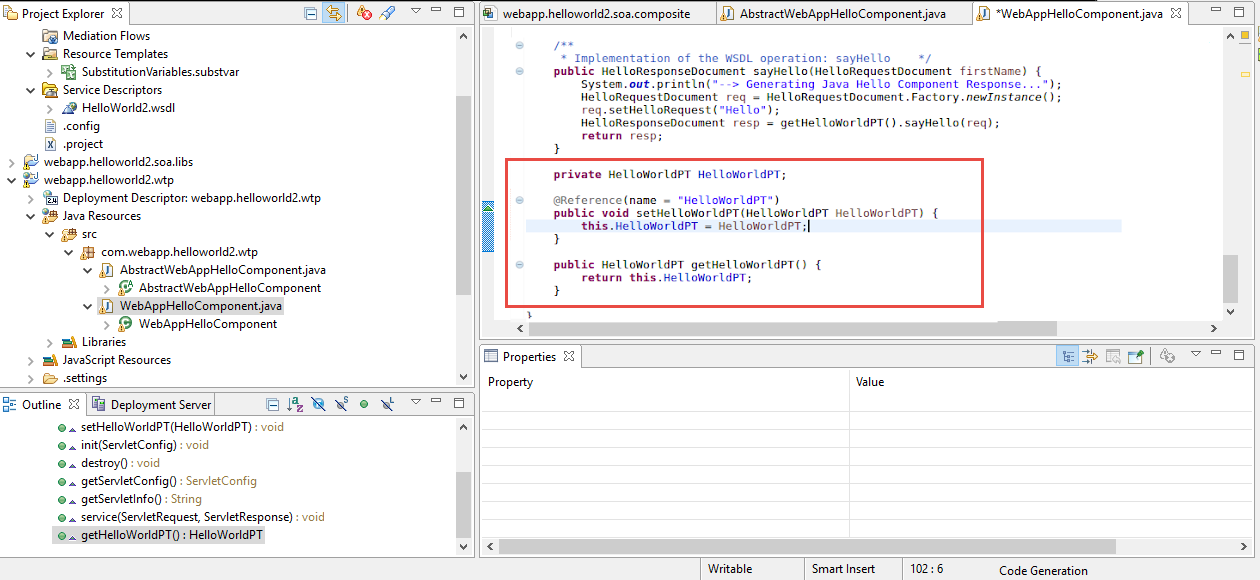
private HelloWorldPT HelloWorldPT; @Reference(name = "HelloWorldPT") public void setHelloWorldPT(HelloWorldPT HelloWorldPT) { this.HelloWorldPT = HelloWorldPT; } public HelloWorldPT getHelloWorldPT() { return this.HelloWorldPT; } - To:
Java resources > src > com.webapp.helloworld2.wtp > WebAppHelloComponent.java
- From:
- Add the code to call the reference. (to WebAppHelloComponent.java in this example).
-
Make sure all the servlets using the
@Reference annotation are declared in the
web.xml file. For example:
<servlet>
<display-name>WebAppHelloComponent</display-name>
<servlet-name>WebAppHelloComponent</servlet-name>
<servlet-class>com.webapp.helloworld2.wtp.WebAppHelloComponent</servlet-class>
</servlet>

<servlet>
<display-name>AbstractWebAppHelloComponent</display-name>
<servlet-name>AbstractWebAppHelloComponent</servlet-name>
<servlet-class>com.webapp.helloworld2.wtp. AbstractWebAppHelloComponent</servlet-class>
</servlet>
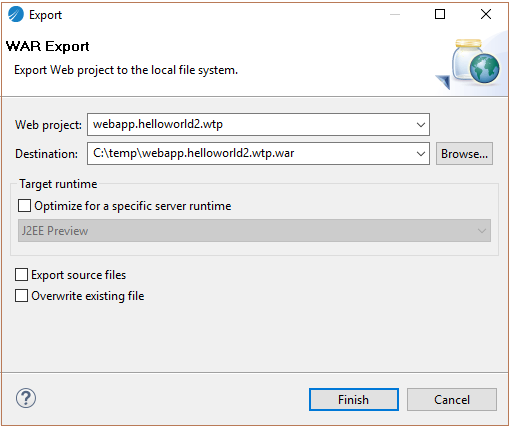
- Export the WTP project or dynamic project to WAR file. Right-click on the composite and select Export > WAR file.
- Click Finish.
Copyright © 2022. Cloud Software Group, Inc. All Rights Reserved.

