Creating a Logging Configuration for an Application
On the Log4j Configuration tab in the Application Configurator, you can create a logging configuration for an application.
-
Click the Log4j Configuration tab.

-
In the Logger tab, click Add. A row is added to the list.
-
In the Logger Name column, type a logger name. The logger name must consist of alphabet, numbers, and characters (such as period [.], underscore [_], and hyphen [-]). The name must start with a letter of the alphabet.
-
In the Appender column, select an appender from the list. You can assign multiple appenders to the logger by clicking Add New Appender
 .
. -
Select a logging level. If there are multiple appenders, the logging level is the highest level of the assigned appenders to that particular logger.
-
(Optional) Select the check box in the Console column to enable console appender for the logger. In the Console column, you can select all the loggers by selecting the check box at the top.

-
Click anywhere outside the fields and click Save.
Updating a Logging Configuration
To update the logging configuration, edit the fields of a logger and click Save.
Deleting a Logging Configuration
To delete a logger, click Delete  next to the logger. You cannot delete or edit the root logger and assign appender. But you can change the logging level (INFO, DEBUG, etc.) of the "NODE_ROOT" log appender for the root logger.
Viewing XML Configuration
To view the XML log Configuration, click Show XML  in the upper-right corner.
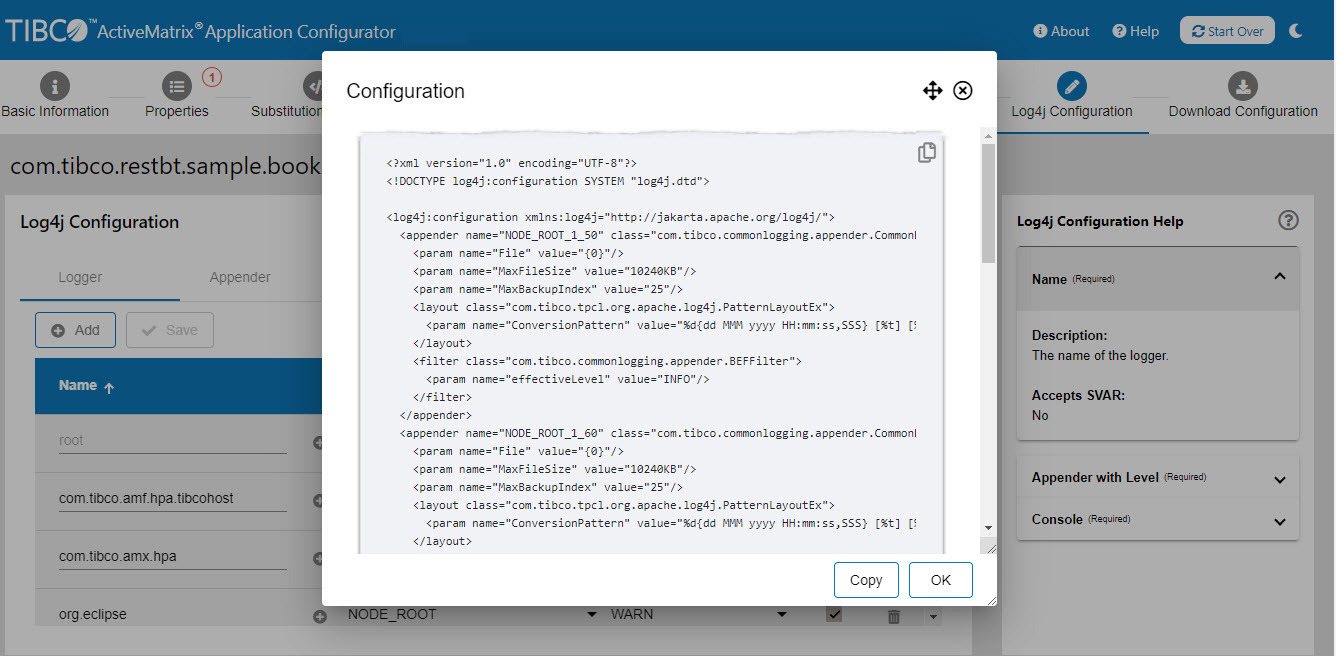
Example:
The following example shows a sample Log4j XML configuration.
The number appended to the appender name is according to the level of the appender set for particular logger. For example, NODE_ROOT_1_50 is NODE_ROOT logger with applied level at INFO. NODE_ROOT_1_60 is NODE_ROOT logger with applied level at DEBUG.
The level of the logger is decided based on the highest level of the assigned appenders to that particular logger.
In the following example, the logger com.tibco.amf.hpa.tibcohost has only one FileAppender 'NODE_ROOT_1_50' assigned. Therefore, the logger level is INFO.
In the case of the logger com.tibco.amf.admin.api.amx.application.impl, two appenders are assigned to it, which are 'NODE_ROOT_1_50' and 'NODE_ROOT_1_60'. In this case, the higher level is DEBUG. Therefore, logger level is DEBUG.
<appender name="NODE_ROOT_1_50" class="com.tibco.commonlogging.appender.CommonRollingFileAppender">
    <param name="File" value="{0}"/>
    <param name="MaxFileSize" value="10240KB"/>
    <param name="MaxBackupIndex" value="25"/>
    <layout class="com.tibco.tpcl.org.apache.log4j.PatternLayoutEx">
      <param name="ConversionPattern" value="%d{dd MMM yyyy HH:mm:ss,SSS} [%t] [%-5p] %c - %m%n"/>
    </layout>
    <filter class="com.tibco.commonlogging.appender.BEFFilter">
      <param name="effectiveLevel" value="INFO"/>
    </filter>
  </appender>
  <appender name="NODE_ROOT_1_60" class="com.tibco.commonlogging.appender.CommonRollingFileAppender">
    <param name="File" value="{0}"/>
    <param name="MaxFileSize" value="10240KB"/>
    <param name="MaxBackupIndex" value="25"/>
    <layout class="com.tibco.tpcl.org.apache.log4j.PatternLayoutEx">
      <param name="ConversionPattern" value="%d{dd MMM yyyy HH:mm:ss,SSS} [%t] [%-5p] %c - %m%n"/>
    </layout>
    <filter class="com.tibco.commonlogging.appender.BEFFilter">
      <param name="effectiveLevel" value="DEBUG"/>
    </filter>
  </appender>
<logger name="com.tibco.amf.hpa.tibcohost" additivity="false">
<level value="INFO"/>
<appender-ref ref="NODE_ROOT_1_50"/>
<appender-ref ref="CONSOLE"/>
</logger>
<logger name="com.tibco.amf.admin.api.amx.application.impl" additivity="false">
<level value="DEBUG"/>
<appender-ref ref="NODE_ROOT_1_50"/>
<appender-ref ref="NODE_ROOT_1_60"/>
<appender-ref ref="CONSOLE"/>
</logger>