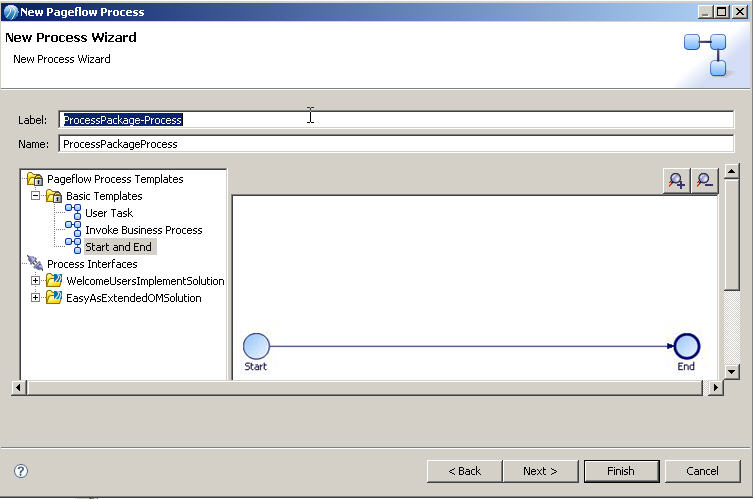
Create a Pageflow Process

All tasks that are available in a business process are available within a pageflow process with the exception of a business process user task. Pageflow processes have a special variant of a business process user task that does not have participants (because the participant is implied by the person who opens the work item), and does not generate work items. These are referred to as pageflow user tasks.

A pageflow process is stored under the Processes branch of the Project Explorer alongside business processes.

Note: To create a Process and its containing package and Project in one operation, see "Projects, Packages, and Processes" in TIBCO Business Studio Modeling User’s Guide.
Note: To convert a business process to a pageflow process, right-click the business process in Project Explorer, and then click Convert To Pageflow Process. Alternatively, a pageflow process can be converted to a business process in a similar way (Convert To Business Process).

Procedure

  1. In the Project Explorer, under Process Packages, select the package you created, or Processes within an existing package, right-click and select New > Pageflow Process.
  2. The New Pageflow Process wizard is displayed.
    Note: If you start this wizard from the File > New menu, the first dialog is Project and Package, where you must specify a valid project and package. This dialog is not displayed if you right-click at the package level to start the dialog; however, you can click Back to display it if necessary.
  3. Enter the Label of the process. If you want to use a template to create the process, select the template and click Next.

    In addition to the process templates, you can select a process interface as the basis for your new pageflow process. This creates a process with the necessary events and parameters that are specified in the process interface.

  4. In the Description dialog, add optional text that describes the process, an optional URL that links to documentation about the process, and click Next.
    Note: The Documentation Url field is intended for design-time collaboration; it is not displayed in the runtime environment.
  5. In the Destinations dialog, select the Destination Environment (optional). This controls the validation that TIBCO Business Studio performs when you save the process:
    Note:
    • The exact destination environments that are displayed depend on the edition of TIBCO Business Studio that you have installed. Select BPM for deployment to BPM.
    • The specific destination components that make up a destination environment can be viewed by selecting Window > Preferences, and selecting Destinations.

    If you do not select a destination environment, basic BPMN validation will be performed.

    Tip: To avoid error messages and warnings associated with modeling constructs that cannot be executed in the runtime environment, set the appropriate destination environment on the process.

    You can change or select the destination environment after the Process has been completed on the Destinations tab of the Process Properties.

  6. Click Finish.
  7. The process that you created is displayed in the Process Editor:

    When you first start the Process Editor, the palette (on the right side of the diagram) might be collapsed; if so, expand it. You can expand this window to fill your screen by double-clicking the title bar. A pageflow process has a different default color scheme from a business process.

    Note: Pageflows do not contain pools or lanes because they are short lived and do not span different parts of the organization.