You can create the model plug-in for the custom mediation task.
Procedure
Run TIBCO Business Studio from the Start menu.
For example, select
Start Programs > TIBCO_Home > TIBCO Business Studio N.N > TIBCO Business Studio.
Select
File > New > Project ....
In the New Project dialog under
Plug-in Development, select
Plug-in Project and click
Next.
Specify a name for the project that reflects the mediation task name and that identifies this as the model plug-in. For example, type LookupTaskModel.
Accept all other defaults and click
Next.
On the Plug-in Content page, locate the Plug-in Options group and clear these options.
Generate an activator, a Java class that controls the life cycle of the plug-in.
This plug-in will make contributions to the UI.
Accept all other defaults and click
Next.
On the Templates page, select
Mediation Task Model Wizard and click
Next.
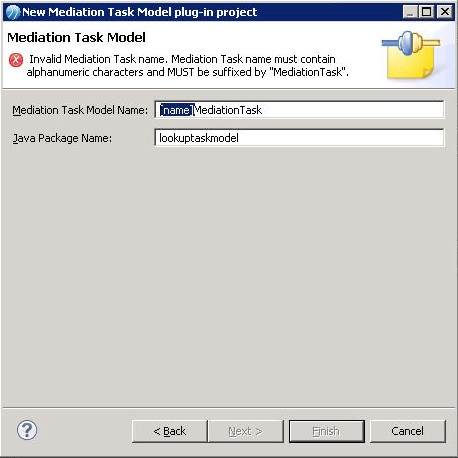
On the Mediation Task Model page, for the
Mediation Task Model Name replace the string within the brackets with another of your choice. This prefix will be used for the Mediation Task Names for the UI and Runtime plug-ins.
The below figure highlights the string to replace:
Specify the
Java Package Name for the model plug-in for the custom mediation task. Click
Next.
By default the Java package name is the same as the project name.
(Optional) Select a schema element for the custom mediation task input/output in the Input/Output Schema Selection dialog.
Type the name of the schema.
Click
Browse to see all the schemas in the workspace, or click
Create to create a new schema.
Specify model attributes that the custom mediation task will use. Model attributes can be given values for each instance of the task, by specifying the values on the General tab in the Properties view for the task.
To add an attribute, click
Add. Edit the attribute name and add default values for the attribute. Click the
Types cell to select the attribute type.
To remove an attribute, highlight the row for the attribute by clicking in one of the cells on the row, and click
Remove.
The following figure shows an example of a new model attribute:
Click
Finish.
TIBCO Business Studio opens the Open Associated Perspective dialog, which asks if you want to open the Plug-in Development perspective.
Optionally, check the check box
Remember my decision. Select
Yes. TIBCO Business Studio opens the model plug-in and the Plug-in Development perspective.
Result
The model plug-in for the custom mediation task is created.