Adding Configuring A Security Constraint Policy
In TIBCO Business Studio you can add/configure a security constraint policy using a wizard.
Procedure
-
Open the
Configure Web Security Constraint wizard using either of the following approaches:
- Approach 1: In the
Properties view, click the
Implementation vertical tab and select the
Security tab.
Under the Web Security Constraint section, either click the policy set to configure it, or click the -not set- hyperlink to add a new Web Security Constraint policy set.
- Approach 1: In the
Properties view, click the
Implementation vertical tab and select the
Security tab.
- Select the security constraint and rename the security constraint if required.
-
Click on the add web resource collection icon
 to add web resources under the security constraint or select existing web resource collection to update.
- Type the Name and Description of the web resource collection.
- In the URL pattern field, click the plus icon to add a URL pattern. Double-click on a listed URL pattern to modify it.
- Check the HTTP methods to be allowed for the web resource collection. Default is "all" HTTP methods. If no methods are selected then "all" HTTP methods option is checked.
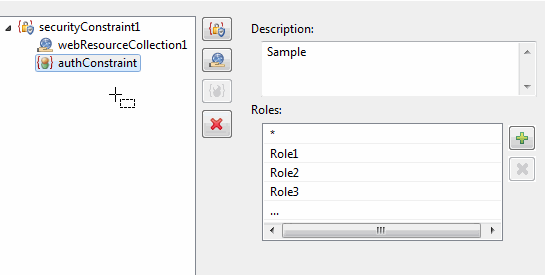
-
Click the add auth-constraint icon
 to add a authorization constraint.
- Type the Description.
-
Click on plus icon to add a role name to the permissible roles list for the security constraint. Click on a listed role name to modify the role name.
-
Click the add security constraint icon
 to add another security constraint to the policy and repeat steps 2 through step 9.
- Click Finish when you are done updating the security constraint policy.
Copyright © Cloud Software Group, Inc. All rights reserved.