Installing Resource Instances on Nodes

After you have created a resource instance, you can add it to one or more nodes from the GUI or by using the CLI.

Prerequisites

The resource instances must have already been added to the nodes.

GUI

Procedure

  1. Choose a starting point and follow the appropriate procedure.
    Starting Point Procedure
    Hosts
    1. Select Infrastructure > Hosts.
    2. Select a host.
    3. Click Resource Instances.
    Applications
    1. Click Application and select an application.
    2. Click Resource Template> Resource Instances.
    Nodes
    1. Select Infrastructure > Nodes.
    2. Select a node.
    3. Click the Resource Instances tab.
    Resource Templates
    1. Select Shared Objects > Resource Templates.
    2. Click a resource template.

      You can filter resource templates using Type and Scope.

    3. Click Resource Instances.
  2. Select a resource instance.
  3. Click arrow next to Install for an install option.
    • Install - installs the selected resources only if dependent resources can be autoinstalled or have been previously installed.
    • Force Install - installs the selected resources and issues warnings if dependent resources are not installed.
    • More install options - check the check boxes for the following options as applicable:
      • Install with force, bypassing validation checks.
      • Provision driver in resolve mode (restarts the node).
  4. If the resource instance depends on a recently modified resource template, the Resource Instance Install Impact Dialog dialog displays.
    1. Select the resource instances that you want to reinstall. These are resource instances created from this resource template or other resource templates that depend on the modified resource template.
    2. Select the applications that you want to restart.
    3. Select the nodes where you want the resource instances reinstalled and the applications restarted.
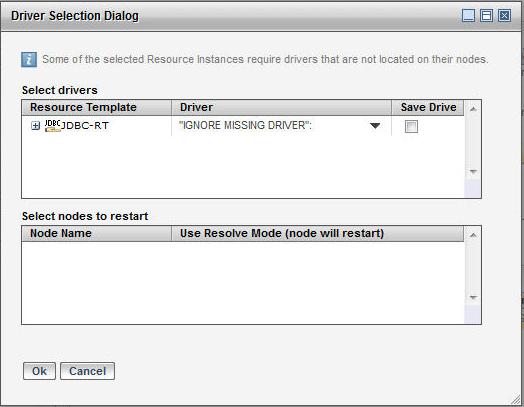
  5. When using JDBC or JMS drivers, if you have configured multiple drivers that have the same class name but different driver JAR file names, the Driver Selection Dialog displays. The following shows the dialog box for a selecting a JDBC driver.

    1. Select a version from the Driver drop-down list.
    2. If the driver requires the use of a resolve mode, the checkbox for Use Resolve Mode (node will restart) is checked by default.
    3. Click OK.

Result

The resource instances are installed on the nodes with the Runtime State is either Stopped or Running depending on the state of the node.

When a resource instance is installed and its resource template references another resource template, Administrator automatically creates a resource instance of the same name as the referenced template and install it. This is done recursively for several levels if needed.

Note:
  • Only those drivers installed using TIBCO Configuration Tool are detected and provisioned.
  • If the driver for a particular class is already installed on the node, the provisioning process is skipped.
  • If using a driver not supported by TIBCO Configuratino Tool, choose the option to ignore the missing driver in the Driver Selection Dialog.

CLI

Procedure

  1. In the data file, specify a ResourceInstance element in base format.
    <ResourceInstance xsi:type="amxdata:ResourceInstance_base" 
    name="resourceHttpClient" />

    If installing either JDBC or JMS resource instances and if you have multiple drivers available, specify the name and version of the driver using the driverFeaturename and driverFeatureVersion elements.

    <ResourceInstance xsi:type="amxdata:ResourceInstance_base" 
    name="resourceJDBC_ORA" resourceTemplatename="ora" 
    driverFeatureName="com.tibco.tpcl.gen.oracle.jdbc.feature" 
    driverFeatureVersion="11.2.100.001"  />

    To store this driver version as the default driver in the resource template, use the setDriverAsDefault option and set it to true. All resource instances created using this resource template will now use this driver.

    <ResourceInstance xsi:type="amxdata:ResourceInstance_base" 
    name="resourceJDBC_ORA" resourceTemplatename="ora" 
    driverFeatureName="com.tibco.tpcl.gen.oracle.jdbc.feature" 
    driverFeatureVersion="11.2.100.001" 
    setDriverAsDefault="true" />
  2. In the build file, set the action attribute of the AMXAdminTask element to install and the objectSelector attribute to Environment/Node/ResourceInstance. The options element is used to specify the provisioning mode.
    • auto-resolve - the mode specified by the driver is used.
    • resolve - the resolve mode is used.
    • element not specified - the provisioning is done in the stable mode.
    <AMXAdminTask action="install" 
    objectSelector="Environment/Node/ResourceInstance" 
    options="auto-resolve"/>
    When installing a resource instance that refers to a JMS or JDBC resource instance, the resource instances are installed but the drivers are not provisioned.
  3. To re-install all dependant resource instances and restart applications that use these resource instances, use the handle-dependencies option.
    <AMXAdminTask action="install" 
    objectSelector="Environment/Node/ResourceInstance" 
    options="handle-dependencies"/>