Defining a Business Process

In this task you will define the business process that will make use of the business data in your business object model.

When you created the EasyAs Business Data project in the How to Use Business Data tutorial, you specified in the Asset Type Selection dialog that the project should include:

  • The business object model,
  • Business processes,
  • Forms.

You can refer to the tutorial How to Design a Simple WelcomeUsers Process for details of how to create tasks and connections in your business process.

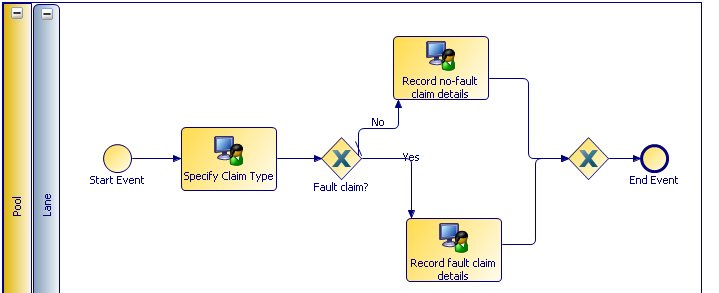
You will define a simple business process, as shown in the following illustration.

Procedure

  1. If the Process Editor is not already open, expand EasyAs Business Data > Process Packages > EasyAs Business Data .xpdl > EasyAsBusinessData(EasyAsBusinessData) > > Processes > EasyAsBusinessData > -Process, and double-click on EasyAsBusinessData-Process to open the Process Editor.
  2. Select EasyAsBusinessData-Process in the Project Explorer and press F2 to rename it. Change the label of the process to Notification of Claim.
  3. At this stage the process is empty. It contains only a Start event, an End event, and a sequence flow between them.

    Select the User Task tool from the palette. Position the mouse pointer over the sequence flow between the Start and End events, then click to add the first user task.

  4. Change the label of the task to Specify claim type.
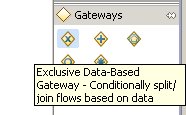
  5. After the Specify claim type task, the flow of the process proceeds differently depending on whether a Fault claim or a No-fault claim is being made. This is indicated by adding a gateway to the diagram. Select the Exclusive Data-Based Gateway tool from the palette. Position the mouse pointer over the sequence flow in the Process Editor, to the right of the Specify claim type Task, and click.
  6. Click the gateway to select it and change the label to Fault claim?.
  7. On the canvas of the editor, to the right of the gateway, add two more User Tasks called Record fault claim details and Record no-fault claim details.
  8. Add a second gateway, of the same type as the first, in the sequence flow near the End event.
  9. Note that if you positioned the second gateway correctly (by placing the mouse pointer exactly over the sequence flow and clicking), the part of the sequence flow that runs between the two gateways is now a separate connection. Right-click on it and select Delete.
  10. Select the Default Flow tool from the Connections drawer of the palette, and use it to create a connection from the Fault claim? gateway to the Record no-fault claim details task. Label this connection No, because this is the sequence of processing when the answer to the question Fault claim? is No.
  11. Select the Conditional Flow tool and draw a connection from the gateway to the Record fault claim details task. Label this connection Yes.
  12. Complete the processing sequence by adding sequence flow connections from each of these two User Tasks to the second gateway.

Result

Note: There is an error symbol associated with the conditional sequence flow. This is because there is as yet no script to define the condition that needs to be satisfied to make the flow of processing follow this branch. You will create this in the next procedure.

There are error symbols associated with all three user tasks. This is because user tasks need to have a Participant assigned to them in order to run. You do not need to assign Participants as part of this tutorial, though you would need to do so in order to test and run it.

For more information, see the How to Design a Simple WelcomeUsers Process tutorial.