Once you have assigned a data field to a task, you can generate a form for that task. This provides fields in which the user can enter data, or in which data can be displayed. The form automatically contains fields corresponding to each of the sub-fields belonging to the data field assigned to the task.
In this case, that means that the form will contain a field for each attribute of the appropriate Class in the business object model.
In this task you automatically generate forms for two user tasks.
Procedure
-
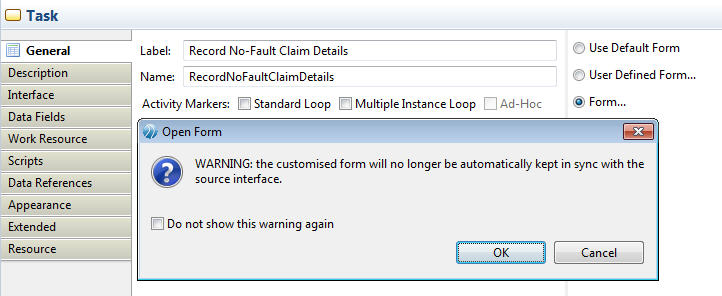
Select the
Record no-fault claim details task.
-
In the
General tab of the Properties view, select the
Form button in the right-hand pane. The Open Form warning dialog is displayed.
-
The warning indicates that any subsequent changes you make, for instance assigning more fields to the same task, will not be reflected in the form. You can optionally check the box so that the warning is not shown again. Press
OK on the
Open Form dialog.
The address of the form is displayed
-
Click
Open Form to view the form.
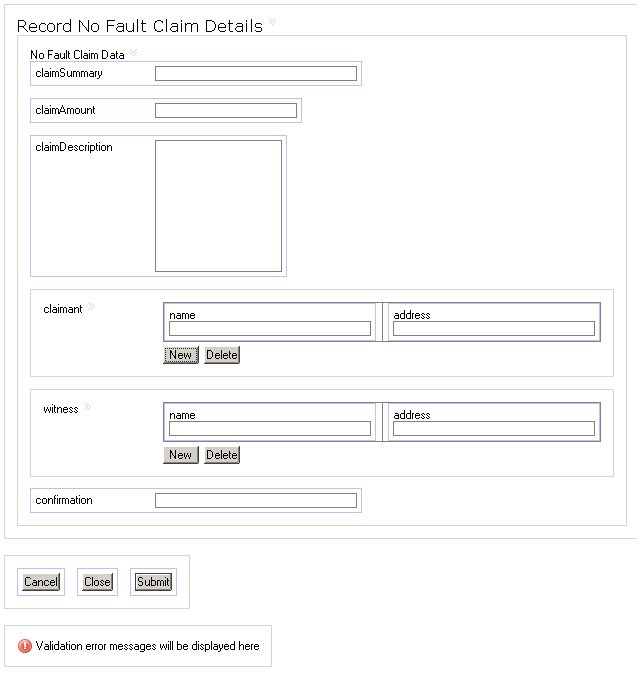
Note that the form displays a field for each attribute of the class. It has default
Cancel,
Close and
Submit buttons as runtime controls.
If you click the
GWT Preview
tab, you can see a preview of the runtime appearance of the form as defined by the Google Web Toolkit.
-
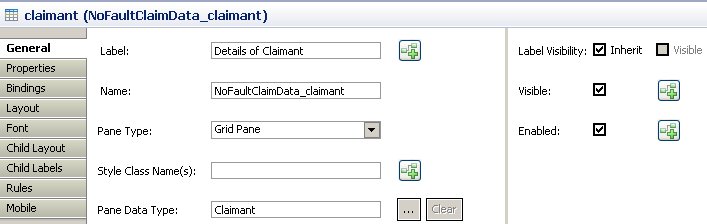
Edit the form as follows. Select the
claimant field. Details of the field are displayed in the Properties view.
-
On the
General tab, enter
Details of Claimant in the Label field.
-
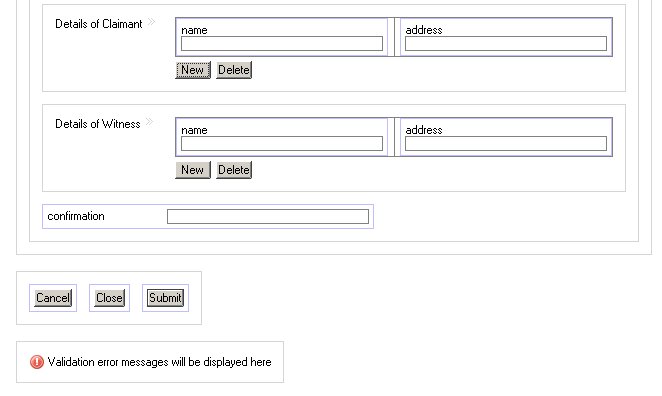
Repeat steps 5 and 6 for the
witness
field. Note that the form now displays the amended labels for these two fields.
-
Repeat steps 1 to 7 for the
Record fault claim details task. When you compare the two forms, note that they contain most of the same fields. The form for
Record fault claim details additionally includes a
Counterparty field, corresponding to the additional attribute of the
FaultClaim class in the business object model.
-
Repeat steps 1 to 4 again to generate a form for the
Specify Claim Type task. This contains only one field, for the
isFault data field.
For more information about forms, see the Forms documentation.
You have now completed this tutorial.
You should now be familiar with:
- Defining data fields that reference business objects.
- Assigning those fields to tasks in a business process.
- Generating the associated forms.
Verifying the Results
You can verify the results of your tutorial by installing the tutorial from the
samples folder in the product directory. Your project must look similar to the sample solution project.
-
Find the
easyasusebusinessdatasolution.zip file, in the location where you installed TIBCO Business Studio (for example,
<STUDIO_HOMEn\samples).
-
In TIBCO Business Studio, select.
-
The
Import wizard is displayed. Select
and click
Next.
-
Click
Select archive file, and click on the
Browse button.
-
Browse to
easyasusebusinessdatasolution.zip and click
Open. The
easyasusebusinessdatasolution project is displayed in the
Import wizard.
-
Click
Finish. The
easyasusebusinessdatasolution project is installed in your workspace.
Note: In this solution project, a Participant has been defined by reference to the
EasyAsExtendedOMSolution organization model, as described in
How to Use Business Data. An error will be displayed unless you have the
EasyAsExtendedOMSolution project open in your workspace.
Copyright © Cloud Software Group, Inc. All rights reserved.