Creating Overlay Calendars
Procedure
- From the Calendar gadget, click Manage.
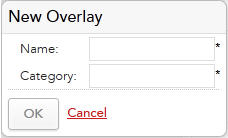
- Click New Overlay. The New Overlay dialog displays.
-
Complete the dialog as follows:
- Name: The name of the new overlay calendar.
- Category: A category for the new overlay calendar. Calendars are grouped by category when opening and copying calendars. See Opening Calendars and Copying Calendars.
- Click OK to create the new overlay calendar or Cancel to cancel your changes.
- Once you have created your overlay calendar, you can specify the exclusions in the same way you did for the system calendar. See Creating System Calendar Exclusions.
- Once you have created your overlay calendar you must map it to an organizational entity before you can use it. See Assigning Calendars to Organizational Entities.
Copyright © Cloud Software Group, Inc. All rights reserved.

