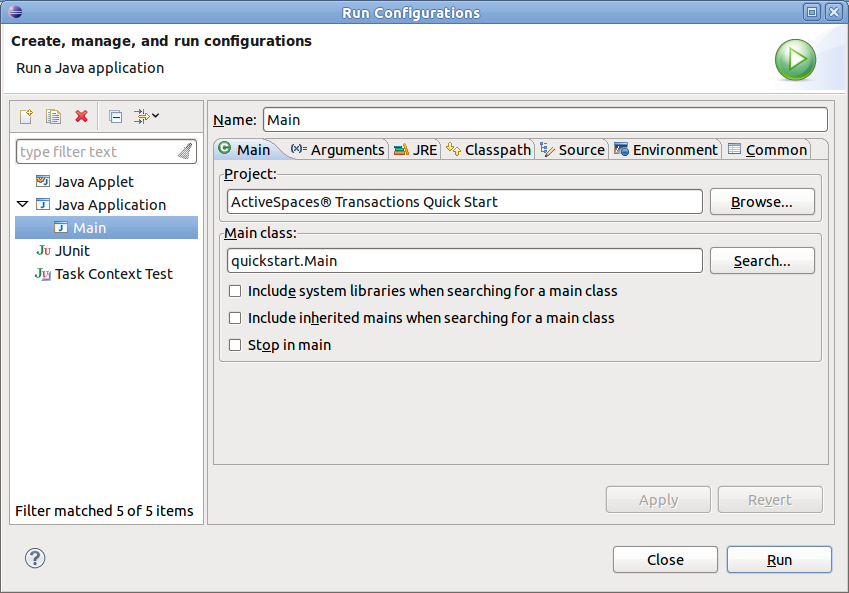
Next we'll configure Eclipse to run our application on the installed nodes.
Under the Run menu, select Run Configurations...
In the left-hand pane of the Run Configurations window, right-click "Java Application". This will define a new run configuration.
In the Main tab, make sure that the "Main class:" is set to
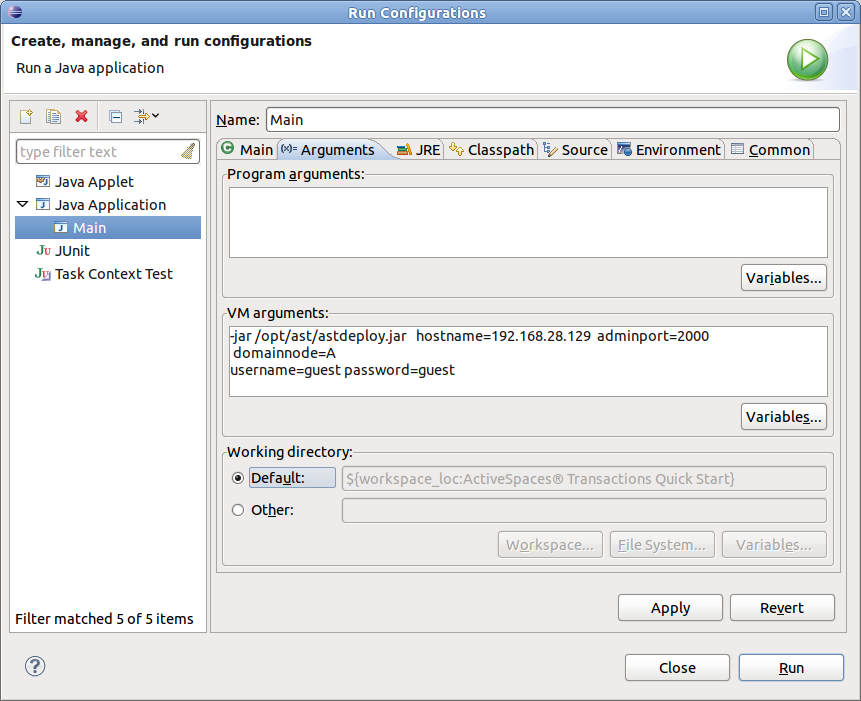
quickstart.Main. Eclipse should have identified this for you; if not, click Search... and select the class.Next, select the "Arguments" tab. Here we will configure Eclipse to run the deploy client tool for each invocation of the project.
In the "VM arguments" text box, enter the deploy tool command required for the installed nodes.
For example, if the product was installed in
/opt/ast, we would use the following argument line:-jar /opt/ast/kis/distrib/kabira/ast/java/deploy.jar hostname=192.168.28.129 adminport=2000 domainnode=A username=guest password=guestThis command line tells eclipse to wrap your project invocation with the development client in
deploy.jar. The client takes parameters that tell it about the network location of the nodes (thehostnameandadminportvalues) as well as credentials to attach to the server (theusernameandpasswordparameters).The
domainnodeparameter selects theAnode in the domain to execute this application.select Apply, then Close.

