First, we will create a new Java project, and include the TIBCO ActiveSpaces® Transactions Java SDK as a support library.
Start Eclipse and create a new Java project:
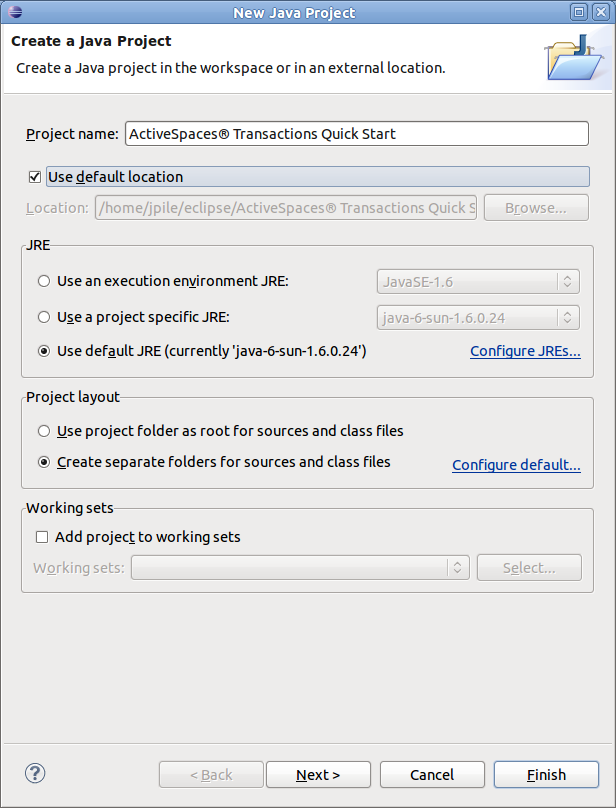
In the File menu, select New ->Java Project.
In the New Java Project dialog that pops up, set the Project name to "TIBCO ActiveSpaces® Transactions Quick Start"
Click "Next" to move to the Java Settings page.
Select the Libraries tab, and click on "Add External JARs..."
Browse to the folder where you installed the TIBCO ActiveSpaces® Transactions Java SDK, and find the file
deploy.jar. Select it and click "OK".Select "Finish" to close the New Java Project window; Eclipse will generate the project structures in your default workspace.