Viewing Logs
This chapter explains viewing of logs for the RosettaNet protocol.
The TIBCO® AuditSafe is used to store information about the messages and documents processed by TIBCO BusinessConnect™ Container Edition- RosettaNet Protocol.
To view the logs, on Data Viewer tile, click Audit Trail > RosettaNet.
All the transactions will be displayed on the Transactions page.
Transactions
The page displays 20 records with the newest transactions listed first as the default. Page through the display to see older records. You can sort the transactions by category, or search for records of a specific type. The number of records returned is limited to 10,000 audit events or a maximum of 500 pages. Attempting to select additional pages after 500, will return a "No records found" error.
Sort Transactions
Sort transactions by clicking the arrows on a column (category) heading.
To re-order the columns: click the category name to select it, and drag it to a different location on the page.
The default sort is by date and time, so the newest transactions appear at the top of the list.
Search for Transactions
The search feature in AuditSafe is powerful and easy to use.
You can search for values within multiple categories. The search finds matching records even if a category (or column) is not displayed. You can hide or show categories by selecting them from the Settings dialog.
- Use the Keyword option to search for a term in all of the categories.
- Searching for values or keywords within the same category is an
OR search.
For example: Search Status for In Progress or Completed to find all transactions that contain those values.
- Searching for values between 2 or more categories is an
AND search. You can combine the two search-types to narrow your results.
For example: Search Status for PROCESSING OR COMPLETED , AND search Audit Event for Request Received.
The system automatically segments your query into OR and AND searches as seen in the following example:
Using Search
- Selecting Time allows you to define a Start and End range for your search.
- Selecting
Keyword will search for the term in all categories.
Search Option Description = Equals: Finds an exact match for a term. Entering the first few letters will list matching options. Select one and press ENTER. If an exact match is not available, no items are listed. != Not Equal to: Use this option to exclude terms from your search. ~ Like: Enter a few letters to list items containing a matching string.
-
Click the Select dropdown to choose a category.
-
Click in the Search Transactions field, select a search option (see above), and enter a word.
-
As you begin to enter a word, the system displays the available options.
-
Select an option and press ENTER to add it to your query. Continue adding options to narrow your returns.
-
Once you have created your query, click Find to list the results.
-
Click the X (Delete) icon to remove a search term.
Settings
The Settings icon allows you to select which columns to display.
Click the gear icon to view the list and check the boxes for the columns you want to view.
Click
Apply to save your choices.
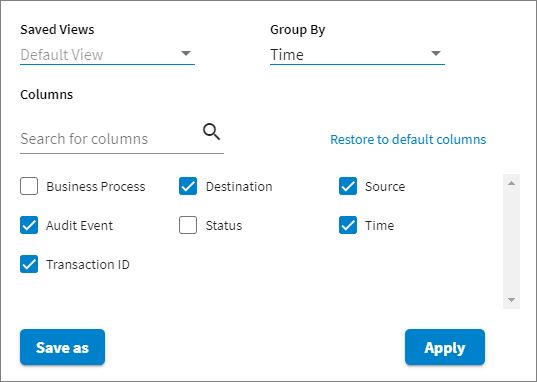
Customize your view using the following options:
| Option | Description |
|---|---|
| Group By | Use this option to group results by category. To do this, select a category from the drop-down. |
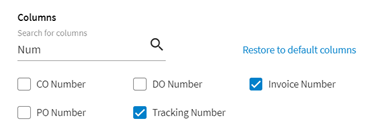
| Columns | Check the box next to the category to display the columns you want to view. You can also search for a category by entering a partial word to display all categories containing that string as seen in the following example. |