Creating a Synchronization Format
Procedure
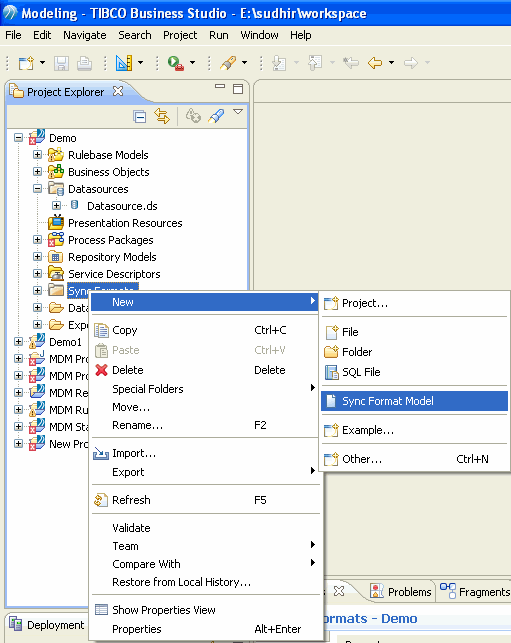
- Right click on the Sync Format Special folder, point to New and click Sync Format Model.
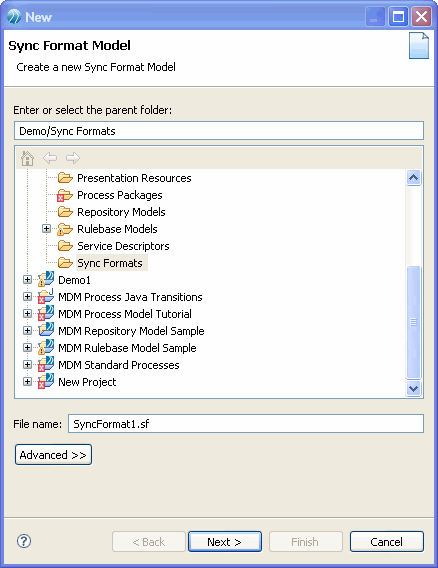
- Enter the appropriate file name for the synchronization format in the File name field. The extension of the file name must be .sf.
-
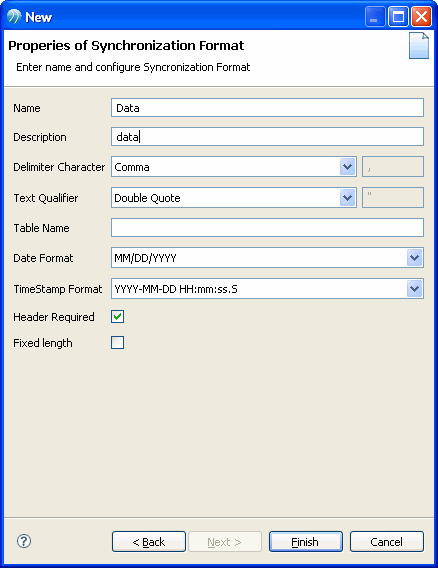
Enter or select the appropriate values in the respective fields.
Field Description Name The synchronization name must be unique and can contain A-Z, 0-9, all special characters (except a space), and characters from other languages. Description The synchronization format description. The description field does not allow more than 80 characters. However, white spaces are allowed in the description. Delimiter Character The delimiter character can be a Comma, Pipe, Semicolon, Space, Tab, or Other character. The backslash (\) is not supported as delimiter. Text Qualifier Character The text qualifier can be a double quote, Single quote, or any other qualifier. Data field may contain Delimiter character. In such case data field should be enclosed with Text Qualifier. Date Format The date format must match the actual date format. If specified incorrectly, data may be rejected or loaded incorrectly. For example, if the date format is specified as MM/DD/YY, and the actual data is specified in DD/MM/YY, then 02/01/12 may be imported as Feb-01-2012 instead of Jan-02-20120. TimeStamp Format The timestamp format must match the timestamp format used in the actual data. If you specify incorrect timestamp format, data may be rejected or loaded incorrectly. By default, YYYY-MM-DD HH:mm:ss.S timestamp format is displayed. If the actual data contains a different format, you can change it.
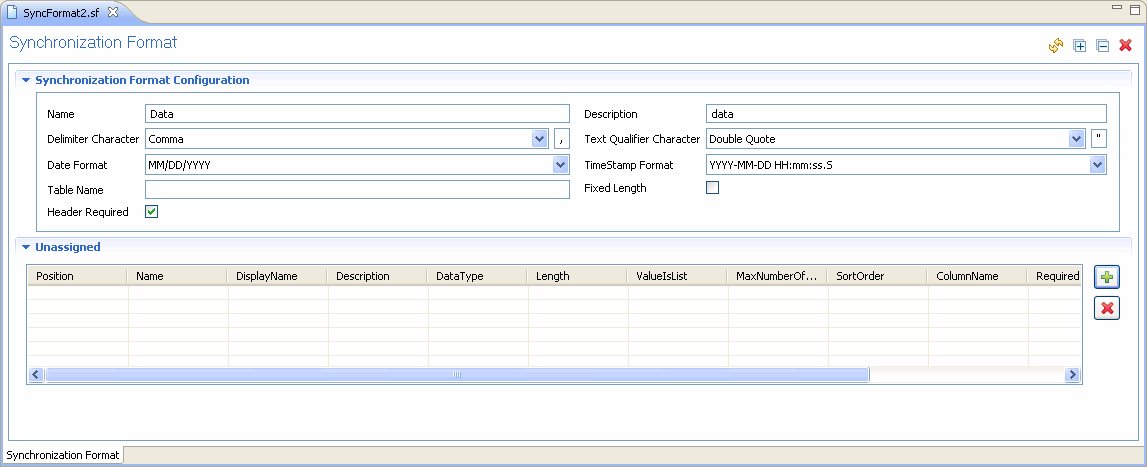
Table Name The table name where the synchronized data is stored. Header Required Select the checkbox if you want the header to appear in the synchronized output file. Fixed Length Select the checkbox if you want the synchronized file to be of fixed length. - Click Finish. The synchronization format editor for the newly created synchronization format is displayed.
Copyright © Cloud Software Group, Inc. All rights reserved.


