Decision Table Editor
Once you have created the decision table and configured the properties of the decision table, it is time to use the decision table.
On double clicking the newly created decision pallet, it opens the decision table editor.
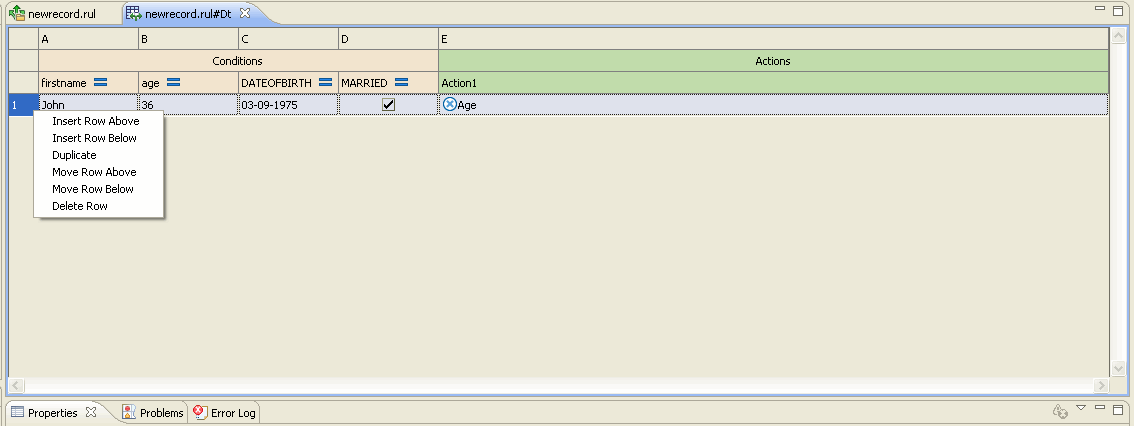
The decision table editor UI appears similar to Microsoft Excel sheet.
The decision table displays the Conditions and the Actions columns. Each variable along with the operators symbol is displayed in the Conditions section. The Action section list the actions column configured during creation of decision table. By default, the number of rows displayed are as per the rows configured in the property section.
To add more rows to the decision table, select the row and right-click mouse. The following actions are displayed:
- Insert Row Above: Insert a row above the selected row.
- Insert Row Below: Insert a row below the selected row.
- Duplicate: Insert a duplicate row.
- Move Row Above: Move the selected row above the previous row. This is disabled for the first row.
- Move Row Below: Move the selected row below the next row.
- Delete Row: Delete a row.
Similarly, you can filter and sort the rows.

