Deploying Modules Incrementally

Using the Deployment Wizard you can deploy the repository models. The relationship, output map, input maps, classification, and rulebase associated with the repository are listed under relevant repository. You can select each individual component or full model for deployment.

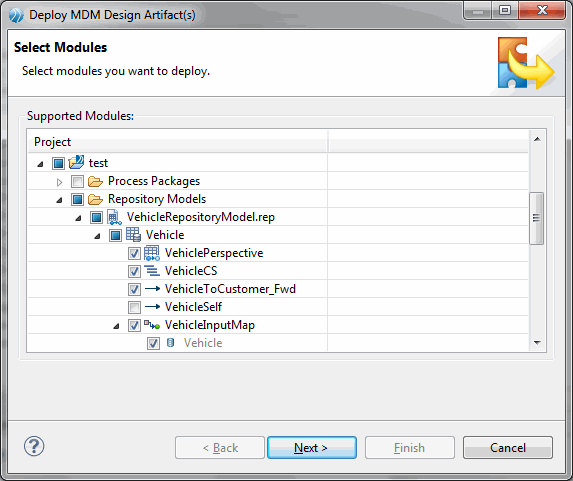
  • When .rep file (repository model) is selected all the associated artifacts are checked and grayed out. The .rep file deploys the entire repository model along with all the associated artifacts.
  • You can also select individual artifact to deploy. The following components can be deployed as a single unit.
    • Repository
    • Relationship
    • Input Map
    • Output Map
    • Classification
Note: If associated components are deployed, parent repository should be available in the MDM server or else error occurs.

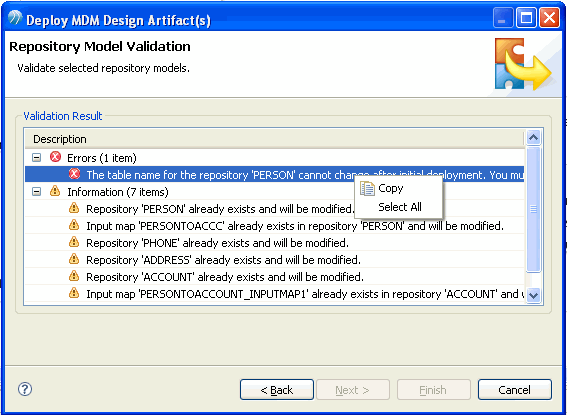
The server side validations are performed on selected modules before actual deployment. The validation page displays the summary of validation errors and information messages. The information messages describes the updates to the metadata after deploy.

If there are errors in the module, the 'Finish' button is disabled. You need to rectify the errors in the module and re-deploy it. This default behavior can be turned off using preference menu. For more information on setting the preferences, refer to Setting Server Validation Preferences.

The following are the steps involved in deploying modules:

Procedure

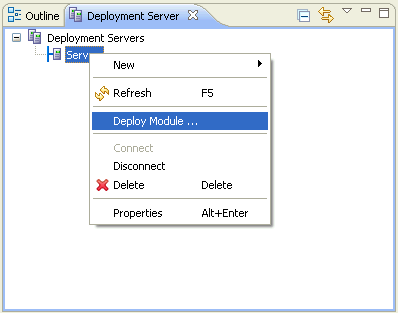
  1. In the Deployment pane, right click the <MDM Server and select Deploy Module.
  2. Select the modules to deploy. If you want to deploy all the repositories in the model, select the . rep (repository model). This will deploy the entire repository model along with all the associate artifacts. However, if you want to deploy individual artifacts like repository, relationship, input map, output map, perspectives, and classification, select each artifacts and click Next.
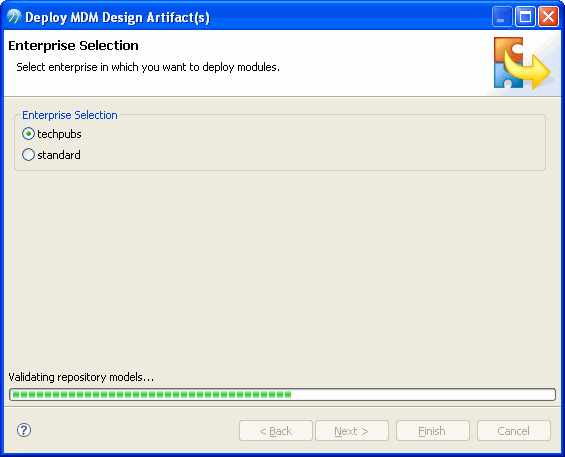
  3. Select the enterprise where you want to deploy and click Next.
  4. The selected modules is sent to the server for server side validations. The validation progress bar is shown at the bottom of the page.
  5. The validation result page is displayed with the validation messages. The errors and information messages are shown in separate sections. If there are validation errors, the Finish button is disabled.
  6. To copy the validation message right-click on the validation messages.
  7. Correct the validation error and redeploy the model.
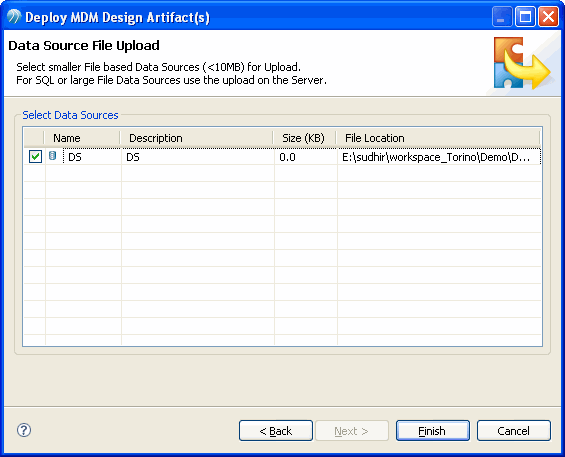
  8. Select the data source file to upload and click Finish.

Result

Once successfully deployed, you can log onto the MDM Server and check if your modules have got included.