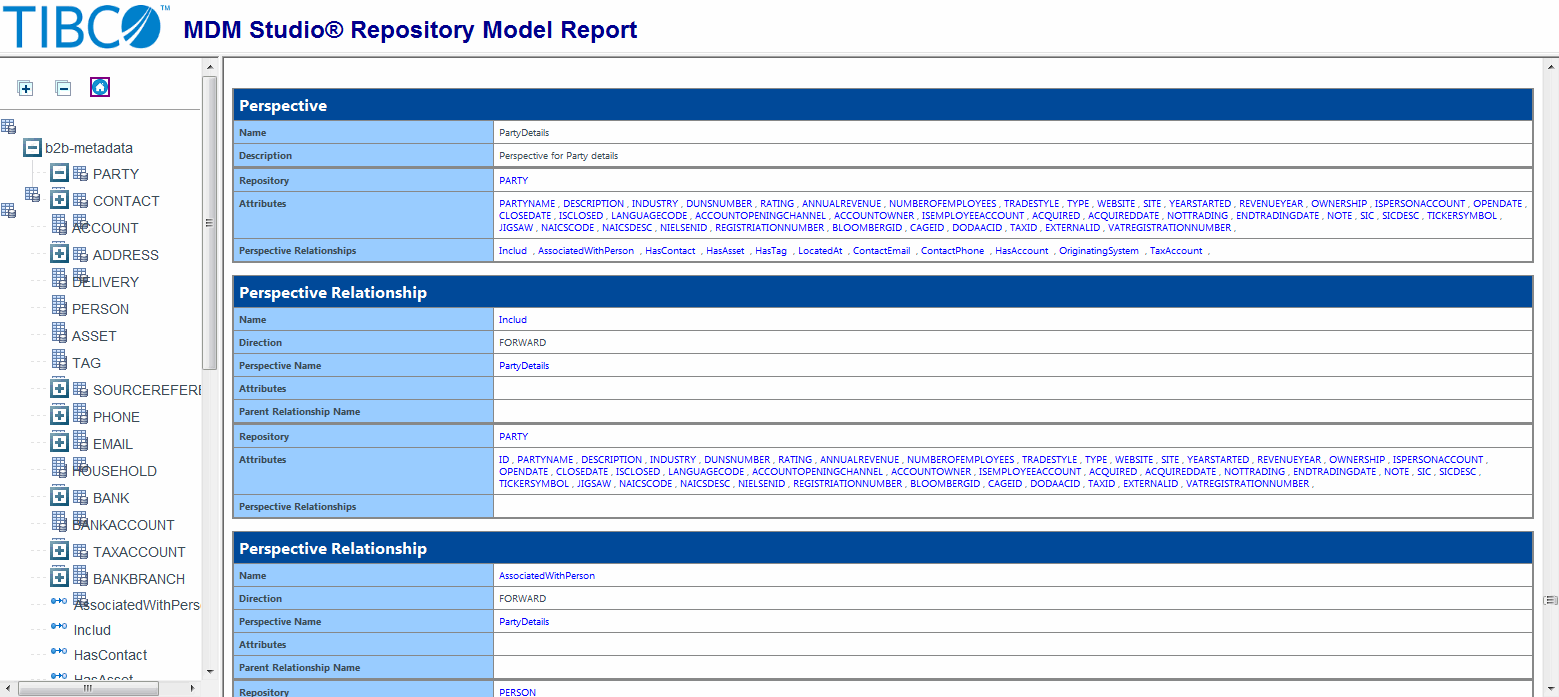
Perspectives Details with selected Repositories and Relationships
The Perspective Details report displays Perspective Name, Description, Repository Name on which the perspective is created, all the attribute in the perspective, and all the perspective relationships.
For each of the perspective relationship section Relationship Name, direction of the relationship (whether it is forward or backward), Perspective Name, Relationship attributes, Parent Relationship names, Target Repository Name, Target Repository attributes selected for perspective, and Next level Perspective Relationships are also displayed.
Customizing the Repository Model Report
The Repository Model report can be customized to change the colors and font of the report.
The repository model report can be used to customize the following:
- Default font
- Image
- Table header color
- Table left column
- Table header font color
- Attribute group name color
- Image layout in the Repository section
Customizing the Repository Model Report
To customize the report model report, perform the following.
From Window menu, click Preferences.
Click on Repository Designer->Report Design.

Click Change to select the font.
The Font window displays, select the appropriate font, font size, and font style and click OK.
To change the Image, click Browse and navigate to the new image in your window open dialog box and click Open.
The path of the new image is displayed in the Image Location field.
Click the button corresponding to the Table Header Color, a new color window opens, select the new color and click OK.
Click the button corresponding to the Table Left Column, a new color window opens, select the new color and click OK.
Click the button corresponding to the Table Header Font Color, a new color window opens, select the new color and click OK.
Click the button corresponding to the Attribute Group Name Color, a new color window opens, select the new color and click OK.
Select the appropriate radio option from the Repository Image Layout. The available options are Left Alignment, Right Alignment, Center Alignment.
Click Apply.
Click OK.