icon from the
Declare Decision Table section of the
Palette and click in the
Declare Constraint compartment.
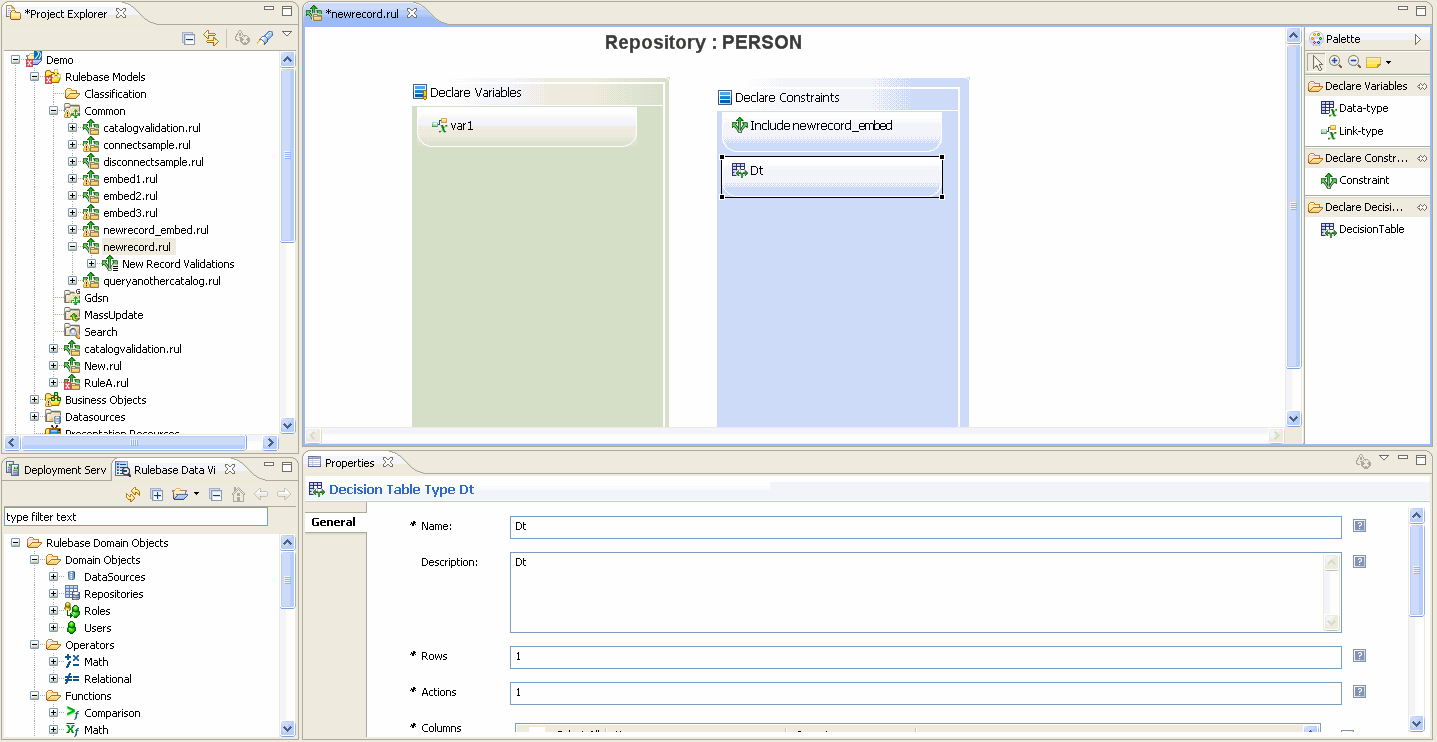
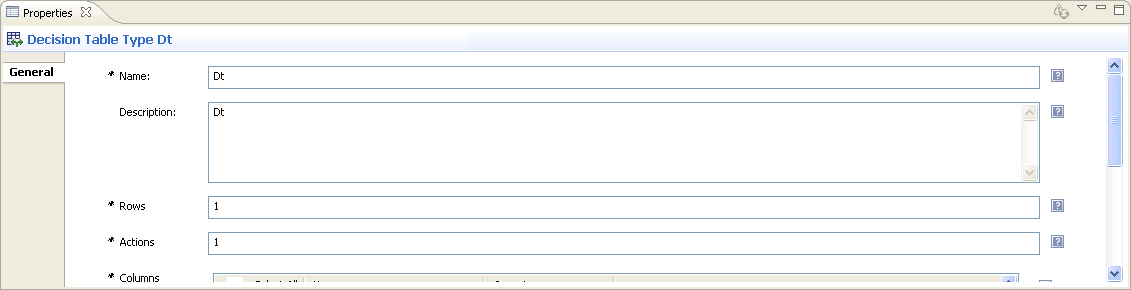
The properties for the newly created decision table are displayed in the
Properties section.
Enter the appropriate Name in the
Name field. By default, the name field is pre-populated as Dt, Dt1, Dt2, and so on. You can change the name as required. The
Name field is mandatory.
Enter the appropriate description in the
Description field. By default the description field is pre-populated with Dt, Dt1, Dt2, and so on. You can change the description as required.
Enter the number of rows required in the decision table in the
Rows field. By default, the
Row field displays 1 row. The rows can be appended using the decision table editor. If the number of rows mentioned in the
Row field becomes less than the existing number of rows in the decision table editor, a message is displayed. If you decide to delete the rows, excessive rows in the decision table editor are deleted starting from the last row. The
Rows field is mandatory.
Enter the number of actions column required in the decision table in the
Actions field. By default, the
Action field displays 1 action column. The decision table can have maximum of ten action column. If you decide to delete the action column, for example, if the number of action column is less than the previously mentioned action column, a message is displayed before deletion. The
Actions column field is mandatory.
Select the appropriate condition columns for the decision table from the
Columns field. By default, the first row is selected. Select the checkbox corresponding to the variables which should be part of the decision table. Select the appropriate operators to associate it with the selected variables. Based on the combination of Variable name from
Vars column and operator image from
Operators column the decision table column title is displayed. The conditions column is divide into three sub columns namely
Select All,
Vars and
Operators.
Select All: The Select All sub column is used to select the entries that would appear as columns in the decision table. Check/Uncheck the checkbox to select and clear the selections. If you want to select all the checkboxes, check the
Select All
checkbox in the header. After the selection, if you try to uncheck the
Select All checkbox, a warning message is displayed and all the checkboxes are cleared except for the first row checkbox. After selecting the checkbox, if you try to uncheck it, the following message is displayed This will delete column data for all the rows? Would you like to Proceed?
Vars: The variables appearing in the
Vars sub column are derived from the repository that is linked to a given rulebase file and from Declare variable container in the rulebase file. The session variables are also displayed.
Note: The variables with File data type and Link Type variables are not included in the Vars sub column.
Operators: The
Operators sub column is used to associate a particular operator with a given variable in the
Vars sub column. The
Operators sub column provides a list of various operators. The operator listing varies depending upon the data type of the variable in the
Vars sub column and whether variable is multi-value attribute or not. For more details on Operators, refer
Operators.
After the variables and operators are defined, you can change the order of the condition columns. To change the order of the
conditions columns, select an entry in the row and change the order by clicking the up arrowicon or the down arrowicon.

 icon or the down arrow
 icon.
icon.