Creating Input Map
You can create input maps within or across repositories.
Procedure
-
In the
Project Explorer window under
Repository Models, right-click a repository on which you want to define the input map and select
.
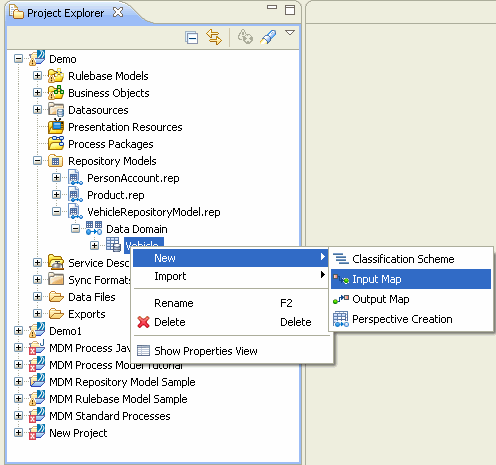
The Input Map wizard is displayed. -
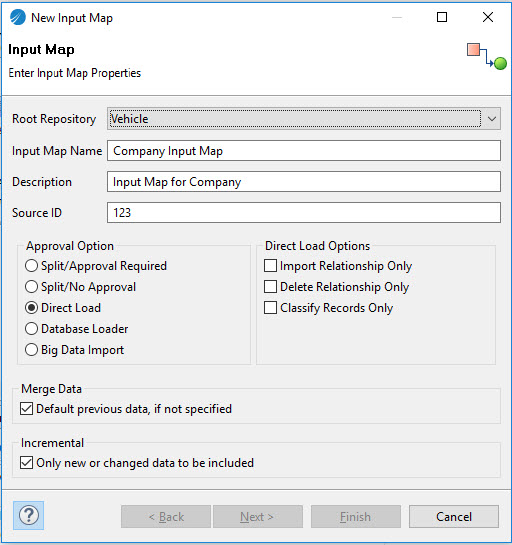
In the
Input Map wizard fields, enter the relevant details.
-
in the
Select Data Source section, select a data source by selecting the check box next to it.
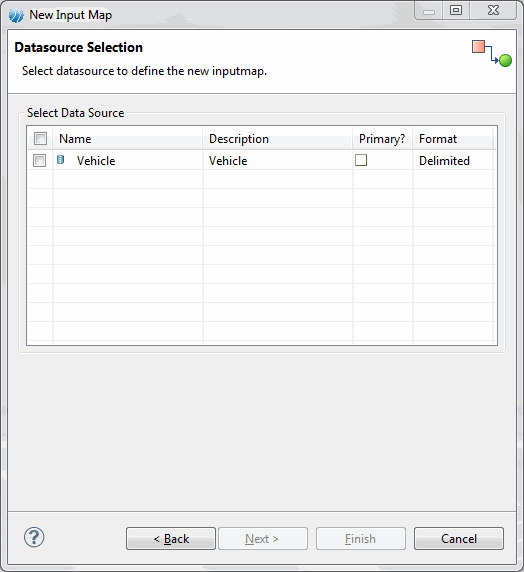
- Click Next.
- Click Next.
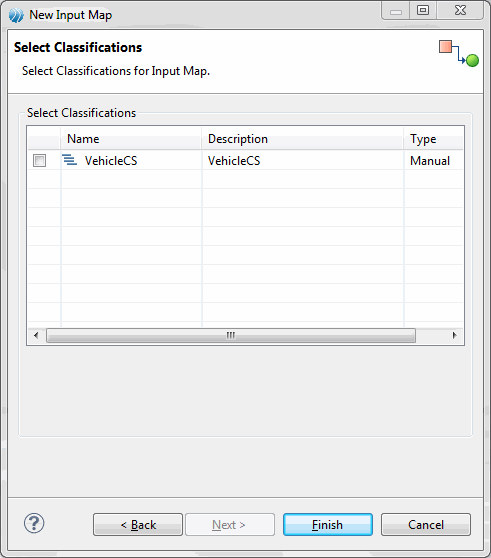
-
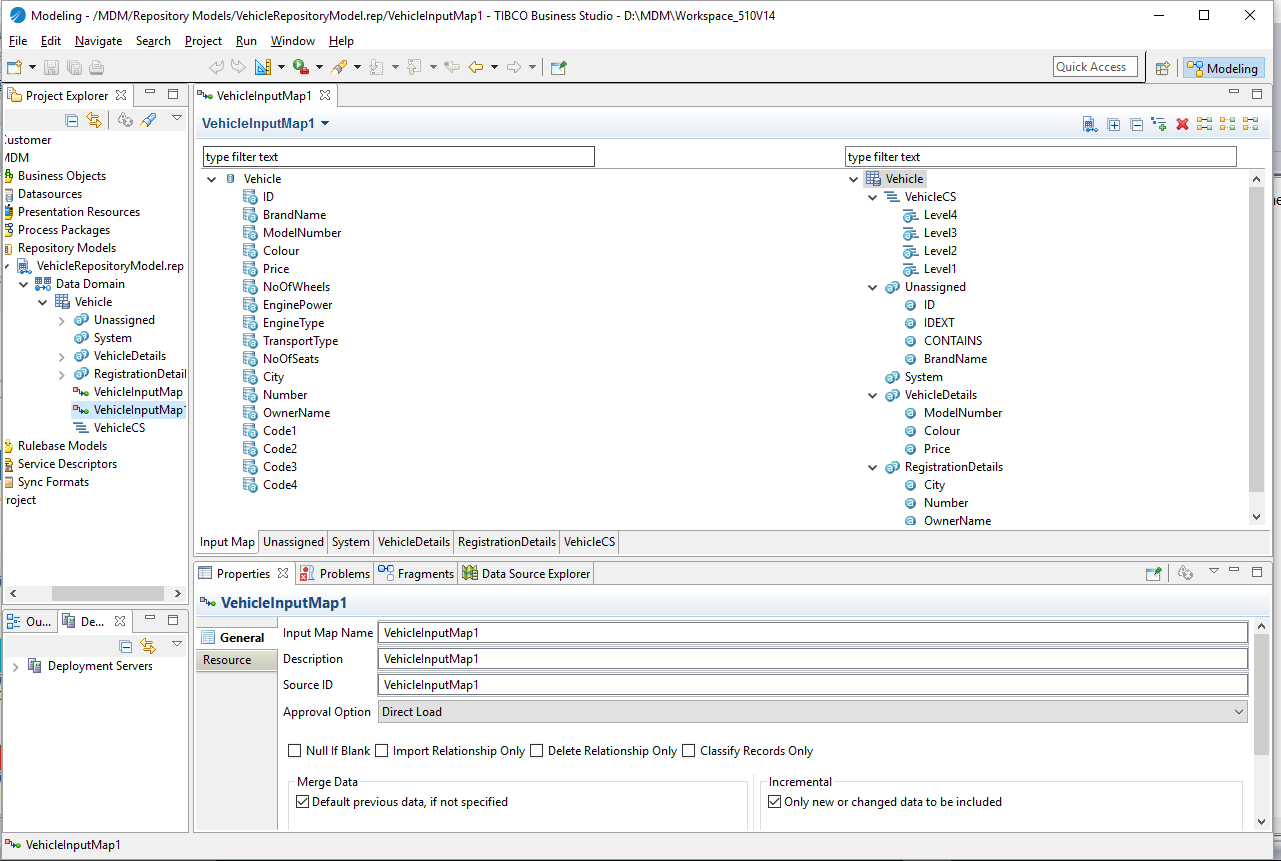
Click
Finish.
The Input map is created and displayed in the Input Map editor.
If the input map is created by selecting relationships, the related input maps are created under the related repositories. Similarly, if the input map is created by selecting classification scheme, the category specific attributes are displayed in the Input Map editor.

Copyright © Cloud Software Group, Inc. All rights reserved.