Defining an E-Mail Service Type from a Service Task
Procedure
- Select the service task. On the General tab of the Properties view for the service task, select the E-Mail option from the Service Type drop-down list.
-
Enter an email address for the recipient in the
To: field, a subject, and the body text for the message. You can enter actual email addresses and plain text, or you can specify data fields, delimited by percent characters. For example, if you specify:
%ManagerID%
in the To field, this will be replaced by the contents of the ManagerID data field. (See Setting up Dynamic Data Inputs to an Email Message for more information.)
This is the minimum configuration necessary to send an email message. For further options, click More Details (which will take you to the E-Mail tab) or the E-Mail tab and continue to specify further parameters.
-
On the
E-Mail tab, you can specify further parameters for the
Definition of the email message.
Note: All of the parameters on the E-Mail tab can be specified using a data field or a parameter. Click the
 button to display the
Select Data Field or Formal Parameter
dialog and choose the required data field or parameter. You can also mix text with data field values, as shown in the
Subject field of the example illustration.
- From: Use Custom Configuration to choose a data field or parameter which will specify a different From: address for this email.
- To: Specify the recipient of the email, either as an explicit email address or by selecting a data field or parameter. This is a mandatory field and you will receive an error if it is not present.
- Cc: Specify any recipients to whom you want to send a copy of the email either as explicit email addresses or by selecting a data field or parameter. Their email address is visible to other recipients of the email.
- Bcc: Specify any recipients to whom you want to send a blind copy of the email either as explicit email addresses or by selecting a data field or parameter. Their email address is not visible to other recipients of the email.
- Reply To: Use this parameter to specify a different email address to which recipients of a message can reply. Alternatively, select a data field or parameter.
- Headers: Message headers provide a list of technical details, such as who sent the mail message, the software used to compose it and the email servers it passed through to get to the recipient. Use this parameter to specify additional information in the header of the email.
- Priority: Select a priority from the drop-down list (Low, Normal, or High) or select a data field or parameter.
- Subject: Type the Subject line for the email message or select a data field or parameter.
-
Click
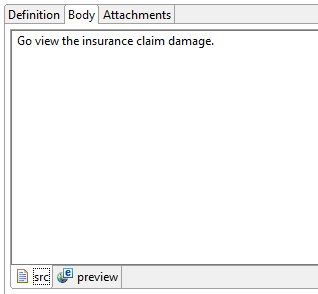
Body to specify the main text of the message. Click in the main part of the field to enter text. You can enter either plain text or HTML. If you enter HTML, then when you use the preview option below, you will see what the output of the HTML will be.You can also specify the contents of data fields or files to be inserted.
At the bottom of the text area are the following buttons:
- Click the
 icon to view the source of the body text of the email.
- Click the
 icon to display a preview of how the body text will look to the recipient.
- Click the
 icon to open the
Select Data Field or Formal Parameter
dialog, which you can use to select a field and specify that the contents of the field should be inserted in the email. This button is only available when you are viewing the source of the body text, not when you have selected a preview.
- Click the
 icon to open the
Open
dialog, which you can use to select a file and specify that the contents of the file should be inserted in the email.
You can alternate between viewing the source of the body text and previewing how it will look to the recipient:
- Click the
-
Click
Attachments to specify a document to be attached to the message:
-
- Files:
- Use this option to browse the file system and attach one or more files to the email message.
Note: To be successful, file attachments must use a consistent directory structure and file name at design time and runtime. So for example, if you are attaching a file C:\temp\readme.txt at design time, then that same file, in the same directory, needs to be available to the runtime.
This also means that in a distributed environment, this needs to be available on any host running a BPM Server node. it would be good practice to have a mapped drive available to all hosts where the attachment is available.

