Creating a Business Process
You can create a Process and its containing package and Project in one operation or you can create a business process.
- Procedure
- Before creating a process, you must create a project and a package to contain your process.
- In the Project Explorer, select the package you created, right-click and select .
- The
New Business Process wizard is displayed.
Note: If you start this wizard from the menu, the first dialog box is the Project and Package dialog box, where you must specify a valid project and package. This dialog box is not displayed if you right-click at the package level to start the dialog box; however, you can click Back to display it if necessary.
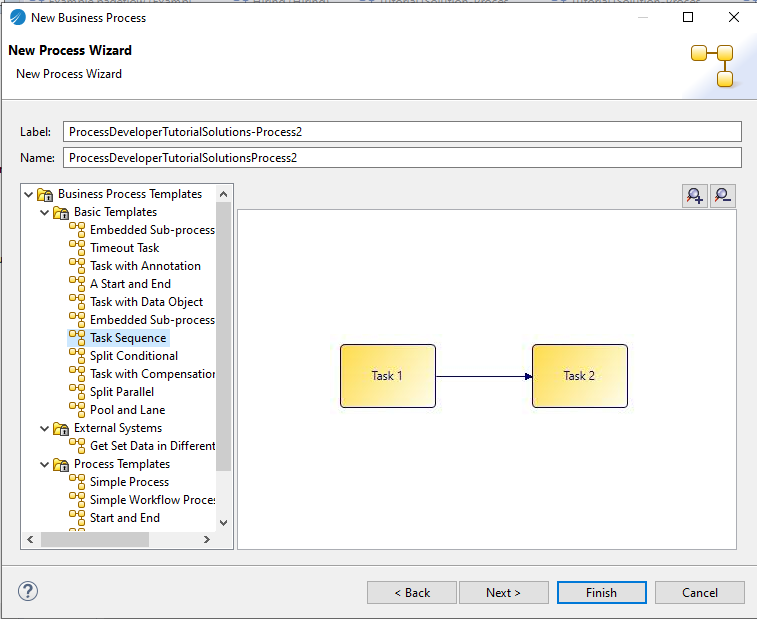
- Enter the
Label of the process. To use a template to create the process, select the template and click
Next. This example shows one of the basic templates (a task sequence).

In addition to the process templates, you can select a process interface as the basis for your new process. This creates a process with the necessary events, parameters that are specified in the process interface.
- In the Description dialog box, add optional text that describes the process, an optional URL that links to documentation about the process, and click Next.
- In the Destinations dialog box, select the Destination Environment (optional).
- The Extended dialog box is displayed. This allows you to add optional supplemental information to the XPDL for the process. For more information see Creating Extended Attributes.
- Click Finish.
- The process that you created is displayed in the Process Editor. When you first start the Process Editor, the palette (on the right side of the diagram) might be collapsed; if so, expand it:
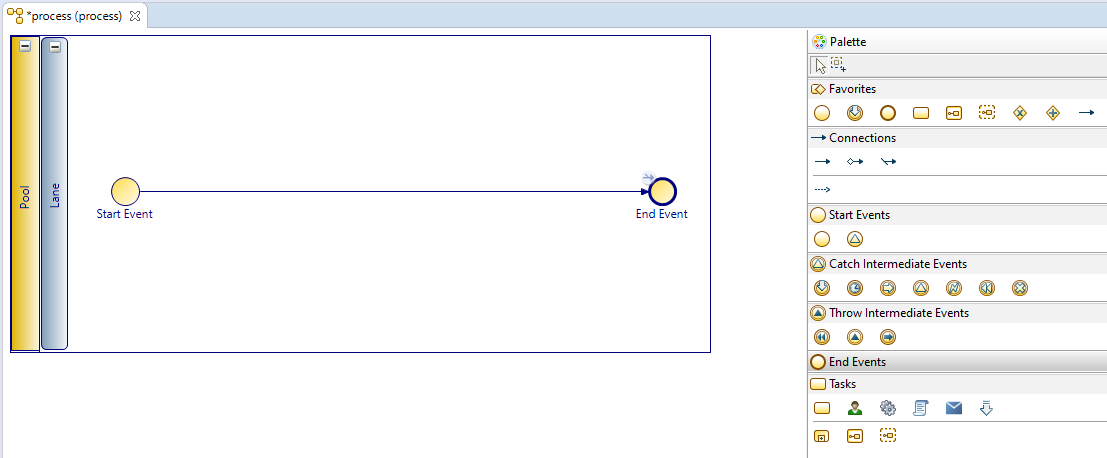
You can expand this window to fill your screen by double-clicking the title bar (in this example, the area labeled Process2).
The Process Editor provides a Pool and Lane that you can rename if you plan on using pools and lanes (see Controlling Flow in a Process). You add elements of your business process using the Palette.