Deploying an application on ECS

You can deploy an application on ECS and monitor the application logs by configuring the container with CloudWatch.

Prerequisites

  • Ensure that you have TIBCO BusinessWorks™ Container Edition application EAR and Docker files in the same directory.
  • In the Docker file, ensure that the EAR file name and path is correct.
  • In the Docker file, ensure that the base image points to the TIBCO BusinessWorks™ Container Edition runtime base image, which is created by the CloudFormation template.

Procedure

  1. To view the runtime base image, go to AWS Console > Services > EC2 Container Service > Repositories > tibco-bwce.
    The Repository URI is shown as
    <AWS_account_id>.dkr.ecr.<region_name>.amazonaws.com/tibco-bwce

To install the AWS CLI and Docker and for more information, see Amazon ECR Documentation.

  1. Retrieve the docker login command that is used to authenticate your Docker client with your registry.
    aws ecr get-login --no-include-email --region <region_name>
    Note: If you receive an Unknown options: --no-include-email error, install the latest version of the AWS CLI. For more details, see Installing the AWS Command Line Interface.
  2. Run the docker login command that was returned in the previous step.
    If you are using Windows PowerShell, run the following command.
    Invoke-Expression -Command (aws ecr get-login --no-include-email --region <region_name>)
  3. To generate the application image, navigate to the folder where the EAR and Docker files are stored and run the following command. For information about building a Docker file, see Docker Basics.
    docker build -t <application_name> .
    Note: You can skip this step if your image is already built.
  4. After the build is ready, tag the image to push it to the repository.
    docker tag application_name:latest <AWS_account_id>.dkr.ecr.<region_name>.amazonaws.com/application_name:latest
  5. To push the image to your newly created AWS repository, run the following command:
    docker push <AWS_account_id>.dkr.ecr.<region_name>.amazonaws.com/application_name:latest
    Note: Ensure that you replace the <region_name> with your region such as ap-northeast-1 and Repository URI with the URI.
  6. Create the services and task definition in ECS. A task definition is required to run Docker containers on Amazon ECS. Create task definition for TIBCO BusinessWorks Container Edition application. For more details, see Amazon ECS Task Definitions.
    The following is a sample taskdef.json file for reference.
    {
        "family": "launch-test-app",
        "containerDefinitions": [
            {
                "image": "<AWS-account_id>.dkr.ecr.<region_name>.amazonaws.com/<repo_name>:latest",
                "name": "bwce-test-app",
                "cpu": 10,
                "memory": 512,
                "essential": true,
                "portMappings": [
                    {
                        "containerPort": 8080,
                        "hostPort": 8080
                    }
                ],
                "environment": [
                    {
                        "name": "BW_LOGLEVEL",
                        "value": "DEBUG"
                    }
                ],
                "logConfiguration": {
                    "logDriver": "awslogs",
                    "options": {
                        "awslogs-group": "bwce-app-log",
                        "awslogs-region": "<region_name>",
                        "awslogs-stream-prefix": "bwce"
                    }
    	    }
            }
        ]
    }
  7. Register the task definition in the repository by running the following command.
    aws ecs register-task-definition --family <family_name_for_your_app> --cli-input-json file://<taskdef_path>.json/> --region <aws_region>
  8. To create a new service for your application, run the following command using the task definition. You can optionally configure your service to use load balancer to distribute traffic evenly across tasks in your service. For more details, see Services in Amazon ECS Documentation.
    aws ecs create-service --service-name <Your_service_name> --desired-count 1 --task-definition <your_family_name> --load-balancers targetGroupArn=<your_target_group_arn>,containerName=<container_name>,containerPort=<container_Port> --role <your_IAM_role_Arn> --cluster <your_cluster_name>

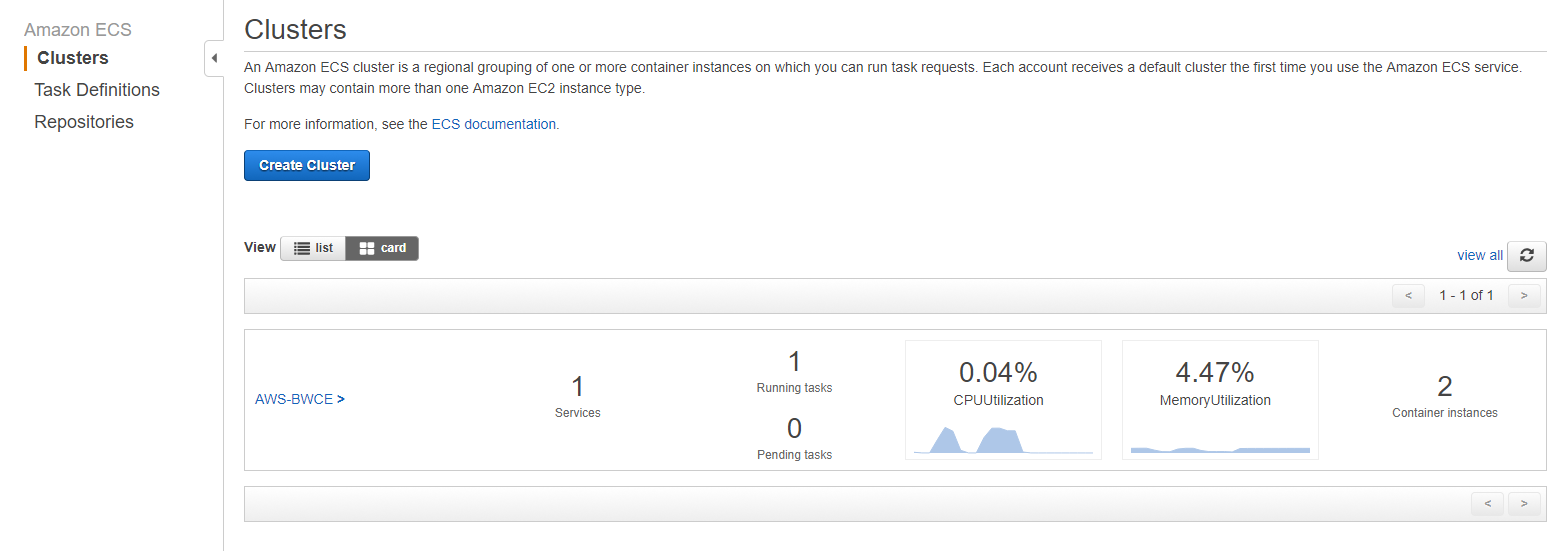
    After the container is automatically configured with CloudWatch logs in taskdef, you can check your application logs in the service created in the ECS cluster.

    You can also manually configure the CloudWatch. For more details, see Amazon Cloud watch Logs.

    After the service is successfully running and the target group status is healthy, you can hit the load balancer URL according to the listener and target group configured in load balancers.