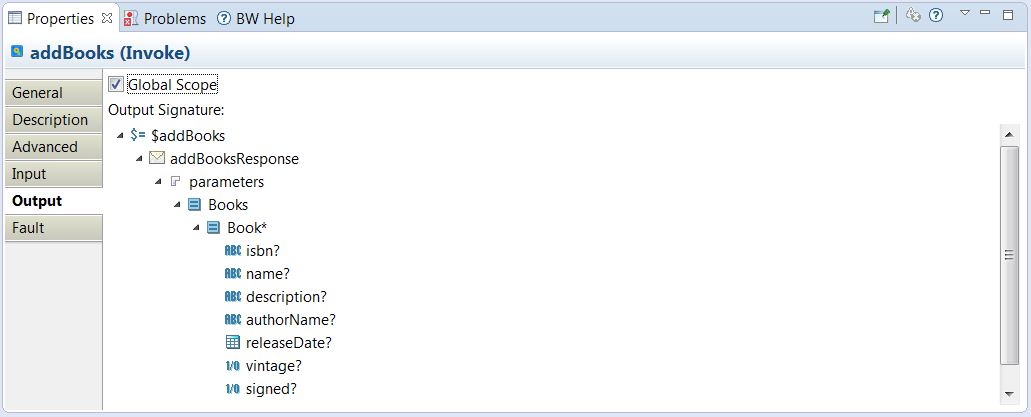
Input and Output
The Input tab is used to enter the data for an activity and the Output tab displays the output schema of an activity.
Configuring the Input Tab
The
Input tab is available in the Properties view and is used to enter data for an activity. Input data for an activity can be any of the following:
- Constant/Literal specified using numbers or strings enclosed in quotes.
- Regular Expression specified using an existing schema item or by keying in a constant expression in the field.
- Mapping the output from previous activities to the current activity's input. Using the mapper, you can choose functions or constants from the Functions and Constants tabs with the mapped data.
- Click the desired item in the available schema in the Data Source panel, such as "name". Drag the item to the desired item in the Activity Input panel, such as "Message".
- To type in a constant or expression, click the schema item ("Message") in the Activity Input panel and type the constant or expression into the field.
Right-Click Menu
When you select an element in the Activity Input schema and right-click, a popup menu appears. The Statement menu item contains several sub-items that are useful shortcuts for creating XSLT statements.
- Surround with Choice — a shortcut for adding a choice statement and its associated conditions or otherwise statements around the currently selected element.
- Surround with If — a shortcut for adding an if statement and placing the currently select element as the sub-element of the if.
- Surround with For-Each — a shortcut for moving the current element into a For-Each statement.
- Surround with For-Each-Group — a shortcut for moving the current element into a For-Each-Group statement and adding a Group-By grouping statement. The current-group() is not provided on source side. When you create for-each binding under a for-each-group, it adds current-group() by default. The Grouping statement creates the list grouped by the desired element, and the current-group() function allows you to access the items in the requests repeating element that correspond to the group that is currently being processed.
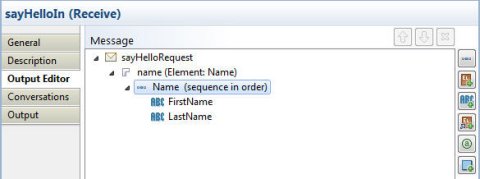
Configuring the Input Editor Tab
Using the Input Editor tab you can configure the input data for an activity.
Instead of specifying a constant or an expression for the schema item, you can first configure the sequence in which this message will appear by setting up the element it is contained in.
You can define the sequence of an element using the icons on the right:
 Add Complex Anonymous Type: Adds an element sequence that is defined by the following:

- Schema type definition or creating a new type definition.
- Number of Minimum Occurs (default is 1).
- Number of Maximum Occurs (1 or unbounded).
- Number of references to this resource (generated, in this case it is 0).
- Initiate Rename Schema Element: rename the schema element by entering the New Name and choosing the option whether to update the references to this element.
- The remaining icons are Go To
 , Accept Changes
 , and Delete
 , which invoke the general editing tools.
 Add Complex Element: This option adds a complex element that you can further define by the following:

- The schema type definition or a new type definition (default is anyType)
- Number of Minimum Occurs (default is 1).
- Number of Maximum Occurs (1 or unbounded).
- Number of references to this resource (generated, in this case it is 0).
- Initiate Rename Schema Element: rename the schema element by entering the New Name and choosing the option whether to update the references to this element.
- The remaining icons are Go To
, Accept Changes
, and Delete
, which invoke the general editing tools.
 Add Primitive Element: This option adds a primitive element that you can further define by the following:

- Choosing by the Primitive Types: String, Integer, Decimal, Boolean, Date&Time, Binary, URI or Any.
- Choosing by the Primitive Sub Types: String, Normalized String, Token, Language, Name. NC-Name, Q-Name, Name Token, Name Tokens, ID, ID ref, ID refs, Entity, and Entities.
- Number of Minimum Occurs (default is 1).
- Number of Maximum Occurs (1 or unbounded).
- Number of references to this resource (generated, in this case it is 0).
- Initiate Rename Schema Element: rename the schema element by entering the New Name and choosing the option whether to update the references to this element.
- The remaining icons are
Go To
,
Accept Changes
, and
Delete
, which invoke the general editing tools.
 Add Reference Element: This option adds a reference element that you can further define by the following:

 Add Attribute: This option adds an attribute that you can further define by the following:

- Choosing by the Primitive Types: String, Integer, Decimal, Boolean, Date&Time, Binary, URI or Any.
- Choosing by the Primitive Sub Types: String, Normalized String, Token, Language, Name. NC-Name, Q-Name, Name Token, Name Tokens, ID, ID ref, ID refs, Entity, and Entities.
- Use Optional/Required (default is Optional).
- The remaining icons are
Go To
,
Accept Changes
, and
Delete
, which invoke the general editing tools.
 Add Any Element: This option adds an element that you can further define by the following:

- Wildcard Namespace (a space-delimited list of the namespaces can be entered).
- Entering the Minimum Occurs number (default is 0).
- Selecting from the drop-down list the Maximum Occurs number (1 or unbounded.)
- The remaining icons are
Go To
,
Accept Changes
, and
Delete
, which invoke the general editing tools.
Copyright © Cloud Software Group, Inc. All rights reserved.