A REST service provider exposes the resources in a process definition that can be invoked by clients using one of the following operations: POST, GET, PUT, PATCH, DELETE, OPTIONS, HEAD, and custom.
Prerequisites
If a schema definition does not exist, create (or import) a schema definition in the process to which you want to add the REST service. To import an existing XSD file, drag and drop the
.xsd file from the File Explorer to the
Schemas folder of your project.
To create a new schema file in
TIBCO Business Studio™ for BusinessWorks™, do the following:
- In Project Explorer, right-click the
Schemas folder.
- Select
.
- In the Schema Editor, right-click in the respective box to add a directive, element, type, attribute, or group.
Note: When you create a REST service, make sure to edit the
Default Host field in the
HTTP Connection Resource to reflect the actual host name. By default, the
Default Host field is set to
localhost.
Procedure
-
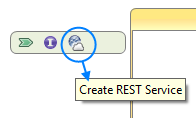
In the
Project Explorer view, select the process to which you want to add the REST service. There are multiple ways to invoke the wizard to create a REST service.
-
In the
REST Service Wizard window, configure the REST service implementation by specifying the values for
Resource Service Path,
Type of Resource,
Operations, and
Implementation Data.
REST Service Wizard
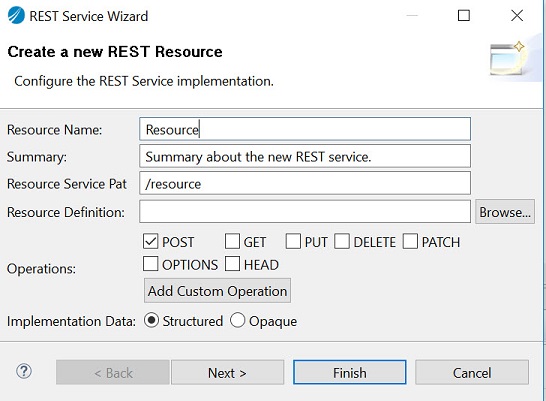
REST Service Wizard fields
| Field
|
Description
|
| Resource Name
|
The name for the new REST service
|
| Summary
|
Summary about the new REST service
|
| Resource Service Path
|
Specifies the URI that is used to access the REST service
|
| Resource Definition
|
Select a resource schema for the REST service, if needed
|
| Operations
|
By default, the POST operation is selected. Select or deselect the operations as needed.
Note: You can add custom operations by clicking on the
Add Custom Operation button.
|
| Implementation Data
|
Choose between structured and opaque implementation data
|
-
Optionally, click
Next to configure the selected operations individually to specify the nickname for the operation (the default nickname is of the format
<operation><resource_name>), summary, and the request and response elements and their data types.
-
Click
Finish.
The wizard adds the REST service and the selected operations, and also creates a process definition with the multiple operations. It generates a
.json file in the
Service Descriptors folder of your project when it creates the service.
Note: The REST service always implements the constructor operator.
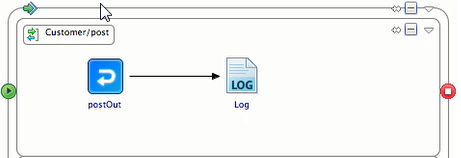
-
Add activities to the process and configure them appropriately. For example, update the POST process to add a
Log activity to log the requests and connect the postpostOut activity to
Log activity.
-
Configure the input and output properties for the activities. For example, select postOut activity and select
. Expand the data tree in the
Data Source tab and map the post element from the left to the post Response element on the right to echo the element. Similarly, for
Log activity, map the post element on the left to the ActivityInput message element on the right.
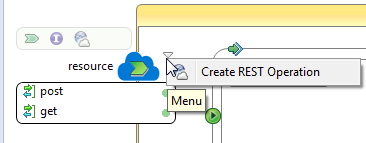
-
You can optionally add an operation to the service using the
Create REST Operation wizard. To open this wizard, click on the down arrow and click
Creat REST Operation to open the wizard.
-
Save your changes.
Result
The REST service is built and can be tested using the built-in tester Swagger UI. For more information about the Swagger UI, see Testing the REST Service in the
TIBCO BusinessWorks™ Container Edition Getting Started guide.
Copyright © Cloud Software Group, Inc. All rights reserved.