Settings
The Settings dialog is configured by default to access the TIBCO BusinessWorks Container Edition site. You can configure additional registries that you might need to access using this dialog.
API Registry Configurations
Configure a new API registry by clicking the New button. Enter the following information:
name - A unique name for the registry
type - Registry type. If the registry is in the cloud, you must select Cloud and enter its URL in URL text box. If the API resides on your local file system, select Local Folder and browse to the folder using the Browse button.
URL - If you selected Cloud as your registry type, you must enter the site's URL in this text box.
Authentication - When creating a new API registry, you must enter your user name and password for the registry that exists on the Cloud.
API Presentation
Configure how you want your API to appear in this view. The three types of presentations available are:
- Flat - Displays the APIs as a flat list with each API's version number displayed next to its name in parenthesis. If there are multiple versions of the same API, each version is shown as a separate API, hence multiple APIs with the same name but different version numbers.
- Hierarchical - Displays every API as a hierarchy of API name label with version number folder under it and the actual API under the version folder. If there are multiple versions for an API, each version is listed in its own separate folder under the API name label.
- Latest Version - If one or more APIs in your registry has multiple versions, selecting this option shows only the latest version of the API and hides the older versions.
Other Configurations
Group by API registry - Groups the APIs according to the registry from which they were discovered.
Show API Registry URL - Displays the URL of the APIs next to the registry name.
Group apps by sandbox - If you have multiple sandboxes that contain apps, the Cloud Applications view displays the sandboxes and groups the apps under their respective sandbox.
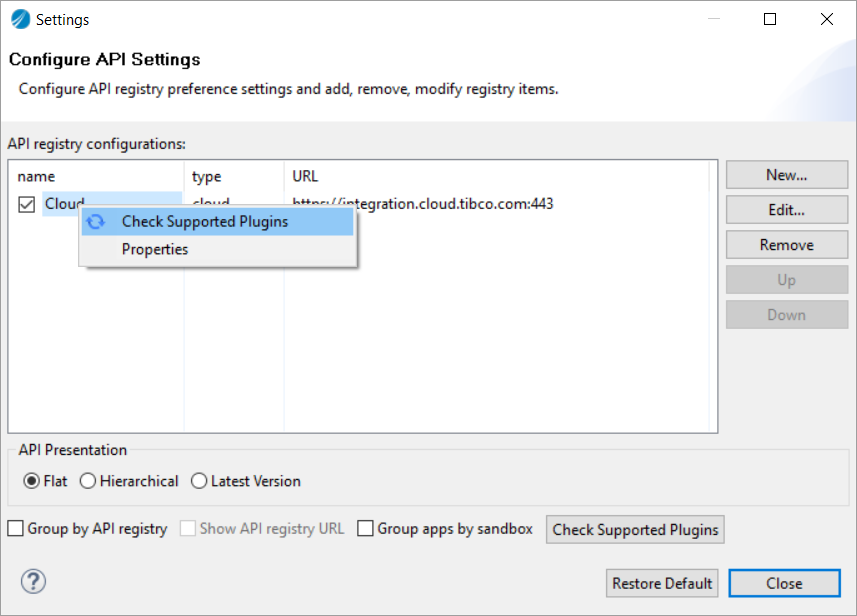
Check Supported Plug-ins - This button refreshes the supported list of plug-ins from TIBCO BusinessWorks Container Edition. When you import an existing project that uses plug-ins, you can validate that the plug-ins used in the project are supported in TIBCO BusinessWorks Container Edition by clicking this button. A message is displayed indicating that the supported plug-ins are synchronized. The read-only list of supported plug-ins shows up in the Supported Plug-ins tab of the Properties dialog that you can access from the right-click menu as shown below. You can verify that you have the latest list from the synchronization timestamp at the bottom of the Properties dialog. You can also access the Check Supported Plug-ins option by right-clicking in the API registry that you want to connect to and selecting it from the resulting context menu.
This list represents the plug-ins that is available to your projects in TIBCO BusinessWorks Container Edition during runtime. In order to use a plug-in during design time, you must have the plug-in installed locally on your machine. If your project uses a plug-in that is not supported in TIBCO BusinessWorks Container Edition, an error message is displayed while pushing the project to the cloud.
Properties - The Properties context menu item opens a dialog which provides information about the registry from which you selected Properties in its General tab. The Supported Plug-ins tab provides a read-only list of plug-ins that are supported in TIBCO BusinessWorks Container Edition.