Building applications for TIBCO BusinessWorks Container Edition in Cloud Foundry
To build applications with TIBCO BusinessWorks Container Edition in Cloud Foundry, follow these steps:
If the Cloud Foundry platform is selected as deployment option during POM generation, the following window is displayed.
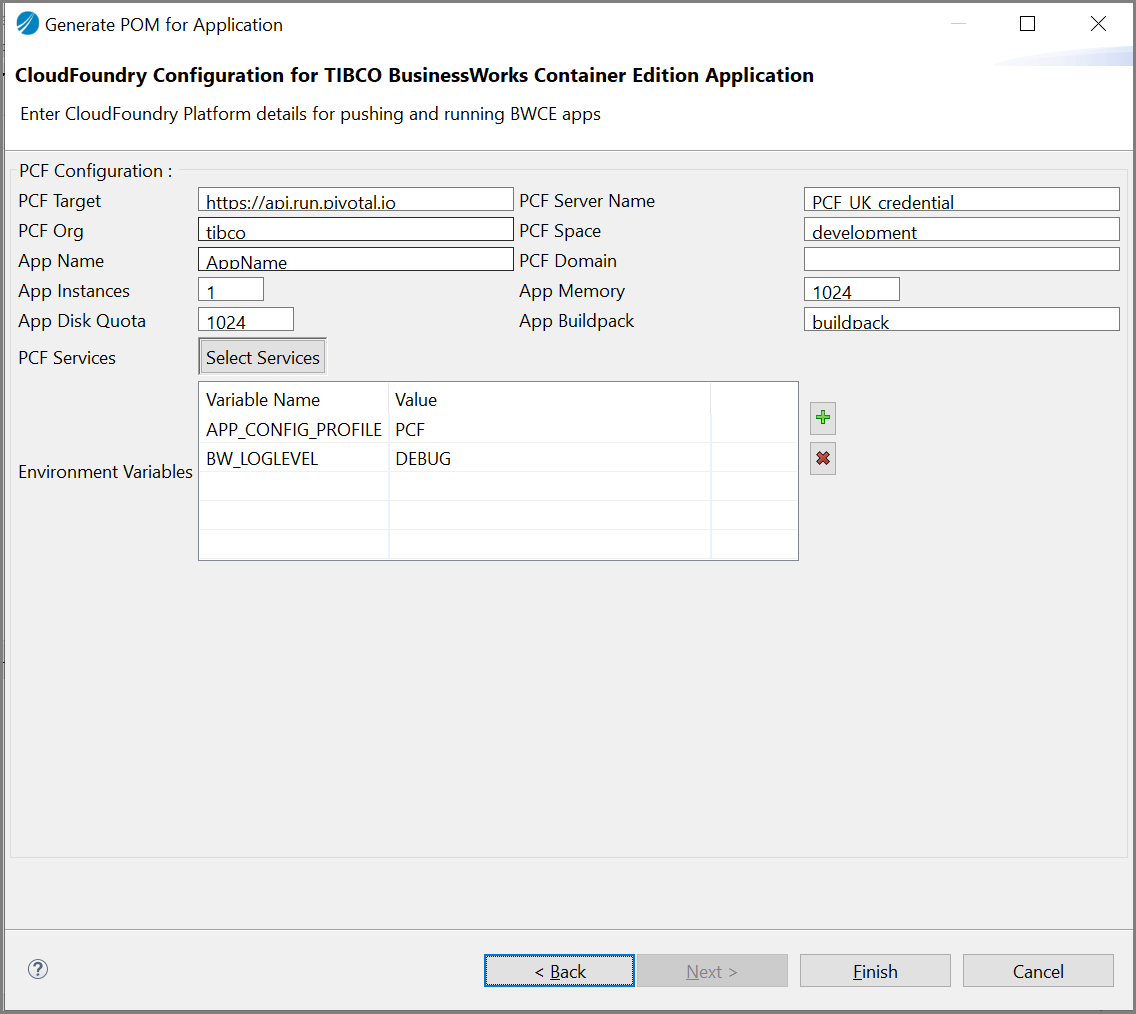
Specify the following guidelines for some of the Cloud Foundry specific fields:
|
1.
|
PCF Server Name: The PCF_UK_credential (Define this as <\server> inside your config/settings.xml of Apache Maven Home)
PCF_UK_credential admin xxxxxxxxxxxx. |
|
2.
|
App Memory: Minimum should be 1024 MB |
|
3.
|
App Buildpack: BWCE buildpack which developer has pushed to PCF instance |
|
4.
|
PCF Services: Select this button to login to Cloud Foundry and select the required services you want to bind to your application. |
PROPERTIES FILES
|
•
|
By default, the pcfdev.properties and pcfprod.properties files are generated with variable name as pcf.property.file . |
|
•
|
For more environments, one of these properties file can be copied and renamed to the other environment. For example, pcfqa.properties. Its values can be customized for required environment. |
GOALS FOR CLOUD FOUNDRY
|
•
|
Execute the maven build goal cf:push, cf:scale etc. |
|
•
|
While executing the goals, provide the credentials using system arguments, -Dcf.username and -Dcf.password. |
|
•
|
You can try other goals from TIBCO Business Studio for BusinessWorks, by creating new Maven Run Configurations for different goals, or from terminal pointing to the workspace using the
mvn initialize cf:command -Dpcf.property.file=pcfdev.properties command
|
Note: For all non-web application, if you are using Cloud Foundry Elastic Runtime 1.6 or above then, it will give health-check error while cf:push, so you have to use Cloud Foundry CLI (6.13 or above) to set health-check as 'none'. After pushing the application, re-push the application after setting health-check as 'none'. You can use command on command line - cf set-health-check App_Name none.