Configuring Teradata Database by Using Custom JDBC Driver

You can configure Teradata Database by using a custom JDBC driver.

Note: If you are using the Data Merger or Data Requester activities, you can insert maximum 16 records in the Teradata database concurrently.

Procedure

Note: Follow the same steps to configure the Teradata database by using JDBC custom driver on TIBCO Business Studio (Container Edition).

  1. In TIBCO Business Studio, go to Window > Preferences.
  2. In the left pane, under BusinessWorks > Palettes > JDBC, set the directory preference as follows: TIBCO_HOME/bw/version_number/config/design/thirdparty.
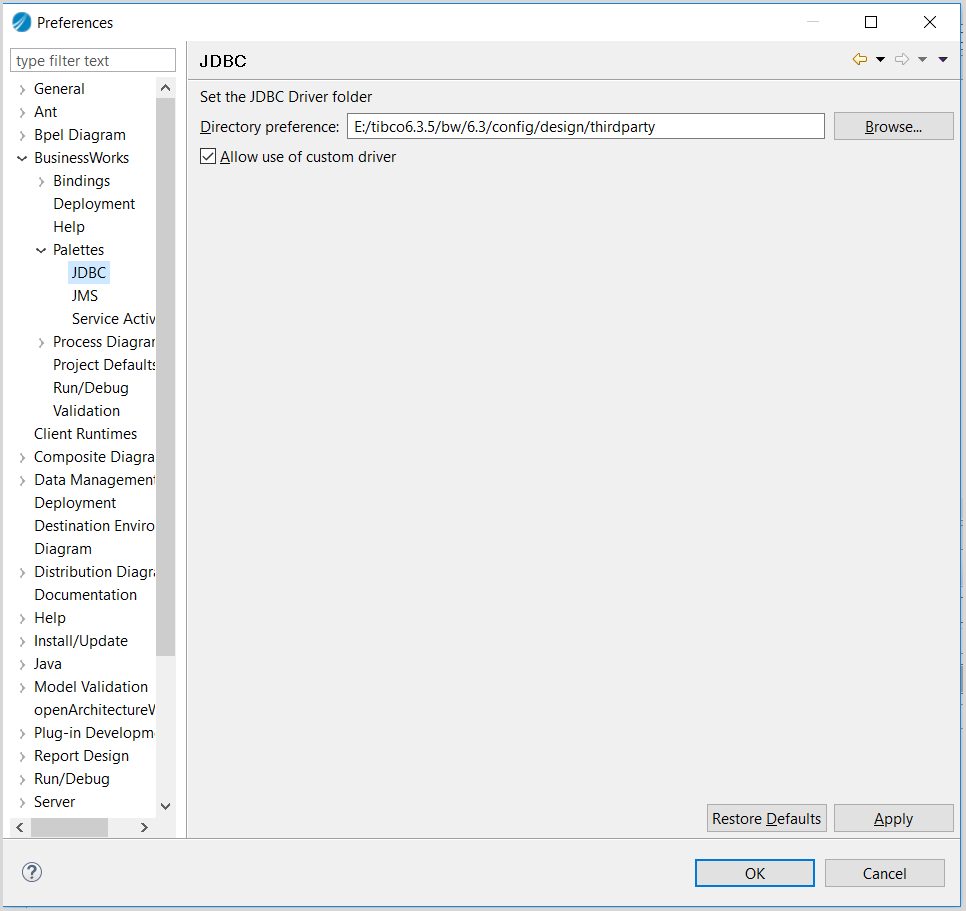
  3. Select the option Allow use of custom driver, click Apply, and then click OK.
    Setting Custom Driver
  4. Copy the TeraData JDBC server JAR files such as terajdbc4.jar and tdgssconfig.jar to the directory preference location selected in the earlier step.
    Note: When you are configuring the connection, if you are using TeraData driver 16.20 onward, you don't need to provide tdgssconfig.jar.
  5. If you have already configured the JDBC driver, skip this step. Otherwise, restart TIBCO Business Studio.
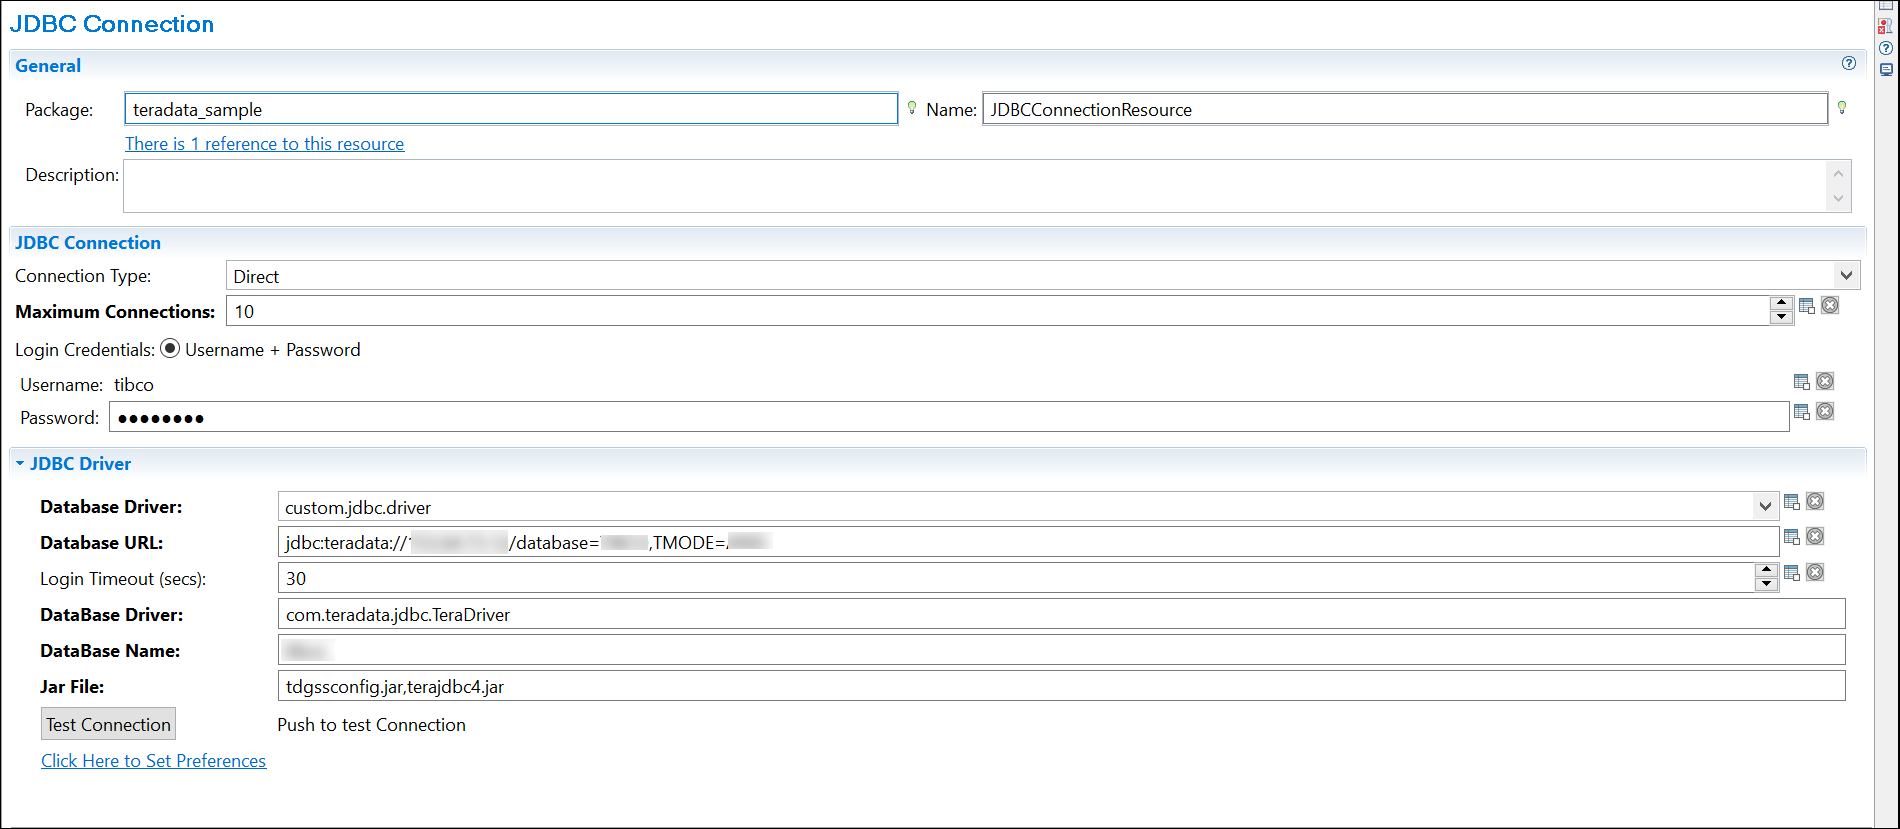
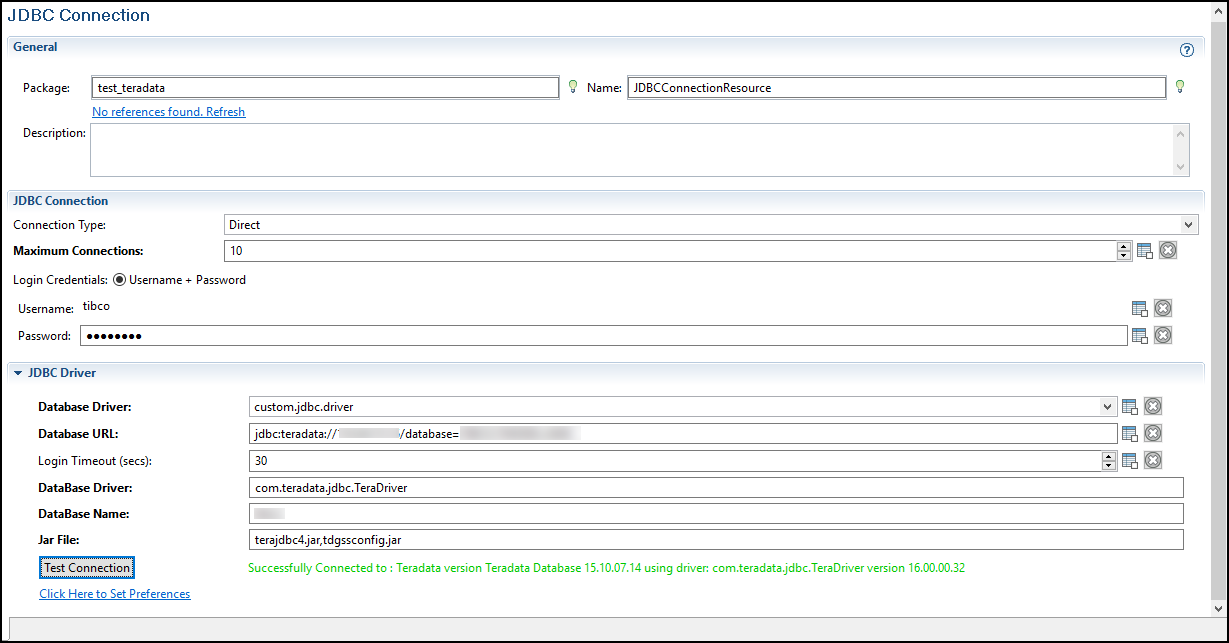
  6. Create a JDBC connection. Use the driver details and user credentials as follows:
    • Database Driver: custom.jdbc.driver
    • Database URL: jdbc:teradata://<host>/database=<db_name>, TMODE=<mode>
    • DataBase Driver: com.teradata.jdbc.TeraDriver
    • Database Name: <db_name>
    • JAR File: terajdbc4.jar,tdgssconfig.jar
    Note: Ensure that there is no whitespace in the database URL and in the comma separated list of JAR files.
    JDBC Connection
  7. Click Test Connection.
    The Custom Driver Runtime Support pop-up window is displayed. Click OK.
    Custom Driver Runtime Support

    A new plug-in project is created.
  8. In the New Plug-in Project window, click Next.
  9. In the next New Plug-in Project window, click Next.
  10. Click Finish. A custom project is created in the workspace with compilation errors.
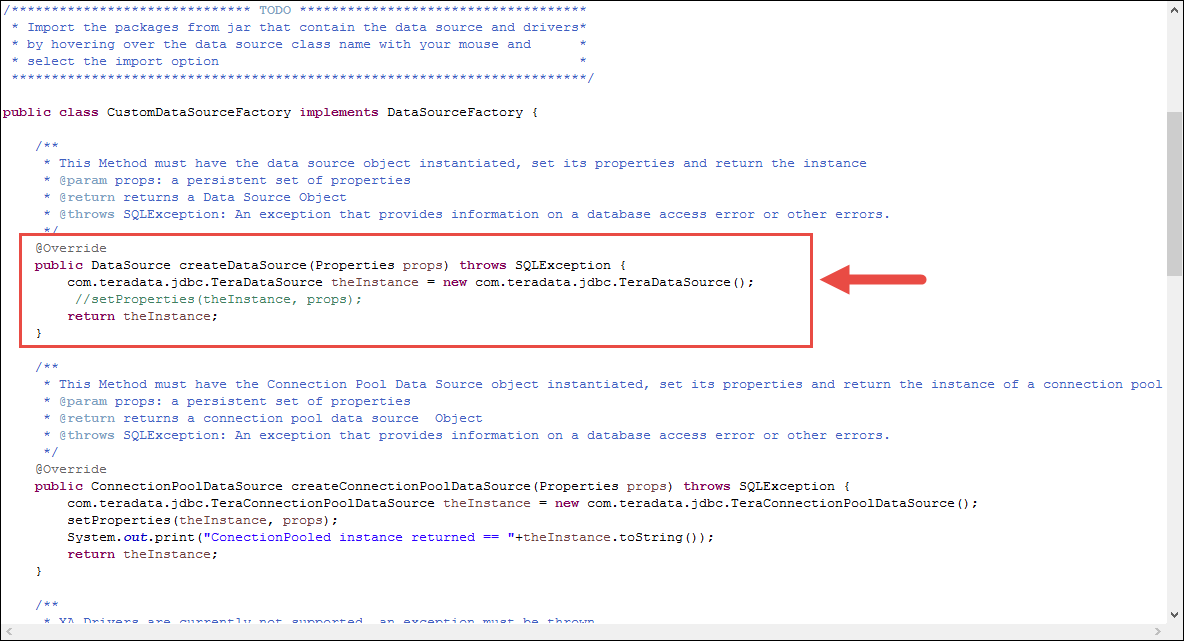
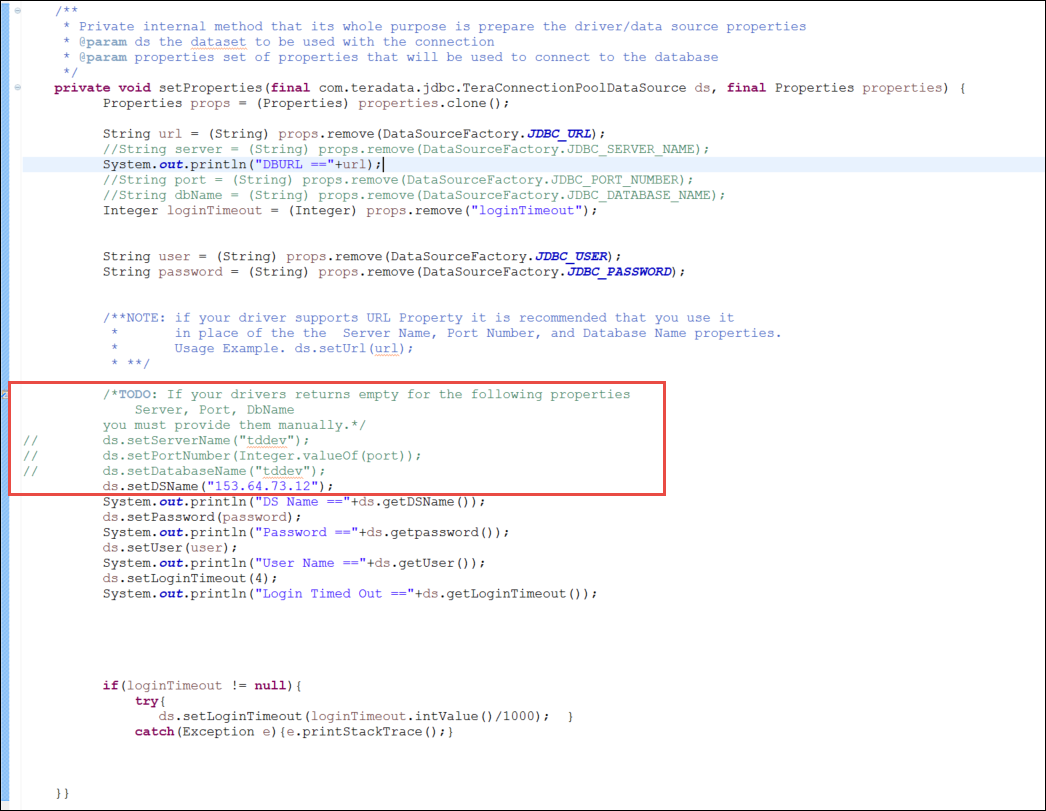
  11. Open the Java file present in the src folder of the new project and make relevant changes to the code as can be seen in the following image:
    Java File to be Edited

    If you have a different DataSource class name, make changes in the code accordingly. Also, ensure to set an additional property of the DataSource name in the setProperties method as per your TeraData credentials. The compilation errors are now resolved.
    Note: Ensure that the IP address of the Data Source name matches the IP address in the Database URL provided when creating the JDBC connection.
  12. Go to the JDBC connection and test the connection again. The connection is successfully established.
    JDBC Connection
  13. To verify that the JDBC connection is done, go to Run > Debug Configurations.
  14. In the left pane, click BusinessWorks Applications > BWApplication.
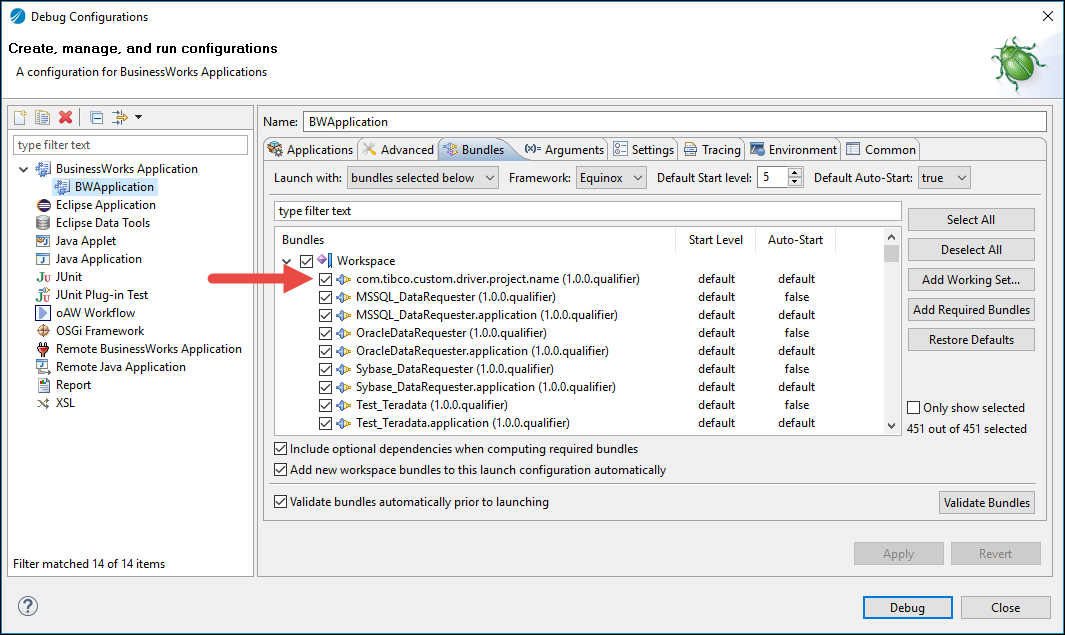
  15. In the right pane, click the Bundles tab and ensure that the name of new project created earlier is displayed and the check box is selected.
    Debug Configuration