Configuring Databases by Using Custom JDBC Driver
You can configure any database such as Teradata and Sybase by using a custom JDBC driver.
Points to note
- If you are using the Data Merger or Data Requester activities, you can insert maximum 16 records in the Teradata database concurrently.
- To avoid issues that can occur after you click the
Validate schema button in the Shared resource dialog multiple times, add the
LOB_SUPPORT=OFFattribute to the JDBC URL for the Teradata database.
- Procedure
- In TIBCO Business Studio, go to .
- In the left pane, under BusinessWorks > Palettes > JDBC, set the directory preference as follows: TIBCO_HOME/bw/version_number/config/design/thirdparty.
- Select the option Allow use of custom driver, click Apply, and then click OK.
- Copy the JDBC server JAR files such as terajdbc4.jar to the directory preference location selected in the earlier step.
- If you have already configured the JDBC driver, skip this step. Otherwise, restart TIBCO Business Studio.
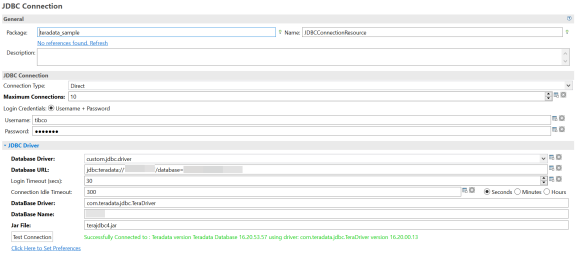
- Create a JDBC connection. Fill in the driver details and user credentials. The following example shows the details as required for Teradata database:
Database Driver: custom.jdbc.driverDatabase URL: jdbc:teradata://<host>/database=<db_name>, TMODE=<mode>DataBase Driver: com.teradata.jdbc.TeraDriverDataBase Name: <db_name>JAR File: terajdbc4.jarNote: Ensure that there is no whitespace in the database URL.JDBC Connection for Teradata

- Click
Test Connection.
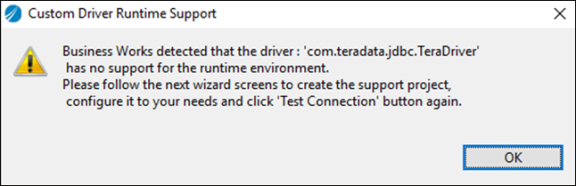
The Custom Driver Runtime Support pop-up window is displayed. Click OK.Custom Driver Runtime Support
A new plug-in project is created. - In the New Plug-in Project window, click Next.
- In the next New Plug-in Project window, click Next.
- Click Finish. A custom project is created in the workspace with compilation errors.
- Open the Java file present in the
src folder of the new project and make the following changes to the highlighted code as can be seen in the following images.
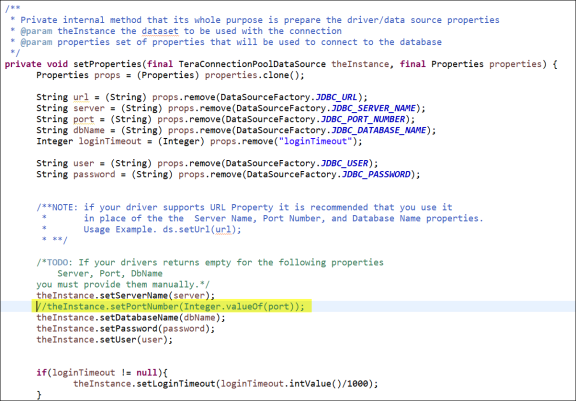
In the
createDataSourcemethod, comment the statementsetProperties(theInstance, props).In thecreateConnectionPoolDataSourcemethod, change the method arguments in thesetProperties(theInstance, props)to resolve the syntax error.In thesetPropertiesmethod, comment the statementtheInstance.setPortNumber(Integer.valueOf(port)).Java File to be Edited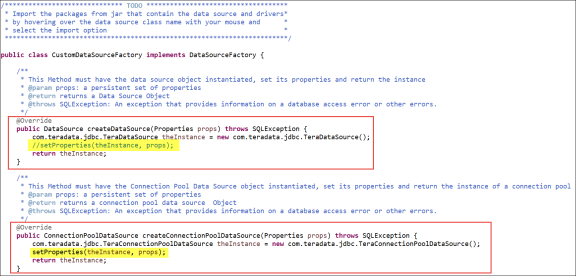
If you have a different DataSource class name, make changes in the code accordingly. You must set an additional property of theDataSourcename in thesetPropertiesmethod. The compilation errors should now be resolved.Note: The IP address of the Data Source name must match the IP address in the Database URL provided when creating the JDBC connection. - Go to the JDBC connection and test the connection again. The connection is successfully established.
JDBC Connection for Teradata
- To verify that the JDBC connection is done, go to .
- In the left pane, click .
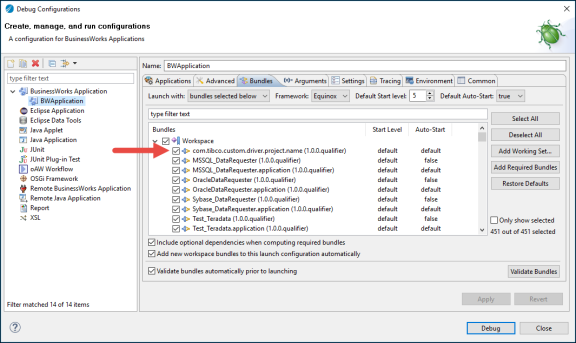
- In the right pane, click the
Bundles tab and ensure that the name of new project created earlier is displayed and the checkbox is selected.
Debug Configuration
For more information, see "Using Custom Drivers" topic in TIBCO ActiveMatrix BusinessWorks™ Bindings and Palettes Reference Guide.
Note: Follow the same steps to configure a database by using JDBC custom driver on
TIBCO Business Studio (Container Edition).