Creating a Schema by Using the ADB Configuration Shared Resource
Adding a Shared Resource
- Procedure
- Expand the created project in the Project Explorer view.
- Right-click the Resources folder and select . Specify the Resource Folder, Package, and Resource Name. Click Finish.
- On the Connection page, select the JDBC connection in the JDBC Connection field.
- On the Schemas page, select
DBPoller,
DBMerger, or
DBRequester as required, and then click
Add. As soon as a new
DBPoller,
DBMerger, or
DBRequester schema is added, a corresponding section is created on the right.
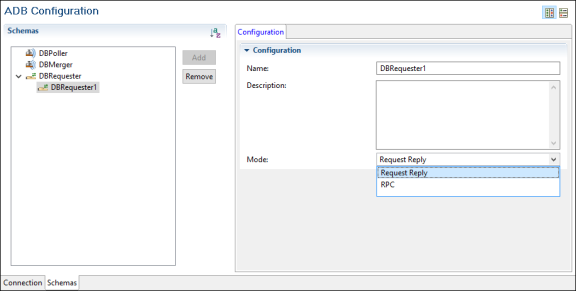 Note: The schema for DataRequester activity has the following modes:
- Request Reply mode takes a sequence of statements as a request and replies back to activity as output.
- Remote Procedure Call (RPC) mode can be used to configure the plug-in to act as remote procedure call server on behalf of a client.
Adding a Parent Table
You can add a parent table only to DB Poller and DB Merger schemas. To add a parent table from the connected Database (through JDBC connection) for the DataEventPoller activity and the DataMerger activity:
- Procedure
- On the ADB Configuration page, navigate to the tab.
- Click
Add table
 . The
Select Table wizard is displayed.
. The
Select Table wizard is displayed.
- Enter a pattern name to search the table.
You can also use the
%character to search for table names. - To fetch data from the default schema, click
Fetch beside the
Default Schema field. To fetch data from any other schema, click
Fetch beside the
Other Schema.
Note: For a parent table, only tables are fetched.
All the tables available in the specified schemas are displayed.

- Click
Finish.
The table is displayed in the Schema tab on the right.
Adding a Child Table
- Procedure
- On the ADB Configuration page, navigate to the tab.
- Select the parent table and click
Add Child table
 .
.
A wizard similar to the one for adding a parent table is displayed.
- Fetch the table and click
Finish.
Note: For a child table, both tables and views are fetched.
The child table is added under the parent table and displayed in the Schema tab on the right.
Selecting a Table from Other Schema
- To access tables in the Other Schema, the database user must have the proper set of permissions granted.
- The
Add table opens a dialog from which you can add a table from the
Other Schema. You can use it to add different schemas at parent and child level.
- If you set the value of the Default Schema field to a different schema (other schema) name other than the default schema specified in an Oracle database and select a table by performing the steps mentioned later, the table is loaded from the other schema and the publishing table is also generated in the other schema.
- If you set the value of the default schema to a non-DBO schema (other schema) for Microsoft SQL Server database or a non-Public schema (other schema) for a PostgreSQL database and select the table by performing the steps mentioned later, the table is loaded from the other schema and the publishing table is also generated in the other schema.
- To select a table from other schema, perform the following steps:
- Procedure
- On the ADB Configuration page, go to the tab.
- Click
Add table . The
Select Table wizard is displayed.
- Enter a pattern name to search the table.
You can also use the
%character to search for table names. - To fetch data from other schema, click Fetch beside the Other Schema field.
- Select a table from the list of tables displayed in the area below and click Finish.
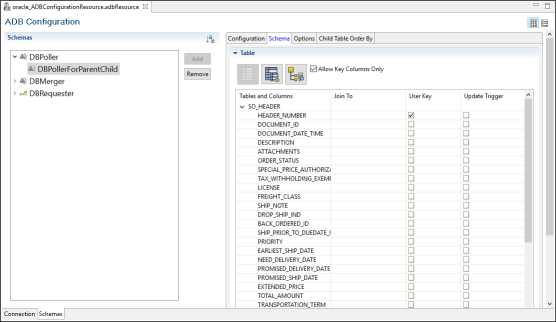
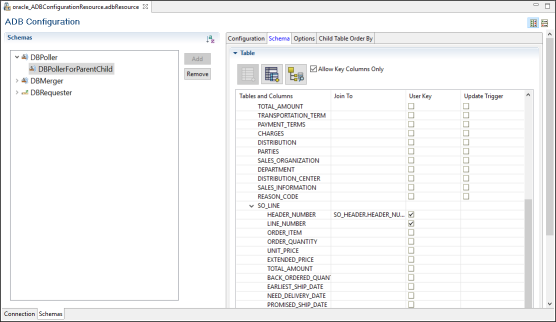
Setting Up a Relation Between Parent and Child Tables
You can set up a relation between the parent and child table by using Join To for the DataEventPoller activity and the DataMerger activity. For applying a Join To relation between a parent and child table, you must set at least one field as the User Key in the child table or clear the Allow Key Columns checkbox.
- Procedure
- If you want to apply the
Join To relation only on fields having a user key, select the
Allow Key Columns Only checkbox. If you clear the
Allow Key Columns Only checkbox, the
Join To relation is applied on any fields from the parent table.
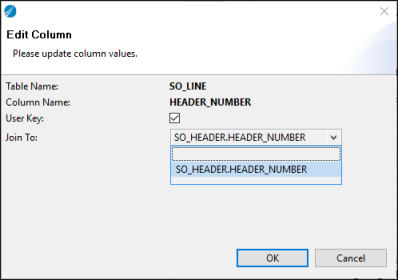
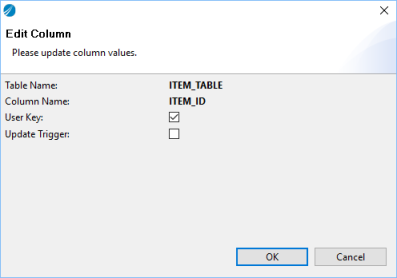
- Select the
Update Trigger checkbox to ensure that the selected column is updated by the database application.
You can edit the information for Join To, User Key, and Update Trigger columns of the child table in a dialog by double clicking the table name.
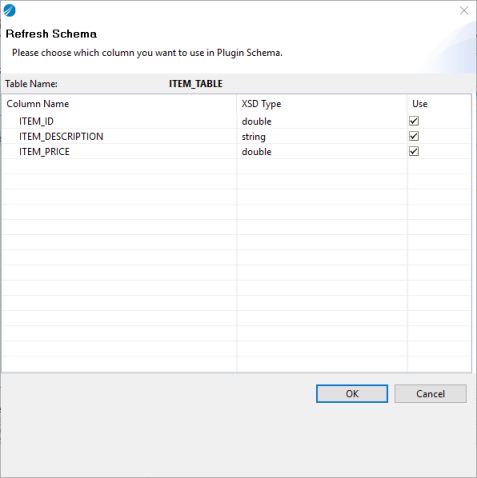
Refresh the Schema
Refresh the existing schema or change the columns used, by using the Refresh Schema from DB ![]() icon.
icon.
Specifying the Columns of an Order By Clause for a Child Table
When a child table is added to a parent table, it is displayed on the Child Table Order By tab. You can specify the columns of an Order By clause used for each child table query. The plug-in returns the child table result set in a particular sequence. To specify the columns of an Order By clause for a child table for the DataEventPoller activity and the DataMerger activity:
- Procedure
- On the ADB Configuration page, navigate to the tab.
- Click
Select Columns on the
Child Table Order By tab.
The Select Child Table Order By Columns wizard opens.
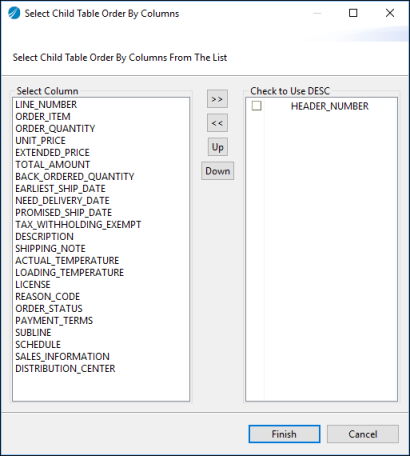
- Select the fields depending on the order you want and move them to the right panel by using
 . Similarly, you can use
 to move them back to the left panel. You can also reorder the sequence by using the
Up and the
Down buttons.
to move them back to the left panel. You can also reorder the sequence by using the
Up and the
Down buttons.
- If you want to get the values of a field in a descending order, select the checkbox beside the appropriate field in the right panel, that is, the Check to Use DESC panel. The default order is the ascending order.
- Click Finish.
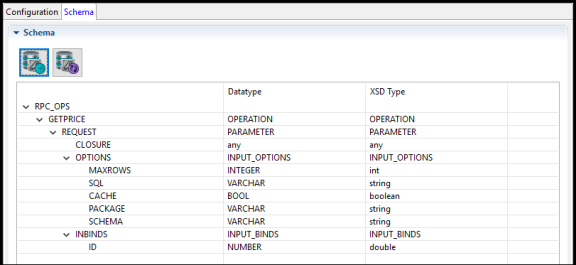
Adding a Procedure to an RPC Custom Operation
- Procedure
- In the ADB Configuration window, select DBRequester and add a schema with RPC mode.
- Select the Use Custom Operations checkbox.
- On the
Schema tab, click
Add Operation
 .
.
The Select Stored Procedure window is displayed. By default, the Operation Name field displays all the procedures from the default schema that you have specified on the Operation Name tab.

- In the Select Stored Procedure dialog, specify
Operation Name.
To select the default procedure (Operation Name), click Fetch and then click Finish.To select another procedure, set the filters as required and click Finish.
Hint: You can click Reset to clear existing data and select another operation name and filters.
The operation you select is displayed on the Schema tab. - Optional: Set filters as required to fetch the procedure and click Finish.
- To select a different operation name and filters, click
Reset.
The operation you selected is displayed on the Schema tab.