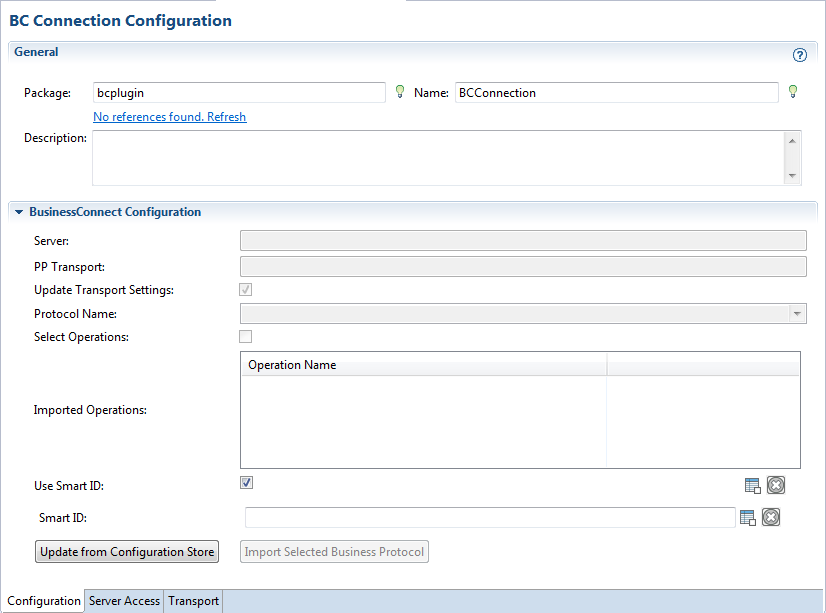
Creating a BC Connection Shared Resource

To utilize the plug-in activities in BusinessWorks processes, you have to create a BC Connection shared resource which contains the information needed to connect to a TIBCO BusinessConnect server.

Procedure

  1. Expand the created project in the Project Explorer view.
  2. Right-click the Resources folder and click New > BC Connection to open the BC Connection wizard.
  3. The resource folder, package name, and resource name of the BC connection are provided by default. If you do not want to use the default configurations, change them accordingly. Click Finish to open the BC Connection Configuration editor.

  4. In the Server Access tab, configure fields to create a connection to the database used for the configuration store.
    For more details, see BC Connection - Server Access Tab.
  5. In the Configuration tab, click Update from Configuration Store to connect to the TIBCO BusinessConnect configuration store and fetch the private process and protocol configuration.
    For more details, see BC Connection - Configuration Tab.
  6. Click Import Selected Business Protocol to import the configuration of the selected business protocol and operations from the TIBCO BusinessConnect configuration store.
  7. Click Save to save the configurations.
  8. In the Transport tab, configure transport information.
    For more details, see BC Connection - Transport Tab.

    The transport type for the communication between BusinessConnect and BusinessWorks private processes has already been configured on BusinessConnect side by using TIBCO Administrator, as explained in TIBCO BusinessConnect Trading Partner Administration Guide, "Private Process Configuration." In TIBCO Business Studio, you can override the settings by using the provided GUI, but the transport type cannot be changed.