Creating an LDAP Connection
After creating a project, you add an LDAP Connection shared resource to create a connection between the plug-in and an LDAP server.
Prerequisites
Procedure
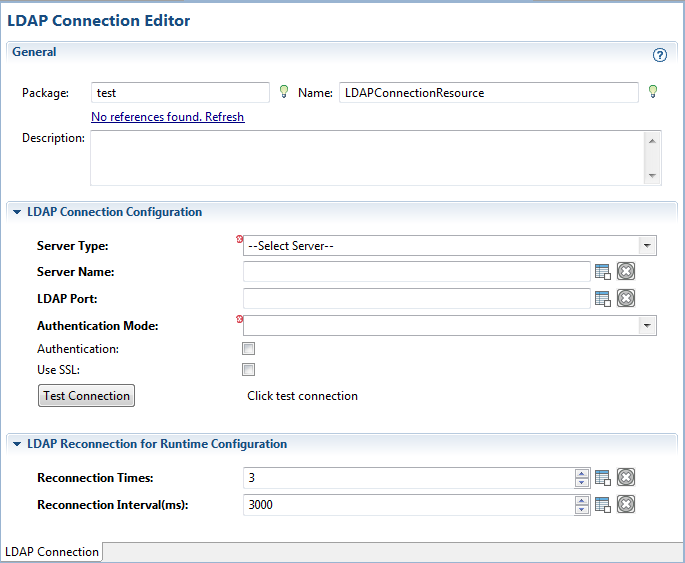
- The resource folder, package name, and resource name of the LDAP connection are provided by default. If you do not want to use the default configurations, change them accordingly. Click Finish to open the LDAP Connection editor.
-
In the
Authentication Mode field, select an authentication mode from the following options:
- Simple: the user credential used to access the selected LDAP server is required.
If you select the Simple authentication mode, the Authentication check box is automatically selected and an Identity Provider field is displayed.
Click
 to select the Identity Provider resource that contains the user name and password used to log in to the selected LDAP server. See
Creating an Identity Provider Resource to create an Identity Provider resource for use.
to select the Identity Provider resource that contains the user name and password used to log in to the selected LDAP server. See
Creating an Identity Provider Resource to create an Identity Provider resource for use.
- Anonymous: no user credential is required.
- External: this option is available only when you select the Use SSL check box. Select the external mode to enable the two-way SSL authentication.
- Simple: the user credential used to access the selected LDAP server is required.
-
If you select the
Use SSL check box, click
next to the
SSL Client Configuration field to select an SSL Client Configuration resource.
An SSL Client Configuration resource contains the client information to be authenticated by the LDAP server.
See Configuring SSL for more details.
Copyright © Cloud Software Group, Inc. All rights reserved.