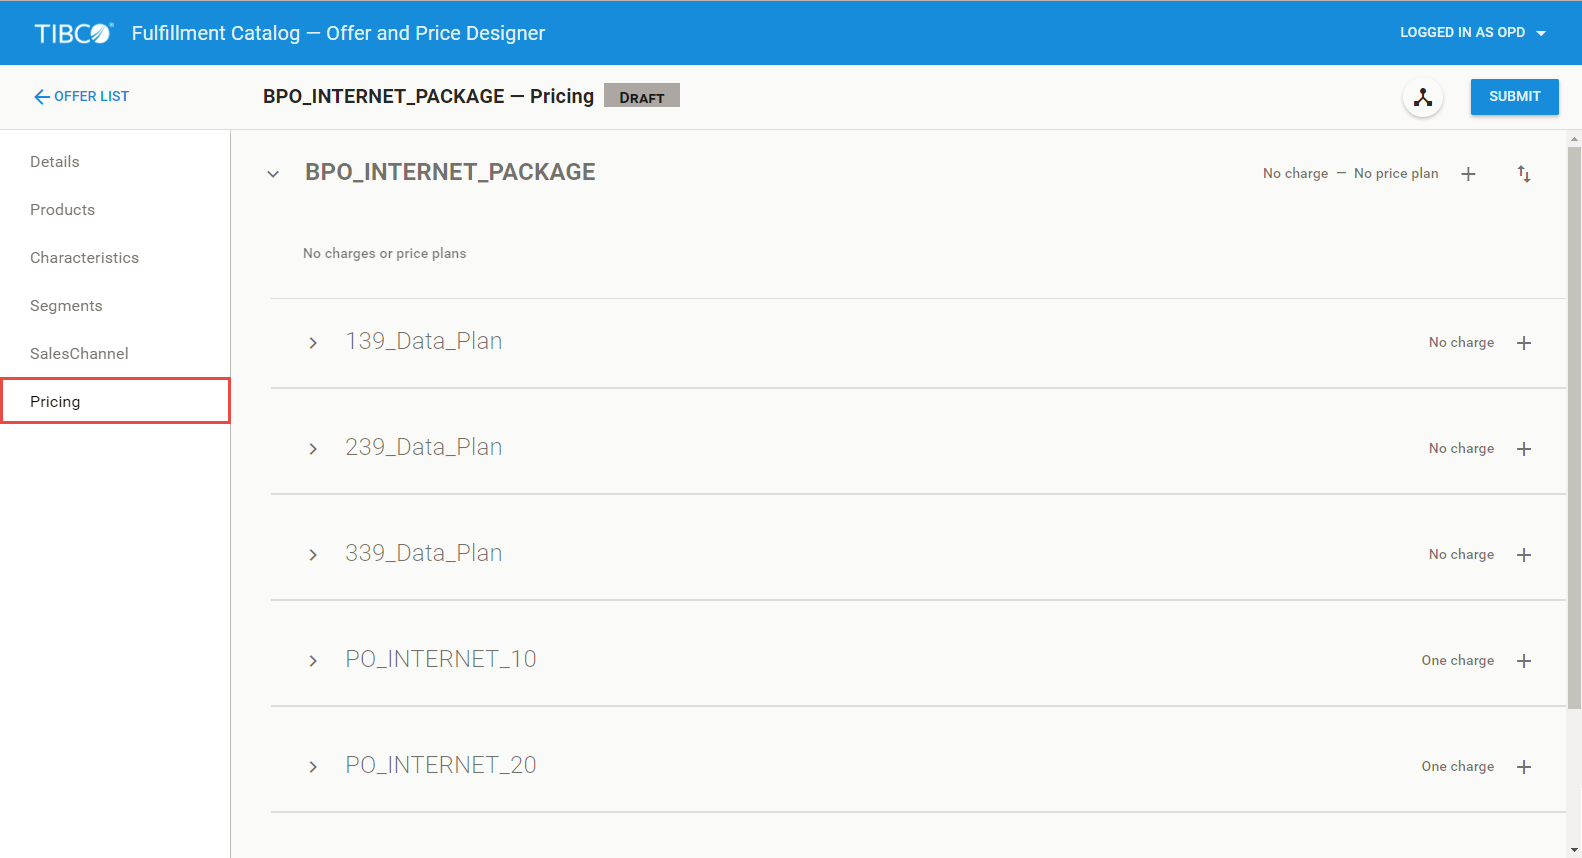
Adding Pricing to an Offer
To add pricing and discount to an offer, perform the following steps:
Procedure
-
Click
Pricing.
The pricing page opens.
-
Click the
+ sign beside the
No charge - No price plan field.
The Create Offer Charge Entry dialog box opens.
- Provide values for the following fields in the Details tab:
-
Click the
Continue button.
The Price tab is displayed.
-
Select the
Type of pricing. The options are:
Option Description One Time The pricing will be charged only once. Recurring The pricing will be a recurring price. Usage The pricing will be dependent on usage. - Provide values for the following fields:
-
Click the
Continue button.
The Characteristics tab is displayed.
-
The
Characteristics tab and the
Segments tab are optional. If you want to add values to the tabs, it is similar to adding
Characteristics and
Segments to an offer. See the following topics for more details:
- See the topic, Adding Characteristics to an Offer for details on adding values to the Characteristics tab.
- See the topic, Adding Segments to an Offer for details on adding values to the Segments tab.
-
After completion of adding values (only if necessary) in the
Characteristics tab and the
Segments tab, click the
Continue button.
The Products tab is displayed. This is also an optional tab.
-
Click the
 icon.
icon.
-
Click the
 icon.
The Create Product Pricing Group dialog box is displayed.
 - Provide values for the following fields:
- Select one of the following options:
-
Click the
Save PPG button.
The control passes back to the Products tab in the Create Offer Charge entry dialog box.
-
Provide values for the following fields:
- Max # items - The maximum number of items in the group. As mentioned in the user interface, the maximum number of items must be greater than minimum values of products.
- Max # apply - The maximum number of apply for the items in the group. As mentioned in the user interface, the maximum number of items must either be -1 or positive.
-
Click the
Save Charge button to save the pricing details that were added.
The control passes back to the pricing page and the newly added pricing will be displayed.
-
Click the
+ sign corresponding to the new pricing plan created.
The Create Discount Entry dialog box opens.
- Provide values for the following fields in the Details tab:
-
Click the
Continue button.
The Price tab is displayed.
-
Select the type of discount. The options are:
Option Description % Percentage of price $ A set price for discount - Enter the discount value in the amount field.
-
Click the
Continue button.
The Characteristics tab is displayed.
-
The
Characteristics tab and the
Segments tab are optional. If you want to add values to the tabs, it is similar to adding
Characteristics and
Segments to an offer. See the following topics for more details:
- See the topic, Adding Characteristics to an Offer for details on adding values to the Characteristics tab.
- See the topic, Adding Segments to an Offer for details on adding values to the Segments tab.
-
After completion of adding values (only if necessary) in the
Characteristics tab and the
Segments tab, click the
Continue button.
The Products tab is displayed. This is also an optional tab.
-
Click the
 icon.
icon.
-
Click the
 icon.
The Create Product Pricing Group dialog box is displayed.
 - Provide values for the following fields:
- Select one of the following options:
-
Click the
Save PPG button.
The control passes back to the Products tab in the Create Offer Charge entry dialog box.
-
Provide values for the following fields:
- Max # items - The maximum number of items in the group. As mentioned in the user interface, the maximum number of items must be greater than minimum values of products.
- Max # apply - The maximum number of apply for the items in the group. As mentioned in the user interface, the maximum number of items must either be -1 or positive.
-
Click the
Save Discount button to save the discount details that were added.
The control passes back to the pricing page and the newly added discount to the price will be displayed.
- Repeat Step 3 through Step 31 to add more pricing and discount, if needed.
-
You can either keep the offer in
Draft status or click the
Submit button to change the status of the offer to
Pending Approval.
Copyright © Cloud Software Group, Inc. All rights reserved.

