Before you start a BW project, create a directory as follows: <<TIBCO_HOME>>\fsjndi\designerExtendedJars
Add the following jars to this location:
fscontext.jarjndi.jarproviderutil.jar
Edit the designer.tra file located in <<TIBCO_HOME>>\designer\5.5\bin.
Add the following entry to this file: tibco.class.path.extended %CUSTOM_CP_EXT%%PSP%%STD_CP_EXT%:<<TIBCO_HOME>>/fsjndi/designerExtendedJars
Procedure
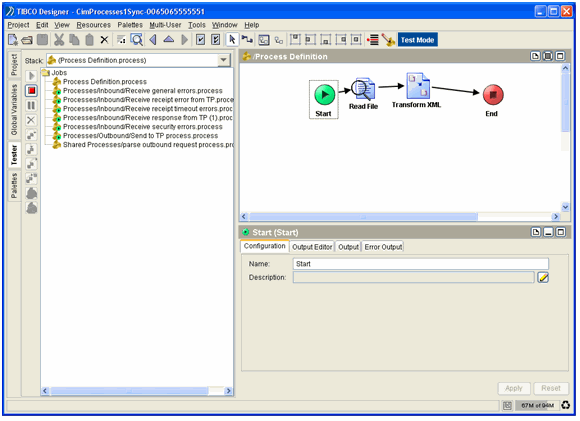
Start TIBCO Designer.
Click
New empty project.
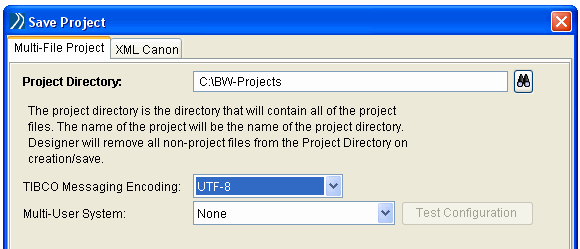
Specify the project directory and encoding.
Click
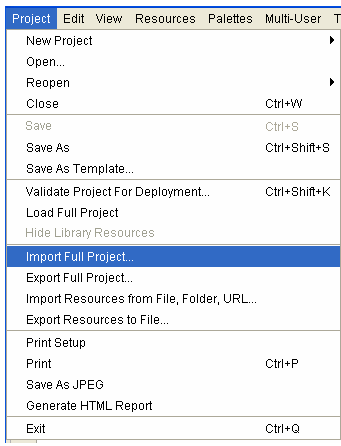
Project -Import Full Project.
Import vcrepo.dat from the existing BW project directory (directory of the same name as your existing BW configuration).
Alternately, if you don’t want to import the existing project, copy the existing BW project directory with another name. This is similar to importing the existing BW project.
Edit the project as imported and copied above.
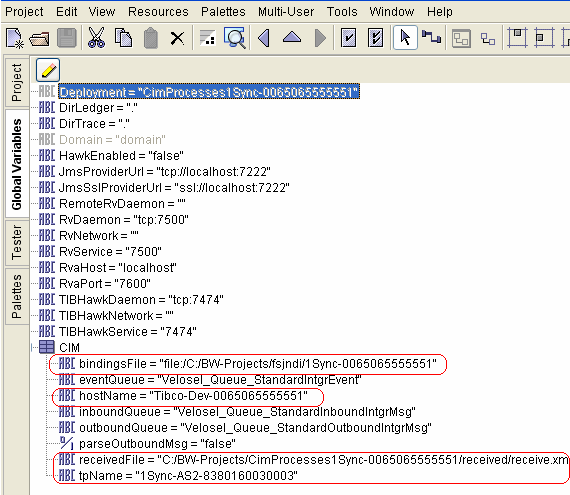
Change the following Global variables per the project requirement:
bindingFile: Provide the directory location where you want to place your binding file for this project.
receiveFile: Provide the directory location where you want the received messages to be saved.
hostName: Provide the name of the participant which you configured in BC as Participant of type Host.
tpName: Provide the name of the participant which you configured in BC as Participant of type Partner.
The Sample values are as follows:
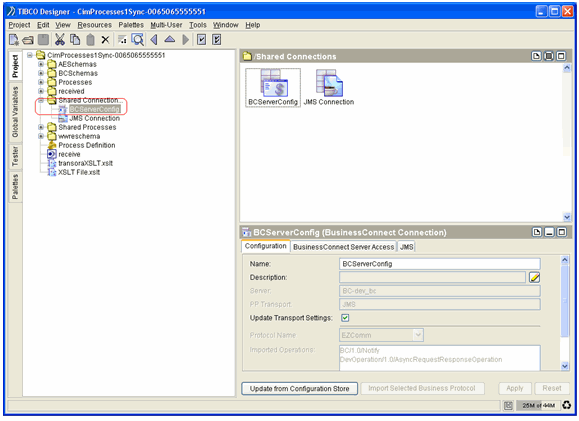
Click Project Tab -Shared Connection.
If you already have a BusinessConnect connection configured, update the connection.
Click the ‘Update from Configuration stores’ button.
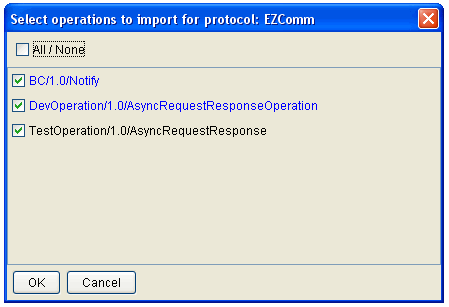
Select the
Select operations check box; click
OK on the next screen.
Click the
Import selected Business Protocol button.
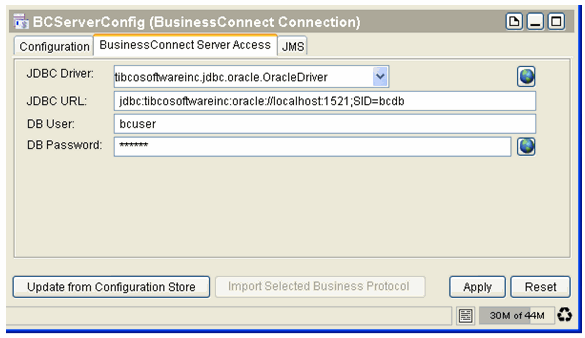
Click the
BusinessConnect Server Access tab.
Click
Update from Configuration Store followed by the
Import Selected Business Protocol button.
Click the
JMS tab of the previous screen.
Click
Update from Configuration Store followed by the
Import Selected Business Protocol button.
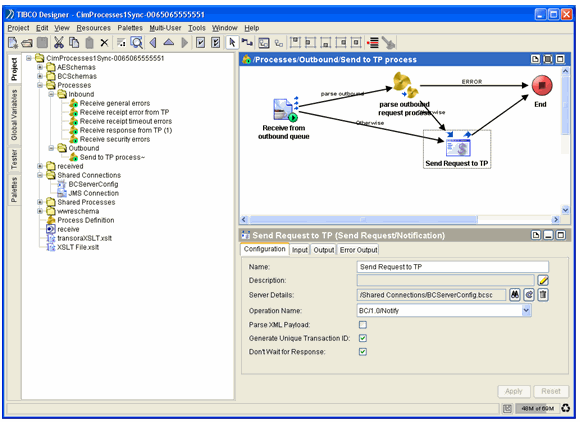
If you have created a new BusinessConnect connection, ensure the property ‘Server Details’ of all the activities point to a valid BC connection. A sample activity ‘Send Request to TP’ of process ‘Send to TP Process’ is as follows:
Start the test engine by clicking the
Tester tab on the left followed by a green start signal.
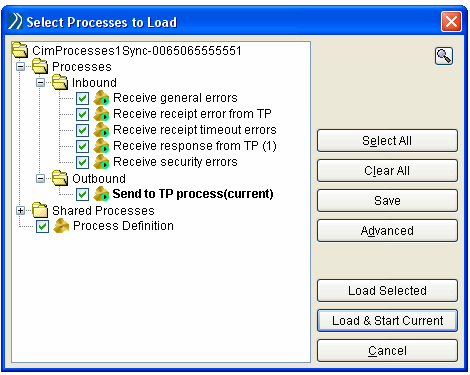
Click
Load selected.
After a successful start, all processes should be visible.