Running Add-on Plug-in Installer Using Configurator
You can access the MDM Add-on Plug-in installer wizard through Configurator. Using this wizard, you can install and execute all the necessary database scripts. The wizard also merges the GDSN configuration (ConfigValues.xml) with the main MDM configuration.
Prerequisites
Before running the Add-on Plug-in installer, install the TIBCO MDM Add-on For Global Data Synchronization over the MDM version of TIBCO MDM.
Procedure
Login to the TIBCO Configurator.
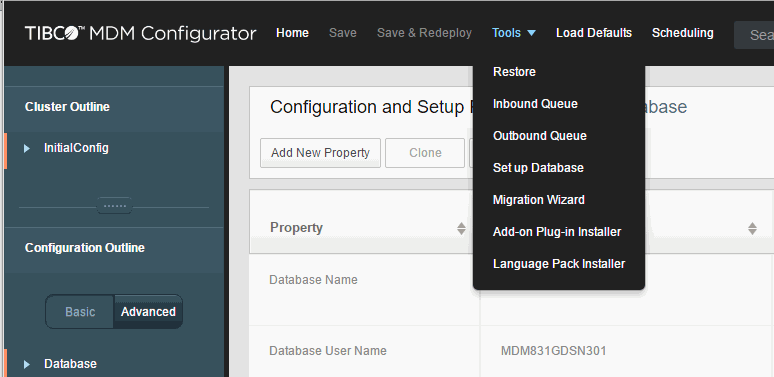
From the
Tools menu, select
Add-on Plug-in Installer. The Add-on Plug-in Installer dialog box is displayed.
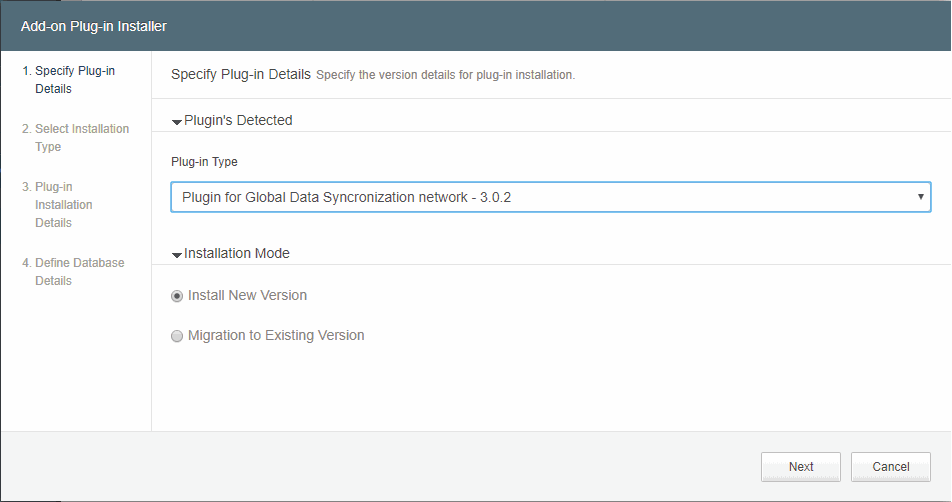
In the Add-on Plug-in Installer window, do the following:
Select
Plugin for Global Data Synchronization network - 3.0.2.
Select one of the installation modes:
Select
Install new Version
to install the new version.
Select
Migration to existing version to migrate to the new version from your current version.
- select
To Version from the drop-down list. Select the current version 3.0 from the drop-down list.
- select
From Version from the drop-down list. The list of the older version is displayed. Select the appropriate version.
Click
Next.
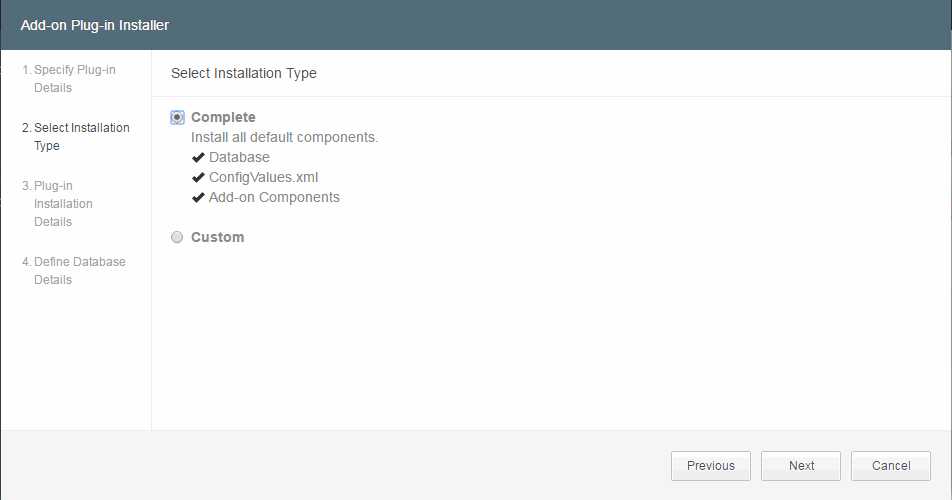
In the Select Installation Type window, do one of the following:
Complete: by default, this options is selected. If this option is selected, all the default components - Database, ConfigValues.xml, and the Add-on components (all other required files) are migrated.
Custom: select
Custom to specify the individual components to migrate.
Database - Selecting this option updates the existing database with new tables and updates the existing tables.
ConfigValues.xml - Selecting this option merges the MDM and GDSN configuration properties.
Add-on components - Selecting this option updates the
MQ_COMMON_DIR with some required components.
Click
Next.
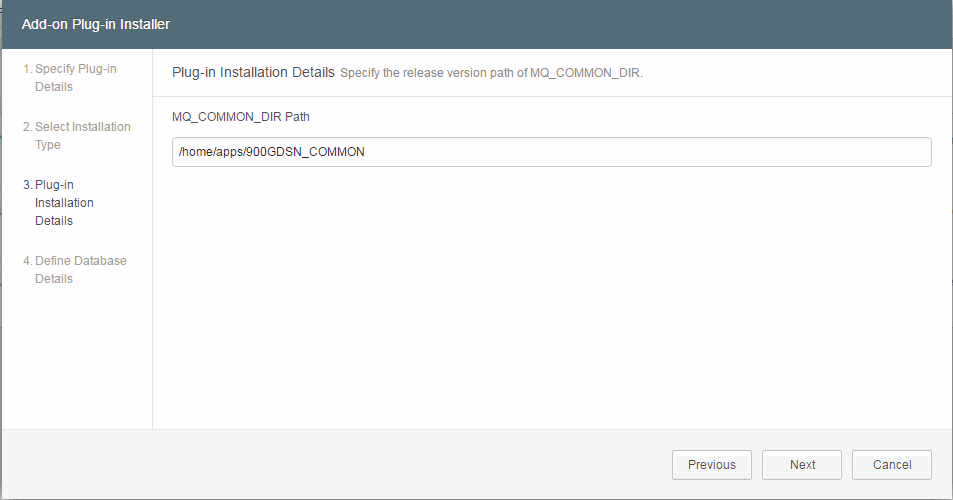
In the Plug-in Installation Details window, confirm the
MQ_COMMON_DIR path. This value is automatically detected based on environment variables. You can update this path if required.
Click
Next.
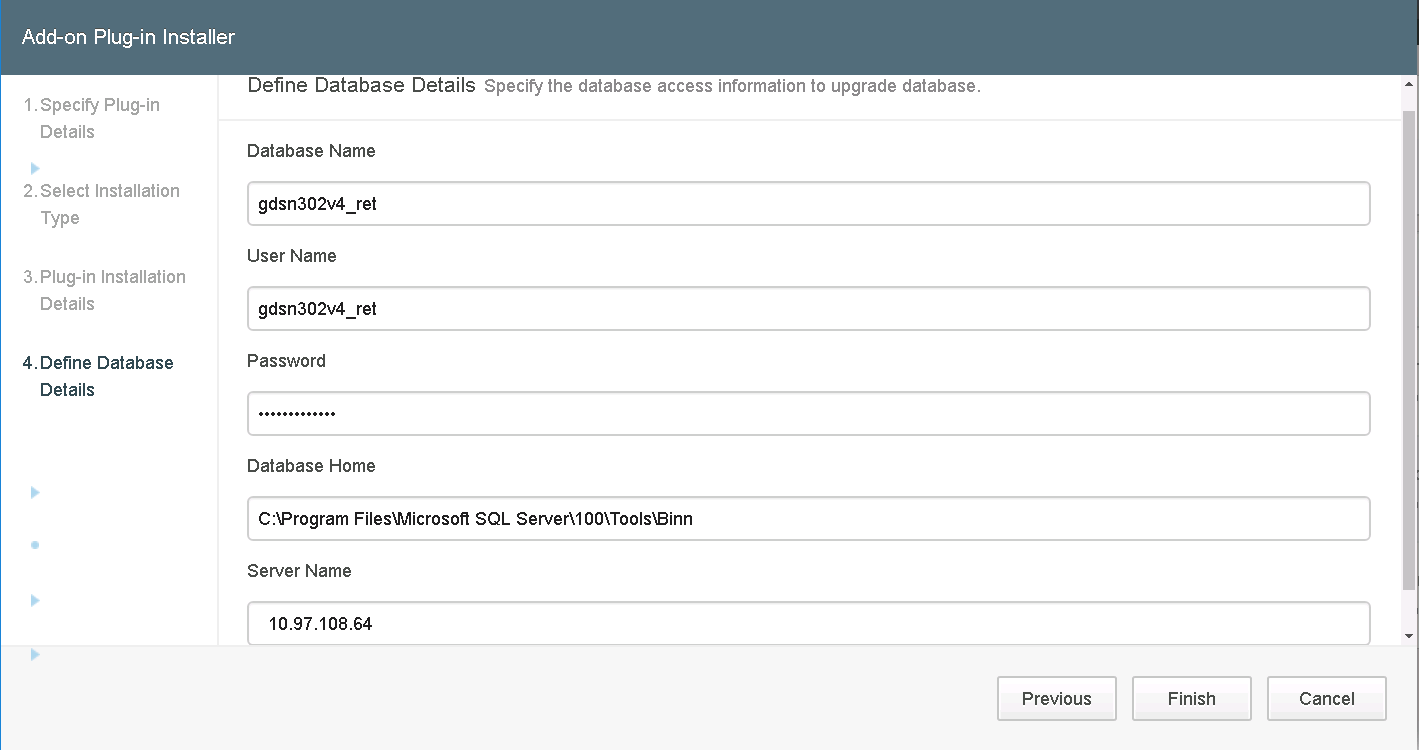
In the Define Database Details window, select the Database, Type, Username, Password, and the Database home (this information is retrieved from ORACLE_HOME).
Note: This step is displayed only if you have selected the complete installation or if you have selected the database component in the Custom installation. OR
Click
Next.
In the Define Database Details window, select the Database, Type, Username, Password, and the Database home (this information is retrieved from SQLSERVER_HOME).
Note: This step is displayed only if you have selected the complete installation or if you have selected the database component in the Custom installation.
Click
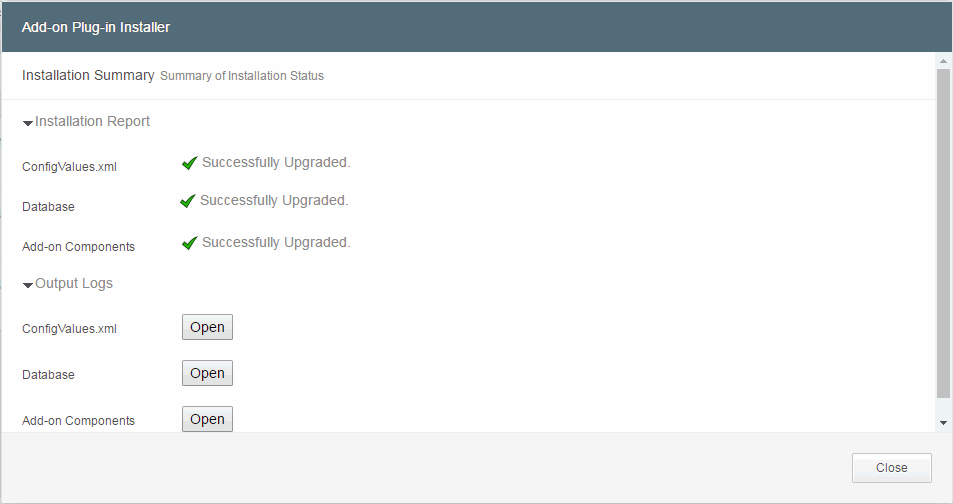
Finish. The installation summary is displayed. The output logs are also displayed and can be downloaded for troubleshooting, if required.