Copyright © Cloud Software Group, Inc. All Rights Reserved


Chapter 5 Managing Trusted Certificates : Storing Certificates Inside a Project

Storing Certificates Inside a Project
You can store certificates inside your project by importing certificate resources into a project. Before configuring a session for SSL, you must add a certificate to your project and create an identity resource.
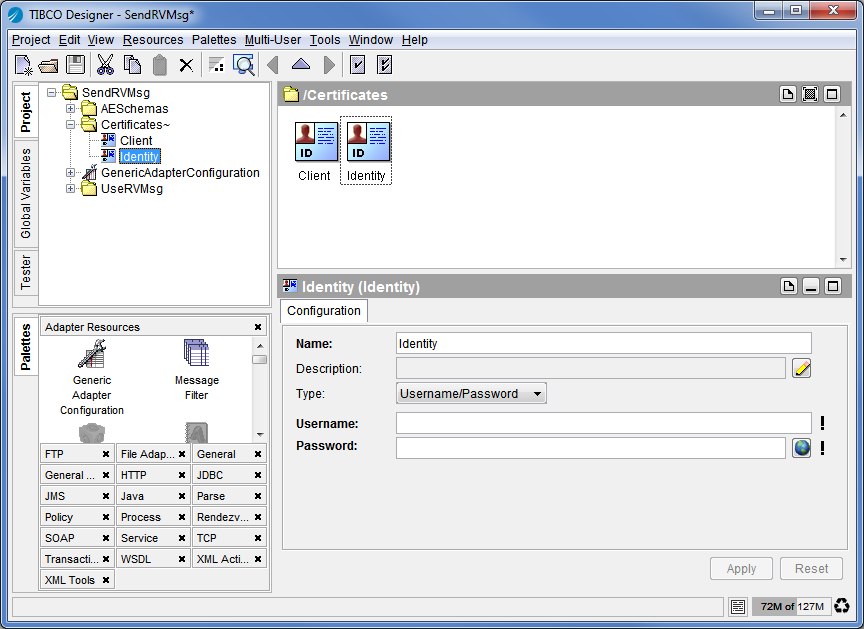
Projects store trusted certificates in PEM storage format. You can import certificates that are in PKCS7, and PEM formats (these formats do not store private keys). A new certificate copy is created when the import completes. If the certificate to be imported is already in PEM format, a new, identical copy is created.
You cannot import certificates from storage formats that require a password, such as PKCS12 and KeyStore.
The steps in SSL configuration are as follows:
1.
2.
3.
Adding Certificates to Your Project
To add a certificate in PEM format to your project:
1.
2.
From the menu bar, choose Tools > Trusted Certificates > Import into PEM Format.
3.
4.
From the General palette, drag an Identity resource into the design panel.
5.
Click on the Identity resource to open its configuration options panel.
6.
Configure your resource. See Identity in TIBCO Designer Palette Reference for more information.
The following diagram shows a certificate and identity resource added to a project. The certificate and identity resource can be attached to a TIBCO Rendezvous or JMS session. See TIBCO Rendezvous SSL Configuration and JMS SSL Configuration for details.
Figure 37 Trusted Certificate and Identity Resource
TIBCO Rendezvous SSL Configuration
You can configure secure transports for TIBCO Rendezvous sessions. This leverages the Secure Daemon feature (using SSL) available in TIBCO Rendezvous 7.0 and later.
The following steps will guide you through an SSL configuration of an Rendezvous publication service as an example. The procedure is very similar for other services.
To configure a TIBCO Rendezvous session for SSL:
1.
Open a project and drag the Generic Adapter Configuration resource to the design panel.
2.
Select the Adapter Services folder and drag a Publication Service to the design panel.
3.
Select the Advanced folder in the left panel to display resources associated with the adapter.
4.
Expand the Sessions folder.
5.
Select the DefaultRVCMSession resource
6.
Check the Use SSL? option, then click the Configure SSL button. This gives you access to the SSL Configuration option as is shown in Figure 38.
Figure 38 TIBCO Rendezvous CM SSL Configuration
7.
You can also click the Copy From button to copy a certificate/identity combination already used by another session.
JMS SSL Configuration
You can configure secure transports for TIBCO Enterprise Message Service sessions.
To configure a JMS Session for SSL:
1.
Open a project and drag a Generic Adapter Configuration resource into the design panel.
2.
Select the Adapter Services folder and drag a Publication Service into the design panel.
3.
4.
Select the Advanced folder in the left panel to display resources associated with the adapter.
5.
Expand the Sessions folder.
6.
Select the DefaultJmsTopicSession resource
7.
In the configuration panel. Check the Use SSL? option, then click the Configure SSL button.
Figure 39 TIBCO Enterprise Message Service SSL Configuration
a.
b.
Note: If you specify an equivalent hostname (for example, an IP address), but the name is not an exact match of the hostname in the host’s digital certificate, the connection is refused.
If checked, only strong Cypher Suites are allowed. See OpenSSL v3.0 Cipher Suite List in TIBCO Designer Palette Reference for a list of available suites.
8.
Click OK when you’re done.
You can also click the Copy From button to copy a certificate/identity combination already used by another session.

Copyright © Cloud Software Group, Inc. All Rights Reserved