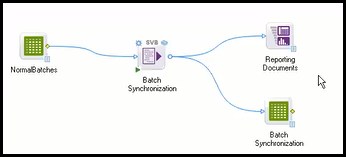
Computing the Optimal Path using Batch Synchronization

Batch Synchronization is a technique for optimally aligning batches of time-dependent sequences. This technique uses one batch from the input data set as a reference and compares it with the other batches.

Workspace node can accessed using the following path: Home > New > Workspace.

Procedure

  1. Open a workspace.
  2. On the Data tab, in the Transformations group, click Batch Synchronization.
    This creates a workspace node.
  3. Select the input spreadsheet and specify variables to be used for warping.
    1. Select the Continuous predictors option in the input spreadsheet to select the variables as inputs to the Batch Synchronization node.
    2. Select the Categorical predictors option in the input spreadsheet to select the variable containing the batch IDs.
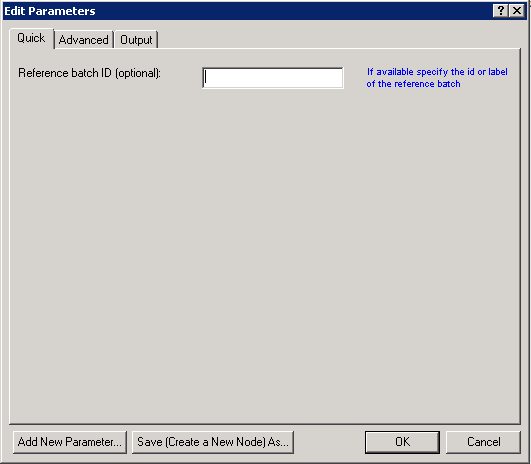
  4. To open the Edit Parameters dialog box, double-click the Batch Synchronization workspace node.
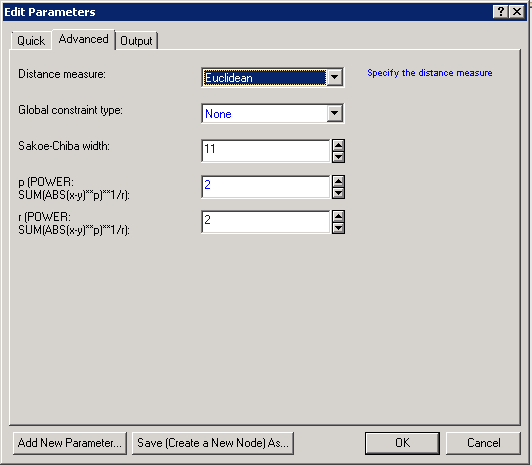
  5. On the Quick tab, in the Reference Batch ID field, enter the batch ID to be used as reference.
    This warps the other trajectories in comparison to the reference batch.
    Note: (Optional) If you do not specify the batch ID, the node selects the reference batch as the batch with trajectory length, closest to the average across all batches.
  6. On the Advanced tab, select the Distance measure and constraints .
    Option Description
    Distance measure Select one of the distance measures to be used for computing the distance between each pair of time points between the two trajectories.
    • Euclidean distance
    • Squared Euclidean distance
    • Manhattan distance
    • Chebyshev distance
    • Power distance with user defined p and r where p, r can be 1, 2, 3 or 4.
    Global constraint type Select from the three available options.
    • None
    • Sakoe-Chiba: Equidistant band around the main diagonal of the cost matrix with user defined width.
    • Itakura parallelogram: Parallelogram induced through the local transition constraints, which restricts the slope of the path between [1/2, 2].
    Sakoe-Chiba width Select the width of the Sakoe-Chiba around the main diagonal from the list box.
    POWER This option is available only when you select Power under Distance Measure on the General tab.
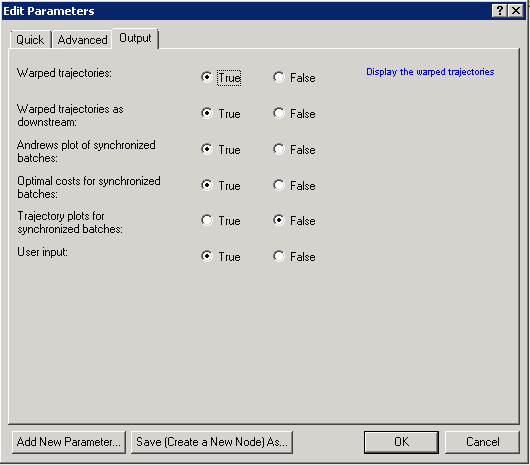
  7. On the Output tab, specify the output documents .
  8. Select True to create a Reporting document for that option.
  9. To save the specifications, click OK.

What to do next

Run all nodes in the workspace to get the Batch Synchronization downstream document (time points listed batch-wise) and Reporting Documents. Open the Reporting Documents to view all the resultant documents and plots.