Appendix
Business rule declaration
The declaration process is the same for the 'Rule' and the 'Rule context' that is used at the level of a simple expression context.
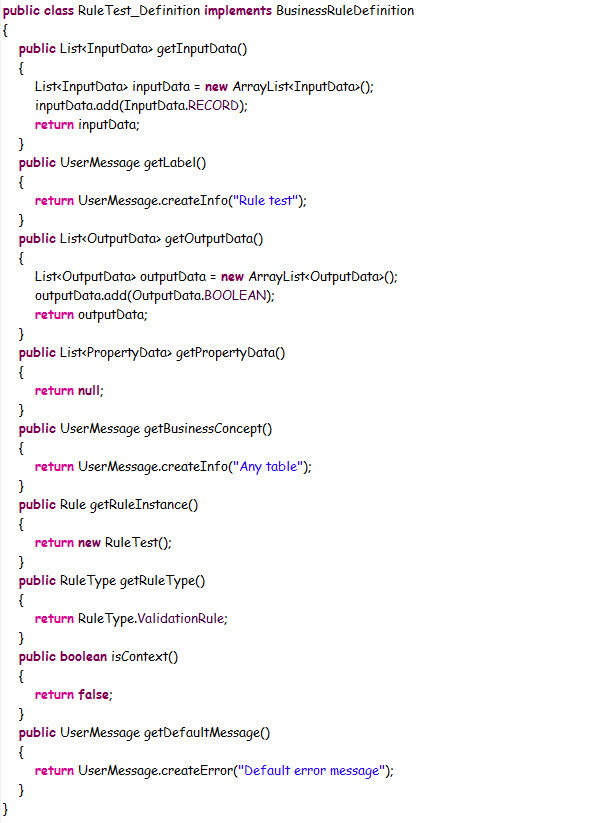
Step 1: Creation of the definition class.
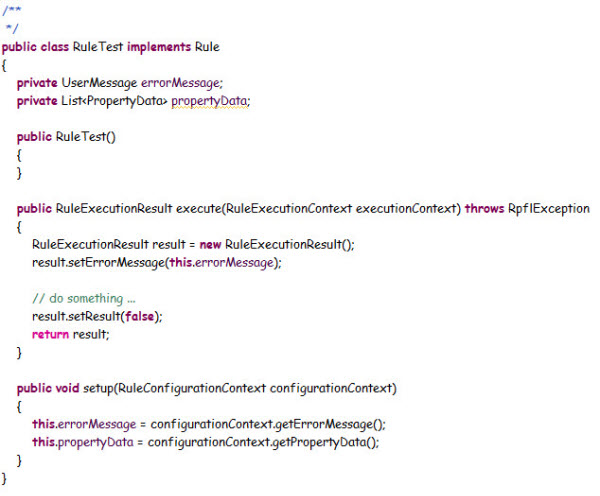
Step 2: Creation of the rule class that implements the execution part of the rule.
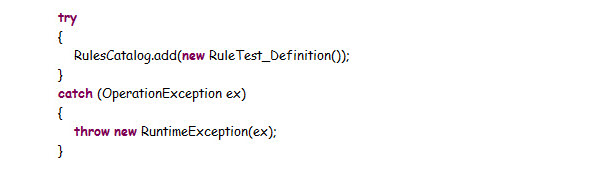
Step 3: Registration of the rule.
Permission rule declaration
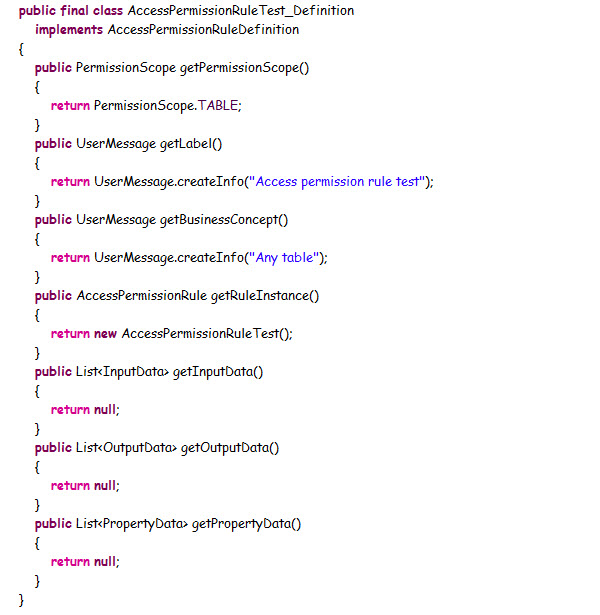
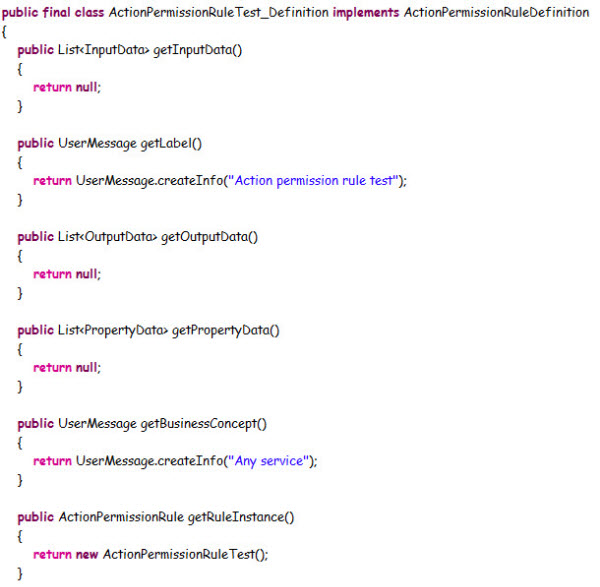
Step 1: Creation of the definition class.
For access permission rule:
For action permission rule:
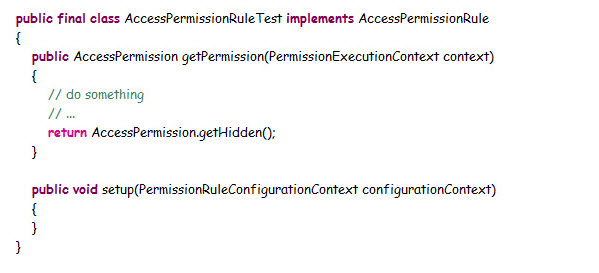
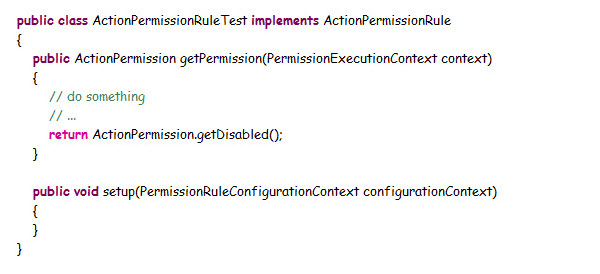
Step 2: Creation of the rule class that implements the execution part of the rule.
For access permission rule:
For action permission rule:
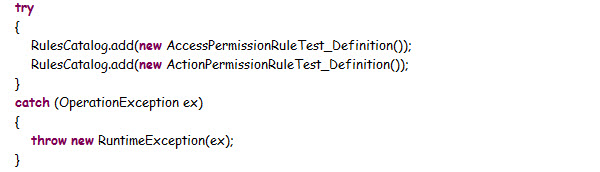
Step 3: Registration of the rule.
Access permission on a data model
The following steps describe how to control the access permission on a data model:
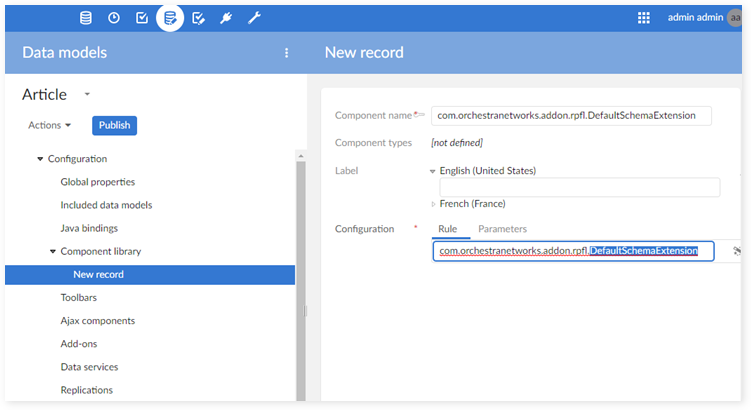
Step 1: Go to Modeling > Data models > Configuration > Component library and create new record:
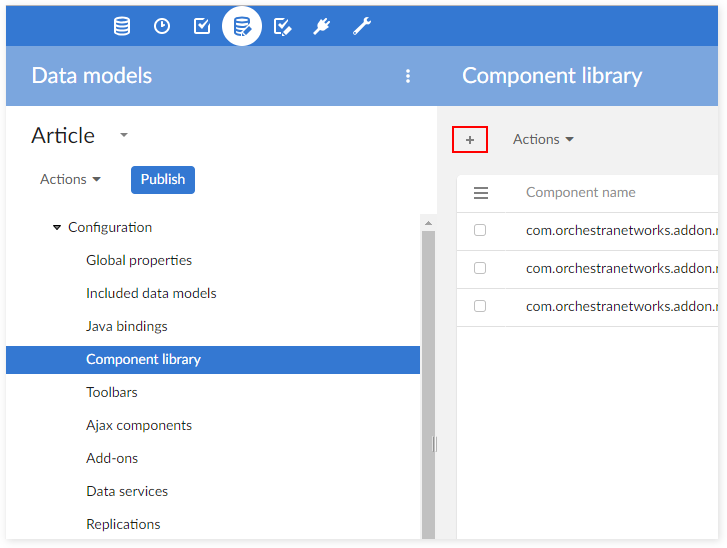
Step 2: Paste the following class path to Configuration > Rule:
com.orchestranetworks.addon.rpfl.DefaultSchemaExtension
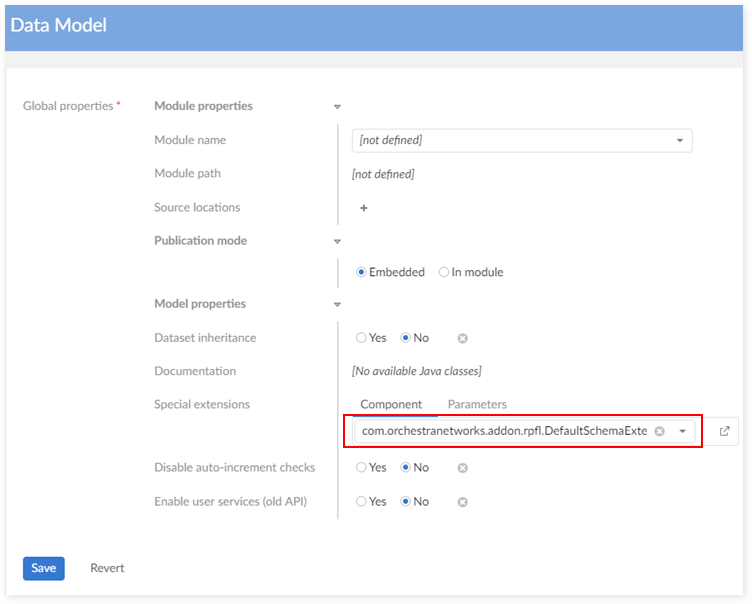
Step 3: Go to Configuration > Data model properties > Model properties > Special extensions and select the new component created in step 2.
Classic access rule declaration
This section describes how to reuse your programmatic access rules.
Step 1: Separate all access rules from your schema extension. Note that your classic access rules have to satisfy 2 conditions:
Implement the interface AccessRule.
Contain a no-argument constructor.
Step 2: If your data model is contained in a module, you only need to put your classic access rule classes in that module. If your data model is not contained in any module, you have to export all classic access rules to a .jar file (feel free to use any naming convention) and put in the folder '../_ebx-eclipse/catalina.base/shared/lib' (that contains "ebx.jar" file). Without this step the add-on cannot load your classic access rules.
Step 3: Restart the server.
Step 4: Configure your permission rules to use classic access rules. Please follow all steps below:
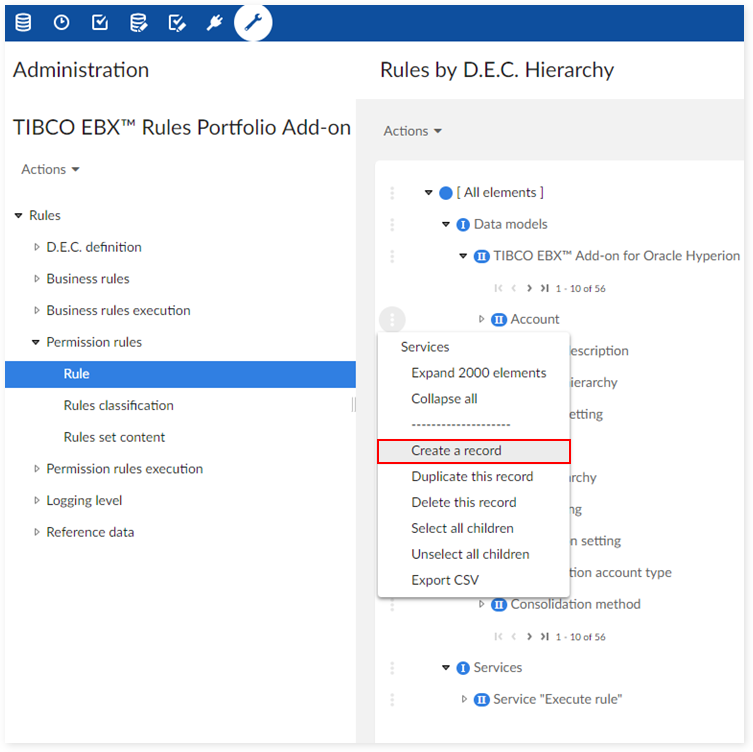
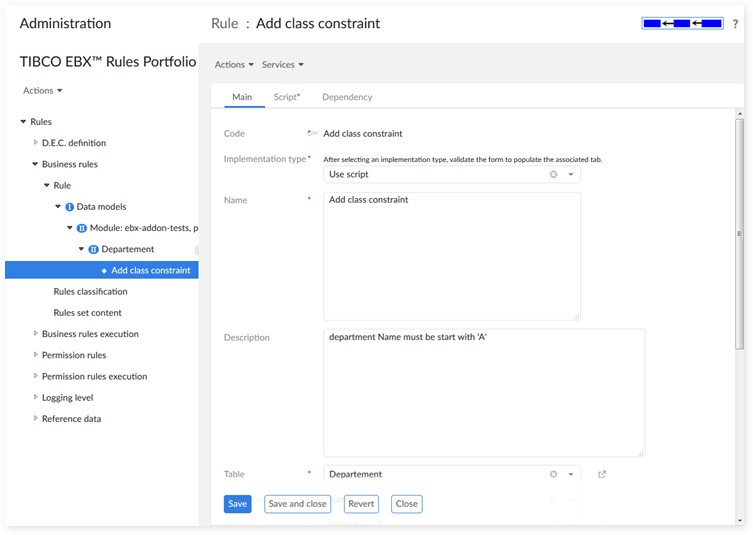
Navigate to the 'Administration' tab → 'Business rules' → 'TIBCO EBX® Rules Portfolio Add-on' → 'Permission rules' → 'Rule' table and 'Create a record' on the appropriate D.E.C. This table's view defaults to 'Rules by D.E.C.' and allows you to easily select the D.E.C. to which you want to add the rule.
Enter the required information and click 'Save'. The 'Classic access rule' tab displays.
Set the 'Implementation type' property to 'Use Classic access rule'.
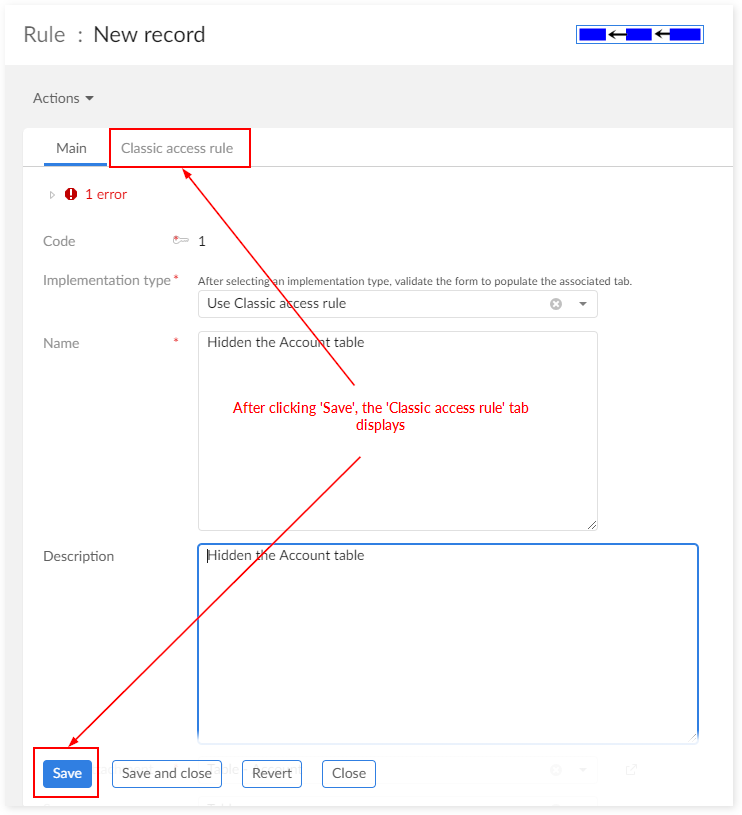
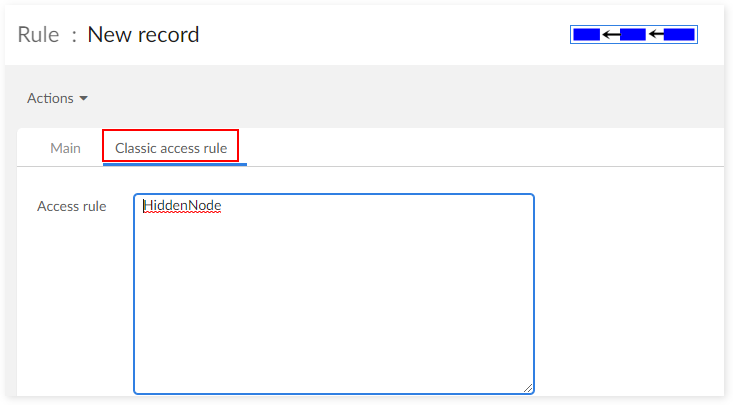
Click on the 'Classic access rule' tab and add the class path of your classic access rule to the 'Access rule' field.
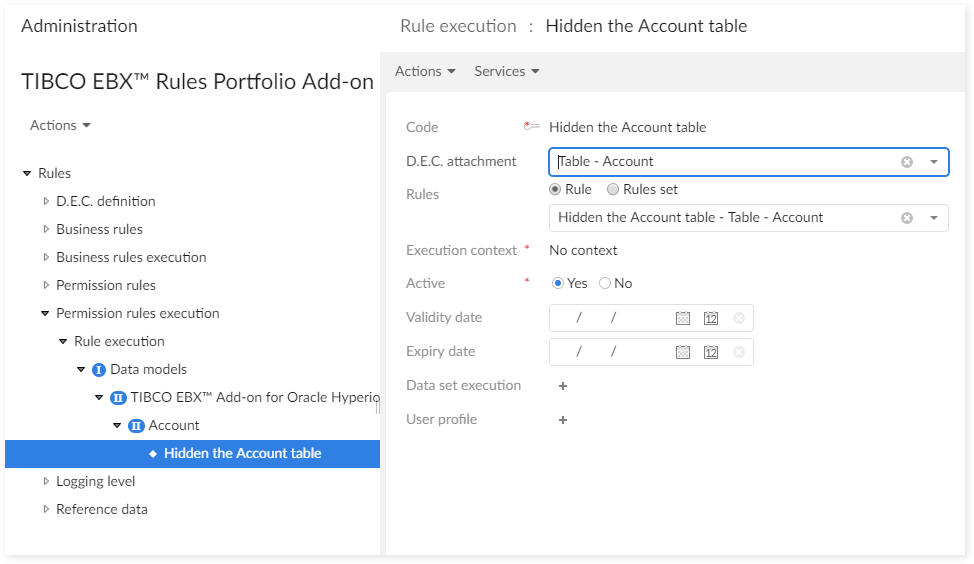
To create a rule execution, navigate to 'Permission rules execution' → 'Rule execution' and add a record to the same D.E.C. used for the rule definition. A rule execution determines the status of the associated rule (active or inactive) and a rule validity time period. In this case, the 'Rule' field is set to the permission rule that links to your classic access rule.
Business rule on a table
The rules are launched by different methods depending on their type:
"Automated rule" is called by triggers on a table.
"Validation rule" is called by triggers on a table or a constraint on field.
"Manual validation rule" is called by the validation service.
"Table set rule" is called by the "Execution rules" service.
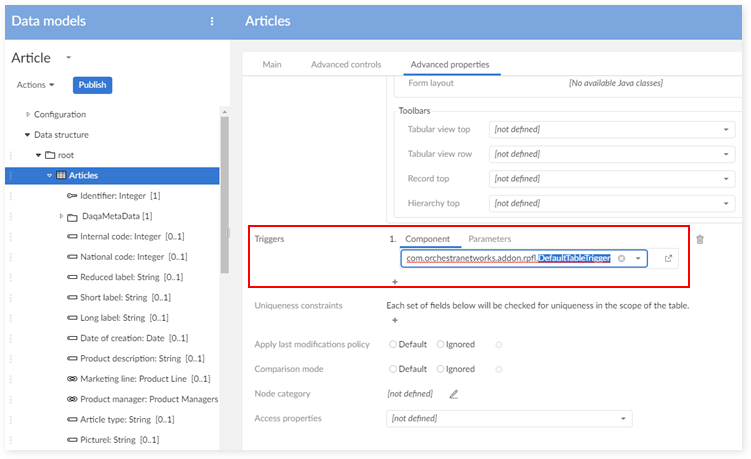
Step 1: Create a trigger that calls the class RuleController in order to run the "Automated rule" and "Validation rule" (see more detail in the Java API documentation). Or you can use the class com.orchestranetworks.addon.rpfl.DefaultTableTrigger which is provided by the add-on.
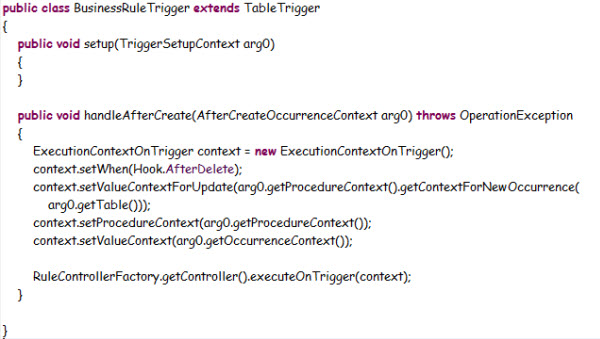
Step 2: Add this class to the new table in data model as shown in this example:
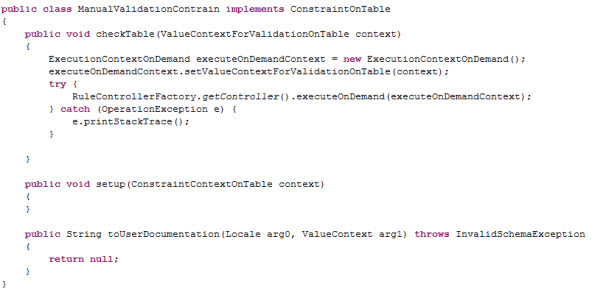
Step 3: Create a class that implements the interface ConstraintOnTable and call the class RuleController in order to run the "Manual validation rule"(see more detail in the Java API documentation). Or you can use the class com.orchestranetworks.addon.rpfl.DefaultConstraintOnTable which is provided by the add-on.
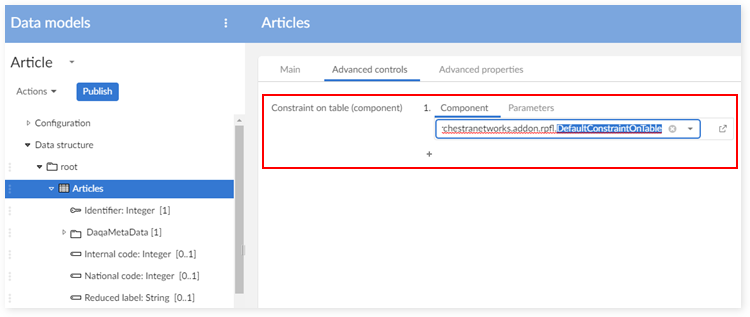
Step 4: Add this class to new table as shown in the following example:
The "Execution rules" service is available on the table if at least one configuration for this table exists in the "TIBCO EBX® Rules Portfolio Add-on" data set.
Dependency configuration
The add-on allows you to set dependencies on a configured validation rule that applies to a field. This section focuses on how you include these dependencies in a rule configuration. For more information on dependencies, see the standard EBX® documentation.
Special Notation | |
|---|---|
| Dependencies on computed values are not allowed. The add-on automatically sets constraints applied on elements defining a value function to the 'Unknown dependencies' mode. Consequently, if a constraint attempts to specify an explicit dependency, an error displays. To avoid this error, you must keep your D.E.C.'s current. If you want to change one field on your data model to computed value or vice versa, you have to follow the steps below:
|
To set a dependency:
Create a validation rule that applies to a field (and executes by an 'On constraint' event). After creating and saving the rule, the 'Dependency' tab displays. You can now configure a dependency based on your needs.
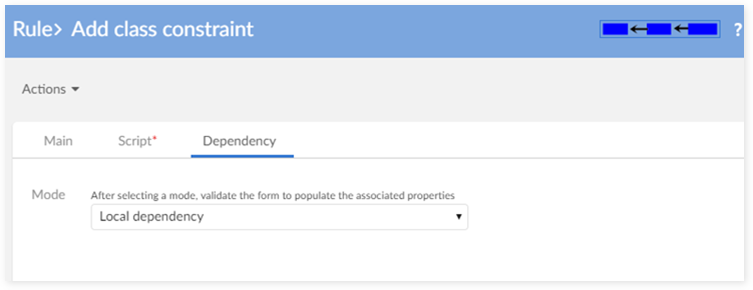
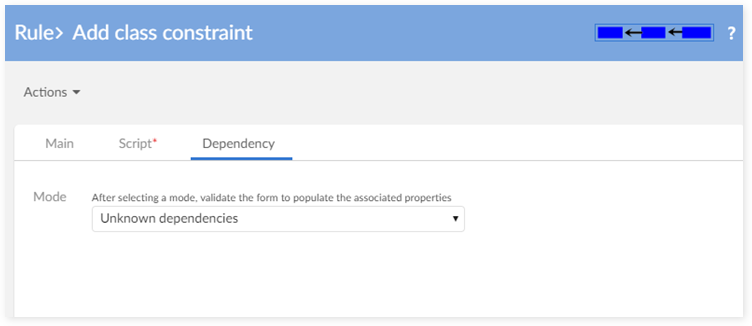
Choose the dependency mode that best suits your requirements. Refer to the 'configuring a business rule' section above for more information on each dependency mode.
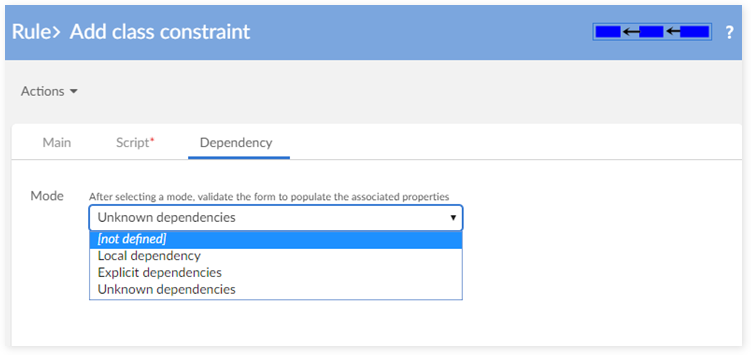
As shown below, if you use either the 'Local dependency', or 'Unknown dependencies' modes, configuration completes after you click 'Save'. However, if you select 'Explicit dependencies', refer to the following steps to complete configuration.
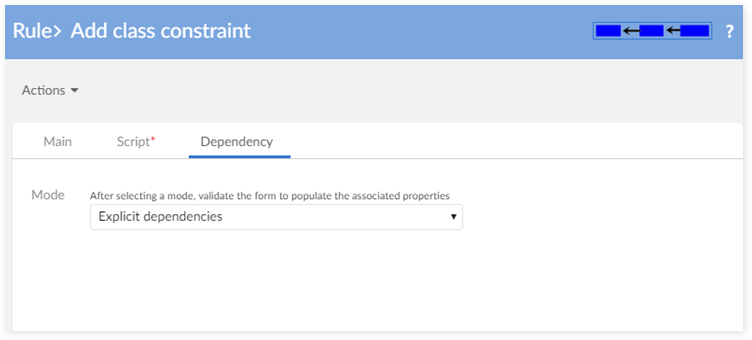
In 'Explicit dependencies' mode, you can declare one or more dependencies that suit your needs. Based on the dependency you choose, fields display that allow you to indicate the node your constraint depends on. The remainder of this section describes these options. To add multiple dependencies, click the '+' icon and repeat the process.
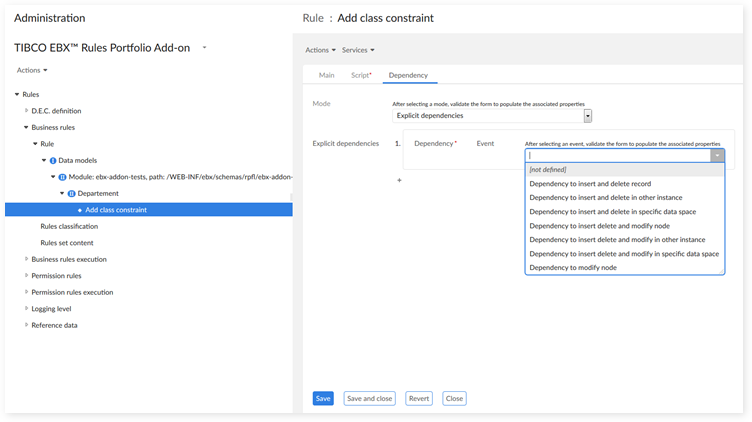
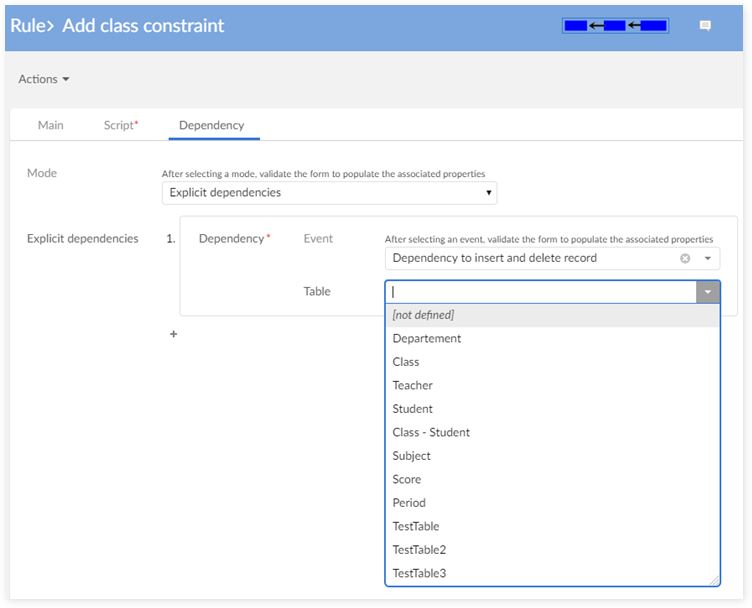
With the 'Dependency to insert and delete record' event, you only need to choose the correct table node.
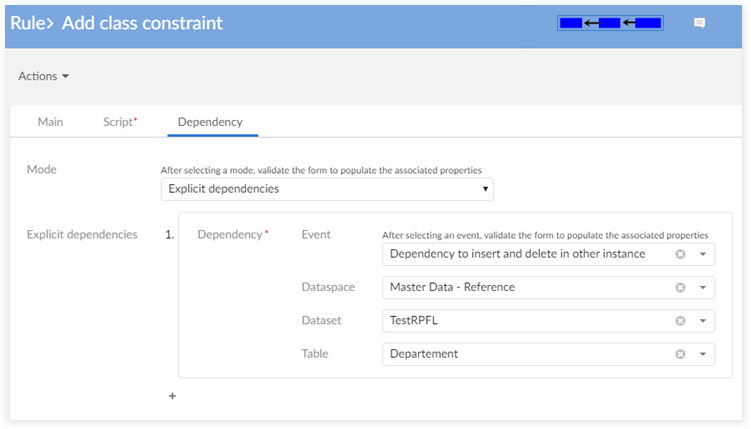
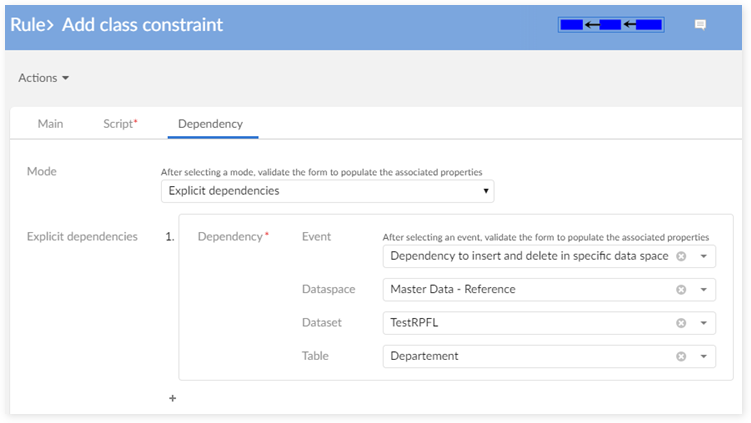
With the 'Dependency to insert and delete in other instance' and 'Dependency to insert and delete in specific data space' events, you have to select-in order: Data space → Data set → Table.
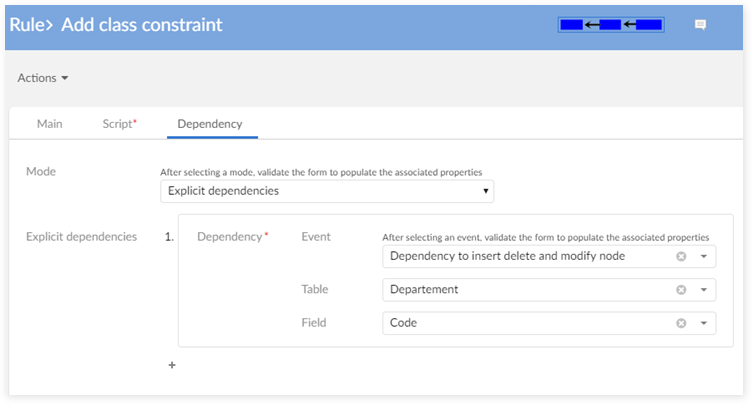
With the 'Dependency to insert delete and modify node' event, you have to select-in the following order: Table → Field.
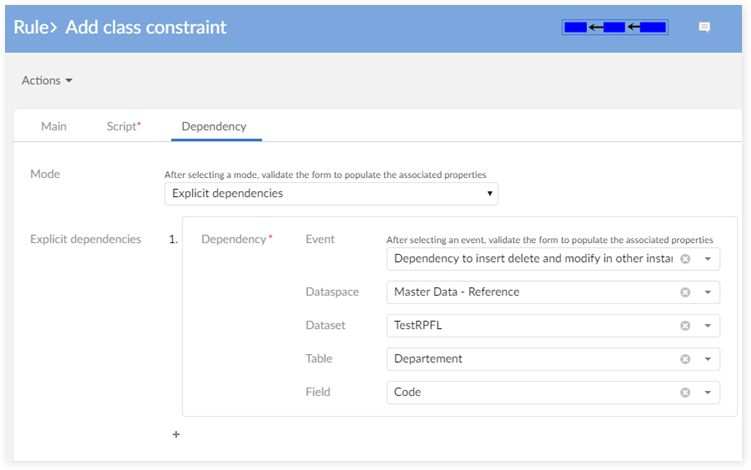
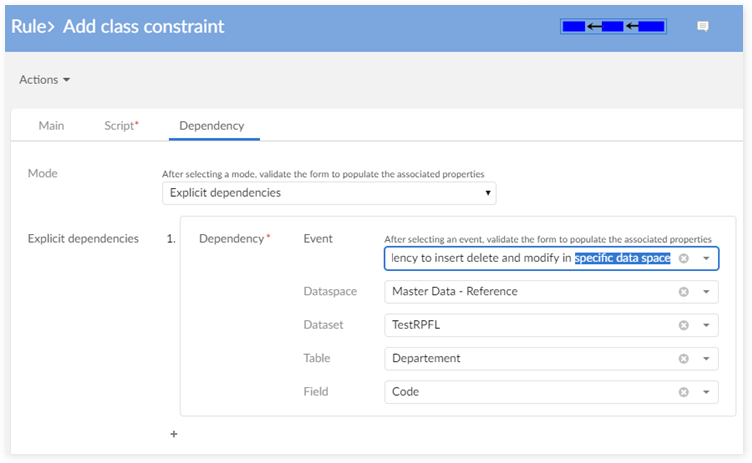
With the 'Dependency to insert delete and modify in other instance' and 'Dependency to insert delete and modify in specific data space' events, you have to select-in the following order: Data space → Data set → Table → Field.
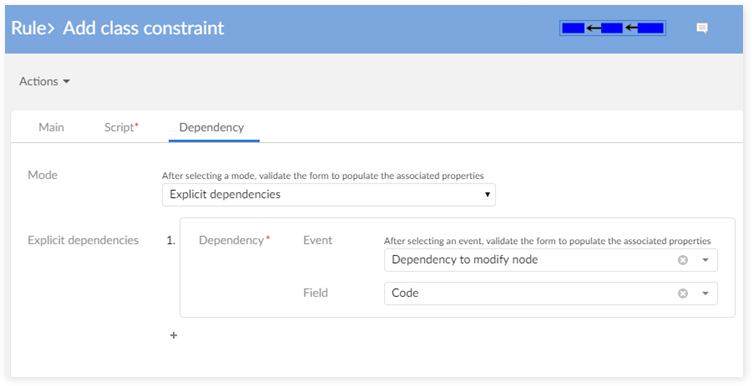
With the 'Dependency to modify node' event, you have to choose one field node.
Hierarchy view related to D.E.C.
Beginning in release 1.5.0, the add-on provides hierarchy views that show D.E.C.s, rules and rule execution using the following structure: Data model → Table → Field.
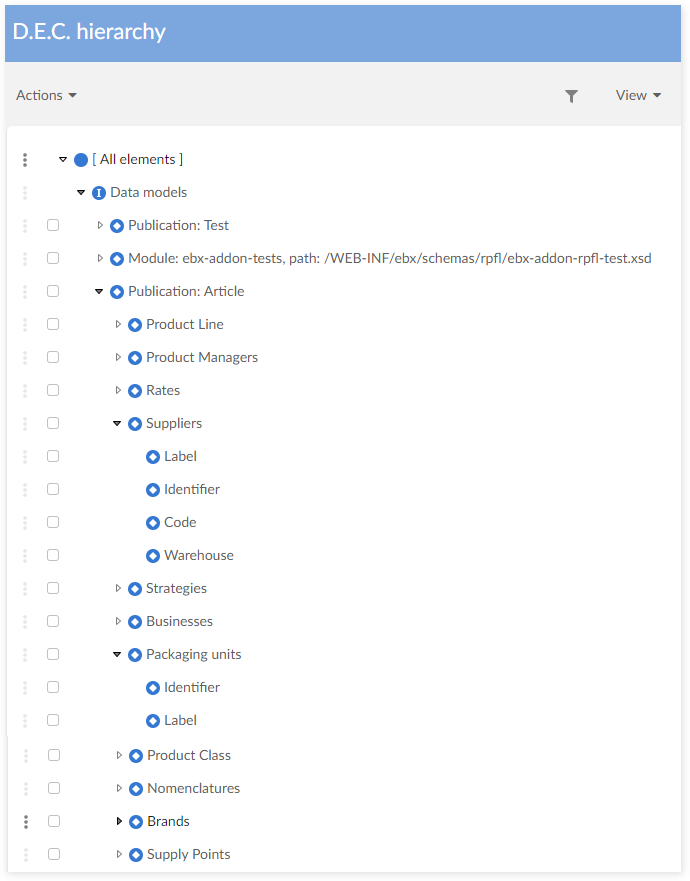
'D.E.C. hierarchy' view
The 'D.E.C. hierarchy' view shows D.E.C.s based on the 'D.E.C. type' value. All D.E.C. types in this view are graded into a hierarchy view.
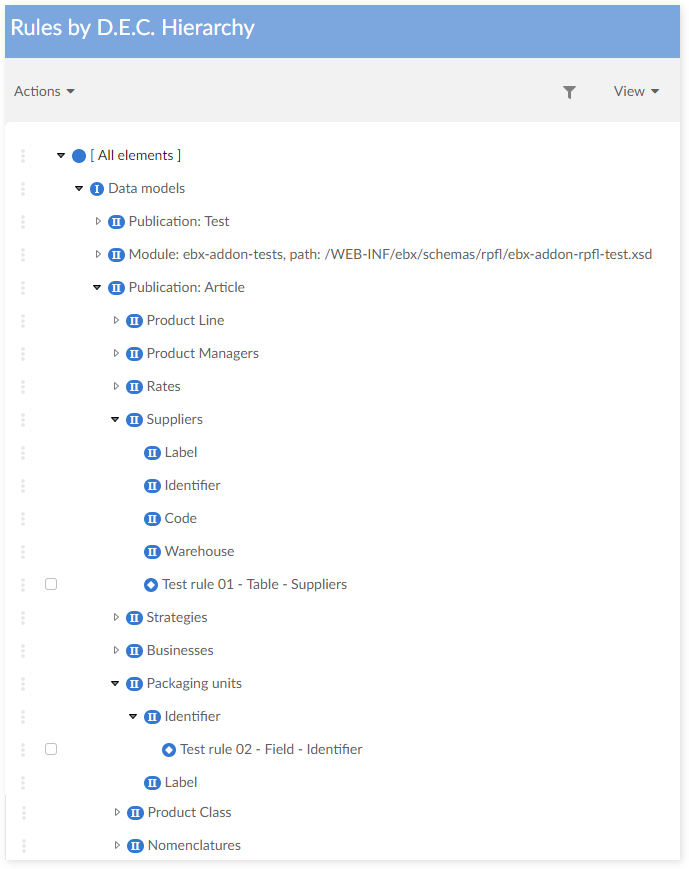
'Rules by D.E.C. hierarchy' view
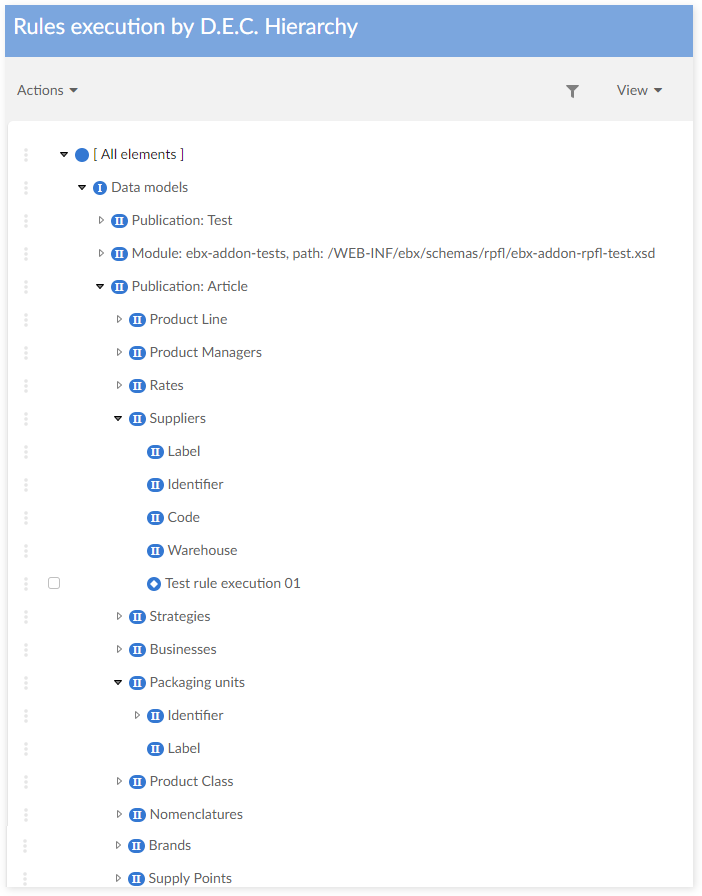
'Rules execution by D.E.C. hierarchy' view
Special notation | |
|---|---|
| The 3 new hierarchy views 'D.E.C. hierarchy', 'Rule by D.E.C. hierarchy', and 'Rule execution by D.E.C. hierarchy' display are not available on old publication of the add-on. Please read the 'Known limitation' section for more information. |
Service permission on a data model
The add-on sets permission rules on services using an 'Action permission rule'. You can declare a service on a data model and directly in the 'module.xml' file. You set service permissions based on how the service is declared.
Declare a service on a data model
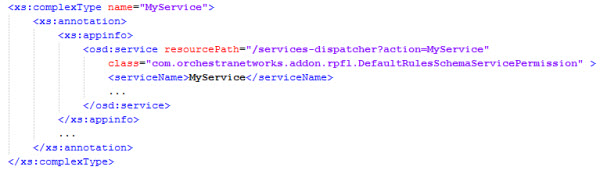
Attach the com.orchestranetworks.addon.rpfl.DefaultRulesSchemaServicePermission class to a service definition on schema, this class specifies in which conditions the service may be executed.
This class must be declared within a service declaration in schema, at attribute class:
Declare a service on module.xml
Create a class that extends DefaultRulesServicePermission. Define the service name by implementing the abstract method getServiceName()
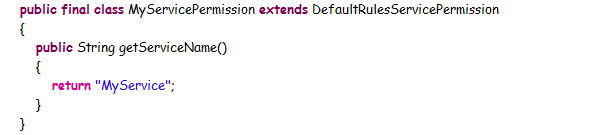
Declare this class as service permission for the declared service in the module.xml.

Environment configuration
This section guides you about some settings of the environment configuration.
Setting logging queue size parameters
By default, the logging queue size is set to 100,000 records. Once the maximum size is reached, rule execution has to wait until new queue space is available.
You can change the maximum queue size by configuring its parameter in the JAVA_OPTS java environment variable. To set the logging queue size to '200000':
JAVA_OPTS="-Debx.properties=$EBX_HOME/ebx.properties -Debx.home=$EBX_HOME -Xmx512m -Drpfl.logging.queuesize=200000"
Setting parallel rules execution parameters
The default number of threads used to run the 'Manual validation rules' in parallel mode is set to up to '5'.
You can change this value by configuring a parameter in the java environment variable. For example, to set the number of threads to up to '2', change the variable's parameter as shown below:
JAVA_OPTS="-Debx.properties=$EBX_HOME/ebx.properties -Debx.home=$EBX_HOME -Xmx512m -Drpfl.max.threadpool=2"
Setting associated queue parameters:
By default, the associated queue is set to 10,000. It is possible to change this value by configuring a parameter in the java environment variable. For example, to set size of this queue to '100000':
JAVA_OPTS="-Debx.properties=$EBX_HOME/ebx.properties -Debx.home=$EBX_HOME -Xmx512m -Drpfl.threadpool.queuesize=100000"