Data model configuration
Before using the add-on you have to configure the data model by adding classes to it that call the add-on. The default classes you have to add depend on how you plan on configuring rules. The Use Case section in this document provides some example configurations. From version 1.4.0. of the add-on you can add classes automatically through schema compilation, or manually. This section provides the steps to configure your data model.
Adding default classes manually
When you add classes manually, you can make use of all rule types. Keep in mind that you have to repeat this process each time you update an existing rule, or create a new rule that does not rely on a default class already part of the data model's component library.
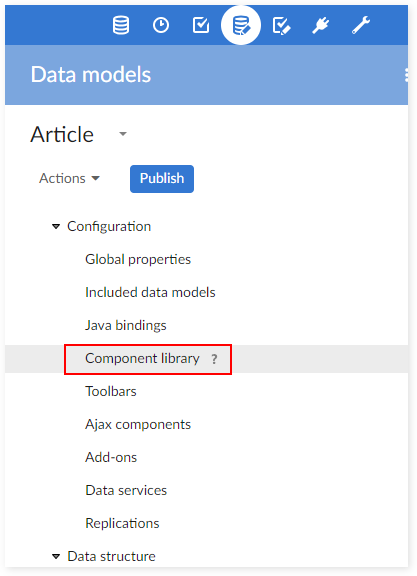
To manually add the classes:
Open your data model and navigate to 'Configuration' → 'Component library'.
Add a new component by clicking on the '+' icon.
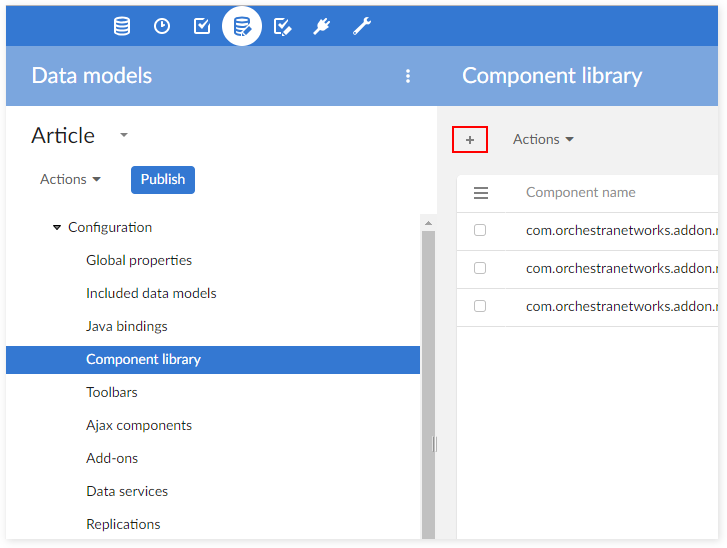
After providing a name and optional label, enter one of the following classes in the 'Configuration' field.
com.orchestranetworks.addon.rpfl.DefaultSchemaExtension → allows you to use the access permission rules.
com.orchestranetworks.addon.rpfl.DefaultTableTrigger → allows you to use the validation rules and automated rules.
com.orchestranetworks.addon.rpfl.DefaultConstraintOnTable → allows you to use the manual validation rules.
com.orchestranetworks.addon.rpfl.DefaultConstraint → allows you to apply the validation rules on fields.
com.orchestranetworks.addon.rpfl.DefaultConstraintOnNull → allows you to apply the validation rules on fields.
com.orchestranetworks.addon.rpfl.DefaultRulesSchemaServicePermission → allows you to use the action permission rules. This default class is applied on the service that you want to set permission to.
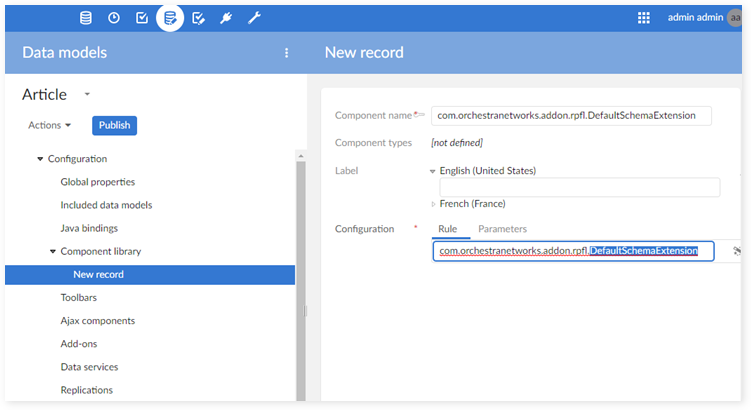
After saving and closing, the class you added displays in the 'Component library' table. You can repeat this process as needed to add the necessary classes to your data model.
Automatically adding default classes
From version 1.4.0 of the add-on, you can add classes to a data model by simply activating the add-on in the model. Thus, alleviating the need to manually add classes one at a time. When you publish your Rules Portfolio the add-on automatically adds the required classes, triggers and constraints to the data model based on rules configured for this model. However, the following limitations exist:
Action permission rules are not supported. You have to manually add these using the method described in the 'Adding default classes manually' section above.
Default classes - available to be added - automatically include the default schema extension. However, one data model can only have one schema extension. If you have your own schema extension in the data model, and you want to use a default class, you have to first remove your own schema extension from the data model. To reuse your programmatic access rules, you have to invoke them into the add-on using the method described in the appendix. See the 'Classic access rule declaration' section for more information.
You must keep your D.E.C.'s current. This is especially true if you add or remove the mandatory attribute from a data model field. To ensure successful rule operation, update the D.E.C. configuration before publishing the data model. For instance, if you update a 'Short label' field to a mandatory field, then you have to find the D.E.C. field corresponding to the updated field and set the 'Mandatory' field to 'Yes' and vice versa.
The following steps show you how to configure your data model to automatically add default classes:
Open the data model and navigate to 'Configuration' → 'Add-ons'.
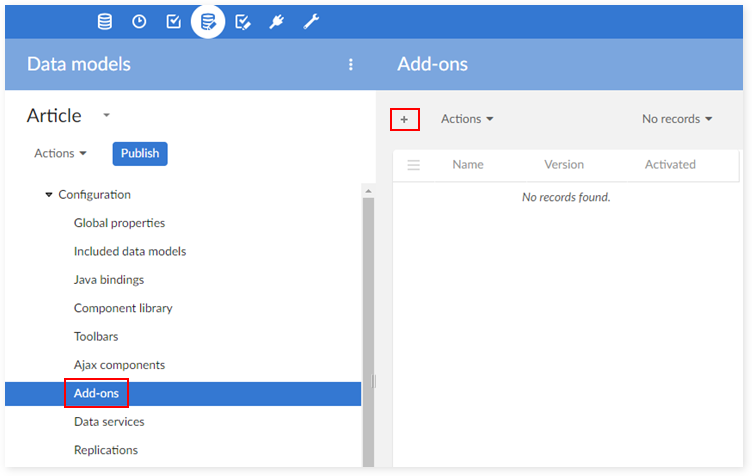
Click '+' to create a new record and select the Rules Portfolio.
