Configuring asset filters
Overview
The add-on includes the following types of filters that administrators can configure:
Filters can apply to tables and display records based on the presence of attached digital assets. Once configured, users can filter records using the EBX® table filter. For more information, see Filtering records containing assets.
A Java class can implement a programmatic filter that only allows users to view assets that meet certain criteria. Once a developer implements the class, an administrator can include it as part of a D.A.C. configuration. The filter is essentially transparent to users as the add-on automatically applies it when they view assets. For more information, see Adding a custom filter.
Filtering records containing assets
Administrators can activate a filter that allows users to display records based on the presence of attached assets. To enable filtering:
Open the desired model in the DMA.
Navigate to Configuration > Add-ons and create a new record.
In the Name field, select Digital Asset Manager.
Save, close, and publish the data model.
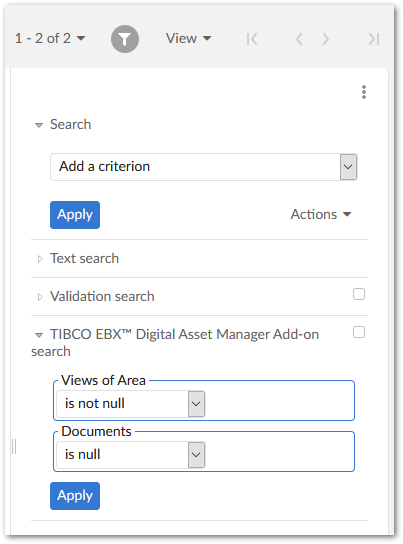
Users can access filter functionality via the EBX® table filter. The filter's TIBCO EBX® Digital Asset Manager Add-on search group displays all fields in the current table configured to accept asset attachments. For each field specify a value of:
is null to show records without attachments in this field.
is not null to show records with attachments in this field.
Adding a custom filter
A custom filter implemented in a Java class can provide fine-grained control over what users can view in the add-on's Drive view. See the API documentation for information on the interface and methods required for this type of filter. Once the class has been created, configuration only requires that you include the filter class in a D.A.C. configuration. The process is outlined below:
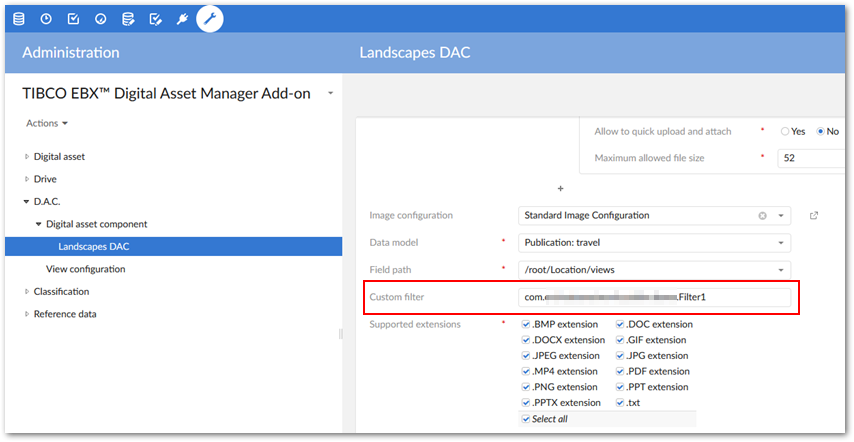
Open the desired record in the Digital asset component table.
In the Custom filter field, enter the fully qualified name of the Java class that implements the filter.
After saving and closing filter, the add-on applies filter functionality. The assets displayed for users in the Drive view are based on their permissions and the filter.