Indicators
The following image highlights main features of indicators while a dashboard is in view mode:
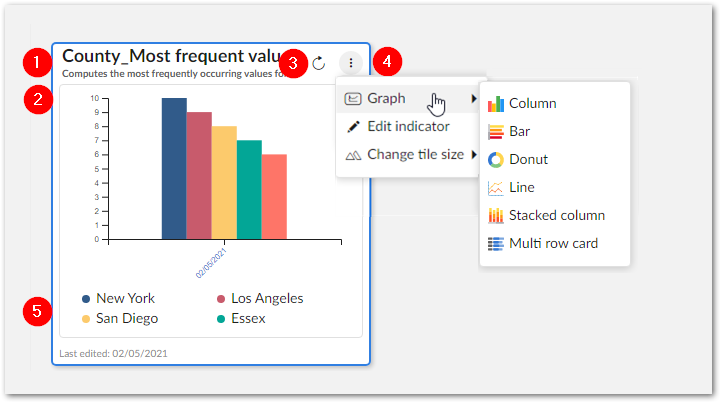
1) Title and description: | The title and description is set when the indicator is created and can be changed when in the dashboard's edit mode. |
2) Visual output: | The visualization of the dimension or characteristic measured by the indicator. |
3) Linked records and execute icons: | The The execute icon displays when on-demand execution is enabled and executes the indicator when selected. You can see the last date of execution below the indicator display. |
4) Indicator menu: | Graph: Allows you to change the indicator's display format. NoteIf you have indicators created prior to version 4.3.0 and you want them to have access to the Multi row card and Bar display options in the Graph menu, you must: Select Edit indicator and manually choose each option in the Chart configuration. This procedure is not necessary for indicators created using version 4.3.0 or later. Edit indicator: Opens the dashboard in edit mode with this indicator selected. Change tile size: Allows you to change the tile size. Available options are Large and Small. |
5) Graph legends: | Color-coded legends that correspond to the indicator's results. On hover: highlights the corresponding bar, line, or slice. On select: hides/shows the corresponding graph element. |
The following image highlights main features when an indicator is selected while the dashboard is in edit mode:

1) Configuration pane | Allows you to view this indicator's asset and function, and change the indicators chart display. Note that the indicator's asset and function cannot be changed after creation. |
2) | Deletes this indicator. |
3) | Opens the Indicator configuration window where you can adjust settings for this indicator. |
4) | Saves this indicator. |