Launching automated data profiling
To perform automated data profiling:
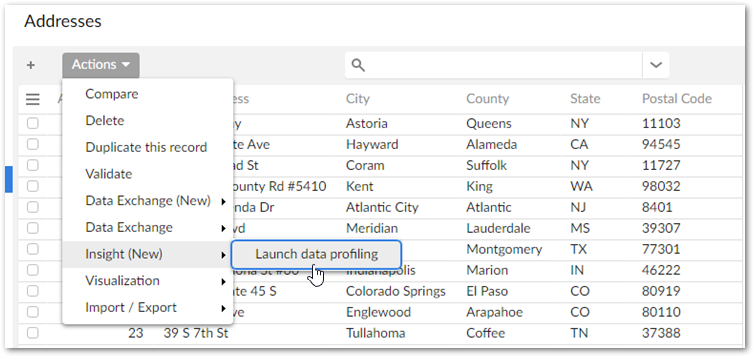
Navigate to the table containing the data you want to profile.
From the table's Actions menu, select Insight (New) > Launch data profiling.
Note
If you do not see this service in the menu, check with an administrator to ensure you have sufficient permission to run the service.
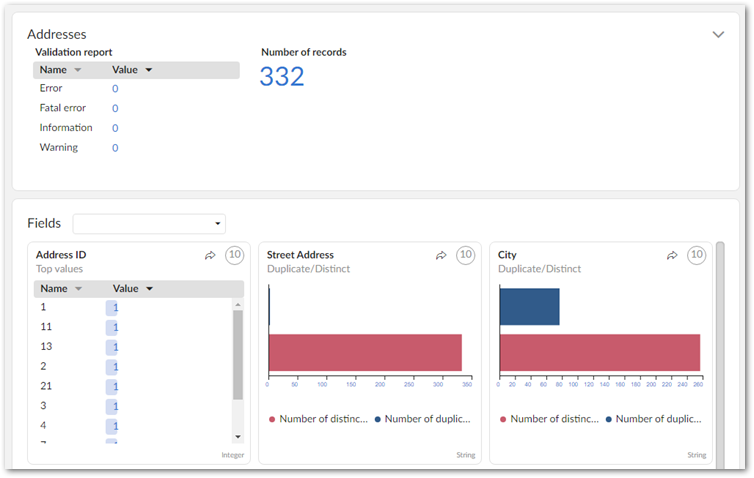
Automatic profiling results are shown below. The first results that display correspond to the Addresses table. The section underneath shows the table's fields. You can:
Drill down to see more results for each field by clicking on an indicator in the area outside of the chart.
View linked records by clicking the
 icon.
icon.Use the Fields drop down to locate a field. Note you can select a field by clicking to open the menu, or type a field's name to locate it.
Note
The following data types are not supported and not included in profiling results: associations, multi-value FKs, selected nodes and multi-value groups.