Setting up map display
Overview
You can configure the add-on to use a widget to display maps in the mobile app. When users select a record that includes a defined map location, an interactive map displays according to the configuration options you set.
The add-on's configuration process for enabling map display involves the two main steps described below:
Update a data model to include a special map data type field. See Adding a map to a data model for more instructions.
In the add-on, create a map component widget and link it to the map type data model field. During this step you specify permissions, display options and any other required parameters. See Configuring the map widget for instructions.
Adding a map to a data model
A map widget must be linked to a data model field of type map. Since EBX® does not provide this type by default, you must add the ebx-addon-common module's map-type.xsd file to your model.
A map data type is an EBX® reusable type that, when used in your data model, adds a group and fields. You can choose a type from three options. Each variation accepts location data using a different format. This means that in order to display a map of a particular location, users must enter the location using the format required by the chosen type. You can choose from the three options highlighted in the image and described below:
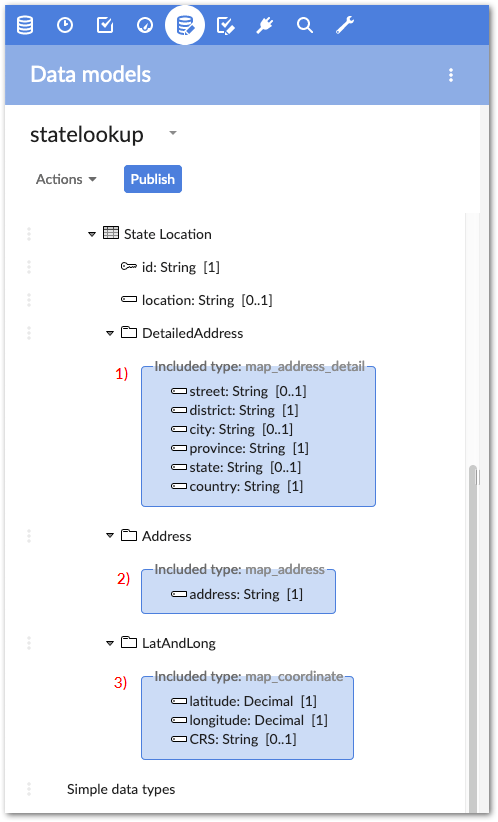
1) | map_address allows users to enter an address as a single string. For example, 3307 Hillview Avenue Palo Alto, CA 94304 USA. |
2) | map_address_detail allows users to enter address information in predefined fields for street, district, city, province, state, and country. Note that the district, province, and country fields are required. |
3) | map_coordinate allows users to enter a latitude and longitude in designated fields and specify a Coordinate Reference System (CRS) to use. The add-on includes a default CRS, but you can also add your own. See Adding a Coordinate Reference System (CRS) for more details about adding a CRS. |
The following steps show how to complete this task:
From the main menu bar, open the Data Models area and select the desired model.
In the Navigation pane, open Configuration > Included data models and select the + icon.
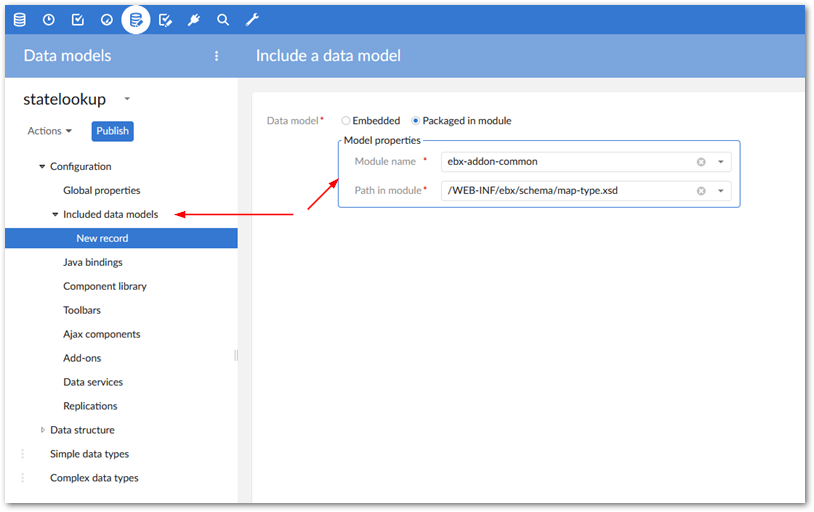
As shown above, select the Packaged in module option and in the Model properties group, choose ebx-addon-common for the Module name and select /WEB-INF/ebx/schema/map-type.xsd for the Path in module field. You can save and close the record.
Use the following steps to create a
maptype field:Create a new field in your model.
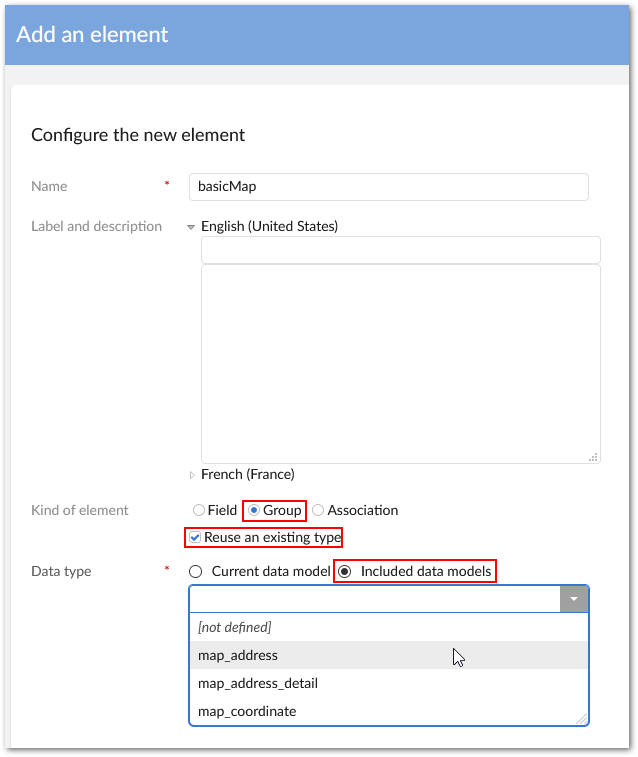
Enter required and optional information.
For the Kind of element, select Group.
Select Reuse an existing type.
Select Included data models as the Data type and choose the desired map type from the drop-down menu. See the beginning of this section for information on each type.
Save and publish your data model.
The next step is to link the field you just created with a map widget. See the next section for details.
Configuring the map widget
You configure a map widget component to link a map widget to a data model field. The configuration allows you to specify display options and any required additional parameters. To configure a map widget:
Access the Administration area from the main menu bar and navigate to TIBCO EBX® GO Add-on > Configuration > Widget Management > Widget Component.
Create a new record and supply information for the required fields. The following image and table highlight some of the options.
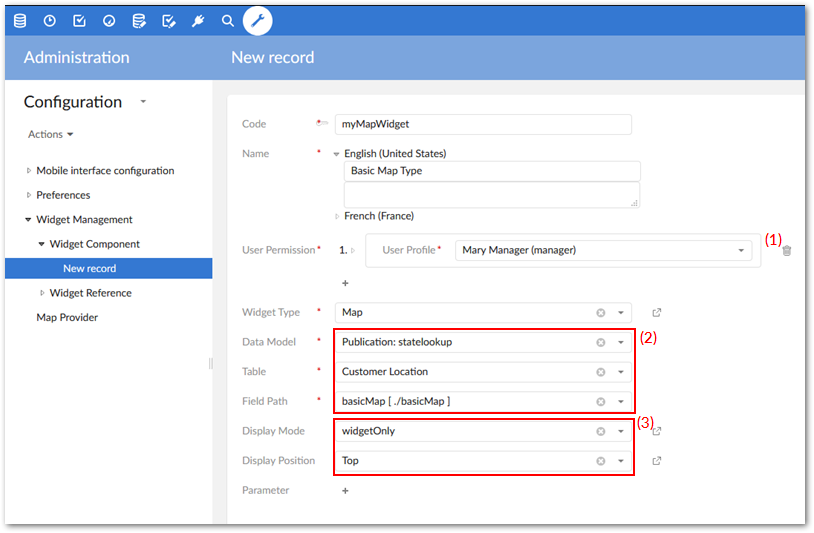
(1) | Set user permissions for this map. |
(2) | Define the path to the map type field through its data model and table. |
(3) | Set display options for the widget. |
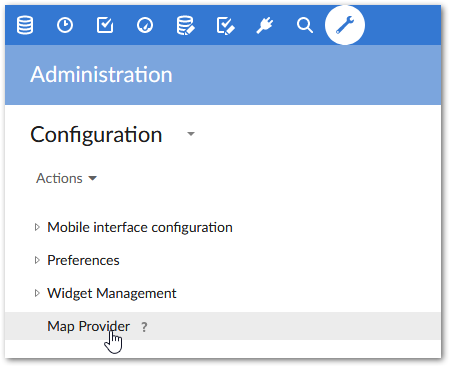
API tokens from map providers
By default, map widgets display maps using OpenStreetMap. You can use an additional provider such as Google and specify that maps for specific tables display using this provider. When adding a map provider you can supply required API tokens. You can access the options to add a provider and API key using the Map Provider table.
Adding a Coordinate Reference System (CRS)
When you use the map_coordinate option in a map setup, the values (fields) used for defining a map location include latitude, longitude, and CRS. Users can choose from any configured CRS. The add-on includes a default CRS, however you can add additional options for users.
To add a CRS:
In the main menu, select the Administration area and navigate to Technical configuration > Map Configuration.
Create a new record and provide:
A unique name.
The CRS definition, which must use PROJ.4 formatting.
After saving and closing, the CRS is available for users to select.