Creating a workflow script
Overview
Create and publish workflow script tasks directly from the EBX® Script IDE. Once a script is published, you can use it in any EBX® workflow model. For more information on workflows, see the TIBCO EBX® User Guide sections: Introduction to workflow models and Introduction to data workflows.
This tutorial demonstrates how to:
Step 1: Create and publish a workflow script task that includes input and output parameters. These parameters allow data to pass to and from the script.
Step 2: Create a workflow model and add the script task to a step in the model. During this task, a data context is created in the model that captures context-dependant data values. The values are populated when the workflow is launched. The values in the data context are mapped with the script's I/O parameters.
Step 3: Create and activate a workflow launcher. EBX® includes a variety of ways to initiate a workflow. This tutorial includes a simplified example to create and add a workflow launcher to a table's Actions menu.
Before you begin
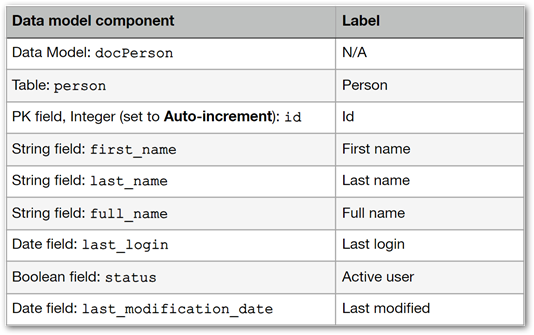
This tutorial uses the same data model and scripts as the Creating functions and Creating triggers tutorials. To follow along with this tutorial, complete the other tutorials to have a data model in the same state, or create your own copy of the model to follow along. The following image shows the complete data model::
Step 1: Writing and publishing the script
You can create and write a workflow script directly in the Script IDE without any pre-requisites. This example shows how to add input parameters to a script, which you map with a workflow's data context. This enables data to pass to the workflow script and be processed.
Tutorial example use case: A business rule requires that no active users are deleted from the Person table. This table includes a field that indicates whether a user is active. A user launches a workflow when they want to delete a Person record. The script checks the users status. If the user is inactive, the record is deleted; if they are active, a message is written to the logs saying the record cannot be deleted.
Script tip: Make it a habit to save and compile your script at regular intervals. This helps catch any compile time errors and creates save points so that you can revert the script to a more stable state.
To write a workflow script task using the EBX® Script IDE:
If the EBX® Script IDE perspective is not open, click the
 icon at the top right of the EBX® toolbar and select Script IDE.
In the Activity Bar on the left, locate and select Workflow.
Create a new script by selecting Create in the middle Navigation Panel.
Add required information and parameters:
Enter the script name:
statusBeforeDeleteEnter the label and optional description:
Check status before deleteAdd parameters to access data context components, such as a dataspace, dataset, table, and record. These values provide input to the script and are operated on by the script's logic.
Add each of the following parameters and leave all options as default:
WF_Script_dataspace
WF_Script_dataset
WF_Script_table
WF_Script_requestXPath
Click Save at the bottom of the workspace.
Write the logic for the workflow script task in the Script tab.
Add the imports:
This script leverages pre-built functions included in the following EBX® Script language (ESL) units:
core.data,core.complex, andcore.log. The syntax to declare a unit is:uses core.<unit_name>;. A reference to the data model is also a required part of the data context for this workflow example. The syntax to reference a model is:references model <data_model_name>;The following example shows the imports:uses core.data as data; uses core.complex as complex; uses core.log as log; references model docPerson;
Create constants to hold the values based on user selection:
When a user selects a record and starts the workflow from a table's Actions menu, information about the selected record is passed to the workflow script's input parameters. The constants must hold the: dataspace, dataset, table, and selected record. Think of it as a parent/child relationship; beginning with the dataspace, you declare the parent and when you declare a child, the parent is passed as input. The following code is added after the
beginstatement in theexecuteScriptTask()procedure:// Create constants to hold the dataspace, dataset, and table const dataspace := data.findDataspace(_ebx.parameters.WF_Script_dataspace); const dataset := data.findDataset(dataspace, _ebx.parameters.WF_Script_dataset); const table := data.findTable<docPerson.person>(dataset);Use a transaction to perform actions on selected data:
It is imperative to use a transaction when operating on context dependent data. A transaction ensures data consistency by isolating affected data and only making changes if the transaction is completed. In ESL, transactions are executed on dataspaces and have the following syntax:
execute transaction <transaction_name> on <dataspace>where <transaction_name> is the variable name assigned to the transaction and <dataspace> is the dataspace name where the transactions occurs. After initiating the transaction, the sample code:Gets the current record using its XPath.
Creates a complex object to store the selected record's primary key.
Assigns the currently selected record's id to the PK's
idattribute.
// Initiate transaction execute transaction tr on dataspace begin // Get current record using XPath var currRecord := data.lookupRecordByFullXPathForUpdate(tr, table, _ebx.parameters.WF_Script_requestXPath); // Create 'primary key' object var pk := complex.primaryKeyOf<docPerson.person>(); // assign the value from the currently selected record's 'id' field to the objects 'id' parameter pk.id := currRecord.id; end
Write the logic to check the user's status and either delete the record or write a message to the log:
In the example, an
if then elsestatement passes in the selected record'sstatusfield. A status offalsemeans the user is inactive and can be deleted, calling thedeleteRecordByPrimaryKey()function. Theelseonly executes if the user is active and sends an info type log message. To view EBX® Script log messages, navigate to: Administration > Scripting management > Script logs.// If the user is considered 'not active', then delete // If they are active write an info message instead if currRecord.status = false then begin data.deleteRecordByPrimaryKey(tr, table, pk); end else log.info('Active users cannot be deleted.');The full workflow script task example:
uses core.data as data; uses core.complex as complex; uses core.log as log; references model docPerson; export procedure executeScriptTask() begin // Create constants to hold the dataspace, dataset, and table const dataspace := data.findDataspace(_ebx.parameters.WF_Script_dataspace); const dataset := data.findDataset(dataspace, _ebx.parameters.WF_Script_dataset); const table := data.findTable<docPerson.person>(dataset); // Initiate transaction execute transaction tr on dataspace begin // Get current record using XPath var currRecord := data.lookupRecordByFullXPathForUpdate(tr, table, _ebx.parameters.WF_Script_requestXPath); // Create 'primary key' object var pk := complex.primaryKeyOf<docPerson.person>(); // assign the value from the currently selected record's 'id' field to the objects 'id' parameter pk.id := currRecord.id; // If the user is considered 'not active', then delete // If they are active write an info message instead if currRecord.status = false then begin data.deleteRecordByPrimaryKey(tr, table, pk); end else log.info('Active users cannot be deleted.'); end end
Publish the script to make it available for use in a workflow model using the Publish button at the bottom of the Script tab.
What's next?: Create the workflow model that will use the script you wrote in the steps above.
Step 2: Creating the workflow model
A workflow model definition includes steps and their order of execution. These models are highly versatile and can range from straightforward, single-step processes to complex, multi-layered sequences. This tutorial focuses on the interaction between a script written in the IDE and a workflow model. A simple workflow model example is used to achieve this.
To create a workflow model:
In the main EBX® toolbar, select Workflow models and then click Create a workflow model.
Provide a unique name that does not include spaces or special characters. To follow along with this example, use
deletePerson.Create a data context:
A data context is used to capture context-dependant data values, such as a selected record's id.
Navigate to Workflow modeling > Workflow model configuration > Data context.
Click the '+' icon to add the following list of variables and set each variable's Input parameter to Yes:
WF_Variable_XPath
WF_Variable_dataspace
WF_Variable_dataset
WF_Variable_table
Each variable gets mapped to a parameter from the workflow script. The names should be similar to the script's parameter names, but it might be a good idea to include additional descriptive information. This helps you differentiate between workflow model variables and script parameters.
Add a step to the workflow model that executes the workflow script task:
Navigate to Workflow modeling > Workflow model steps and in the workflow diagram.
Hover your mouse over the line between Initial transition and Final step, and click the + icon.
Provide the task name:
deletePersonScriptSelect Script from the Step type menu, and click Next.
Configure the script:
Leave the Hidden in progress view and Progress strategy at their default values.
For the Script group, set the Input mode to Script.
Use the Script name menu to select the
statusBeforeDeletescript.A list of the script's input parameters displays.
Use the wand icon to map each input parameter (these come from the workflow script) with the corresponding variable from the data context created in step 2.
Click Create.
Save and close the step.
Select Publish to initiate the publication process and if the information displayed looks OK, select Publish at the bottom of the page.
Step 3: Creating the workflow launcher and activation
A workflow must be initiated by a workflow launcher. You can configure a workflow launcher in several ways. For the sake of brevity, this example demonstrates how to create a workflow that users can launch directly from a table's Actions menu. This requires creation of a workflow launcher and workflow activation.
To create a workflow launcher and activation:
Navigate to: Administration > Workflow management > Workflow launchers > Launchers.
Create a new record:
Enter the launcher name:
DeleteInactiveUserUse the Workflow publication name menu to select the
deletePersonworkflow model publication.The Data context variables group displays below.
For Documentation, add the name displayed in the table menu:
Delete an inactive userMap the data context variables with the EBX® built-in data context types. These values are automatically populated based on the active context when a users selects data to delete and launches the workflow.
Save, but do not close the record.
The Launcher activations section displays.
Create a workflow launcher activation
A workflow launcher activation determines the accessibility of a workflow launcher. The launcher is available to the selected profiles when they are viewing the specified tables.
Click + to create a new launcher activation.
Select the
docPersondata model.Select the
Persontable.For Profiles, ensure your profile is added.
Save and close.
Save and close the record.
The workflow that uses the script we created can now be launched from the
Persontable's Actions menu.