Custom views
Overview
You can customize views in the EBX® Metadata Management application based on the requirements of target users. You can create the following types of views:
Tabular: A table view to sort and filter the displayed records.
Hierarchical view: A tree view that links data in different tables based on their relationships.
Tabular views
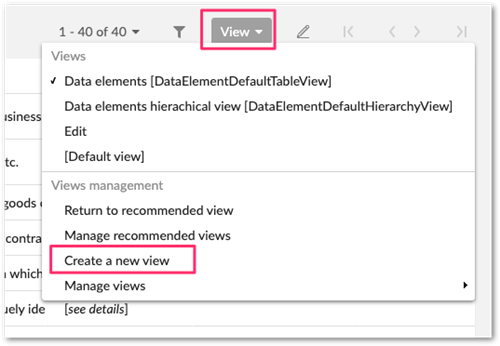
In the table view mode, select the View button on the top right corner. The menu that displays allows you to:
Apply an existing view by clicking on the view’s name.
Manage existing views, if you have sufficient permission.
Create a new view.
Creating a new view
To create a new view, select View, then Create a new view.
In the dialog box that displays, you can:
Set the name
Set the owner
Set profile/user to share the view with
Set the view mode
To create a new tabular view, set the view mode to Simple tabular view. If you want to share your view with other users you can:
Set the profile (identified by [profile-name]): the view is shared with all users included in the profile.
Set the user: the view is shared with only the specified user.
Click on the Next button to continue the creation process. You are presented with the options shown in the following image and described below.
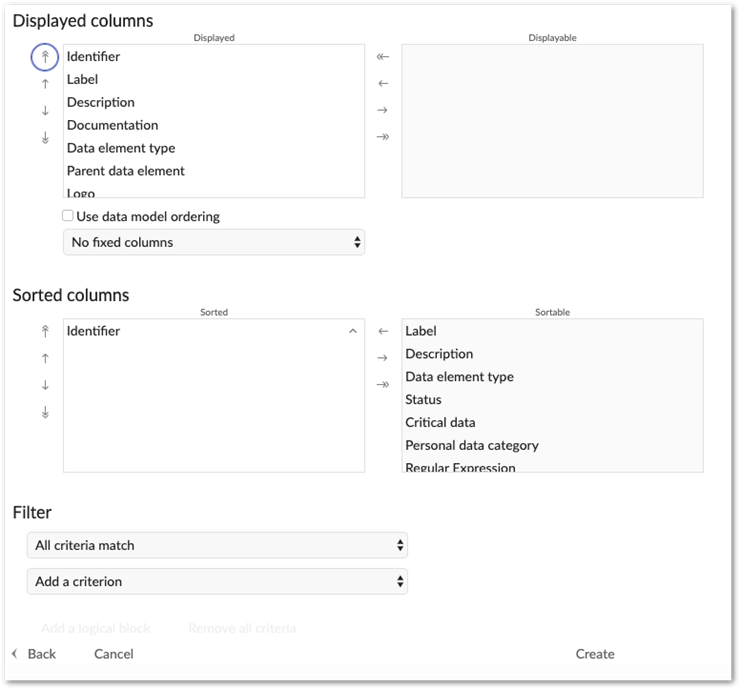
In the next view you can:
Select columns you want to display.
Set columns order.
Add a filter.
Set the pagination (number of records per page).
Enable grid edit and set a toolbar. A toolbar corresponds to a list of available actions on the top of the table. You can set:
Light generic toolbar for the table view.
Generic toolbar for the table view.
Finally, save your new view or select Save and apply to save it and return to the table view with your new view applied.
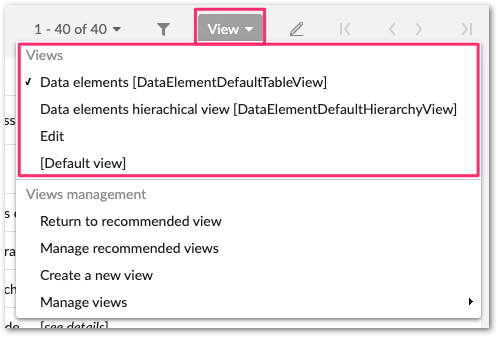
Applying an existing view
To apply an existing view, open the View menu and select the view you want to see.
Hierarchical views
Creating new hierarchical view
To create a new hierarchical view, follow the steps above to create a tabular view. However, in the step to select the view mode, select Hierarchical view.

Select Next to define the hierarchy’s dimensions and other options. The following image and list highlight some options:
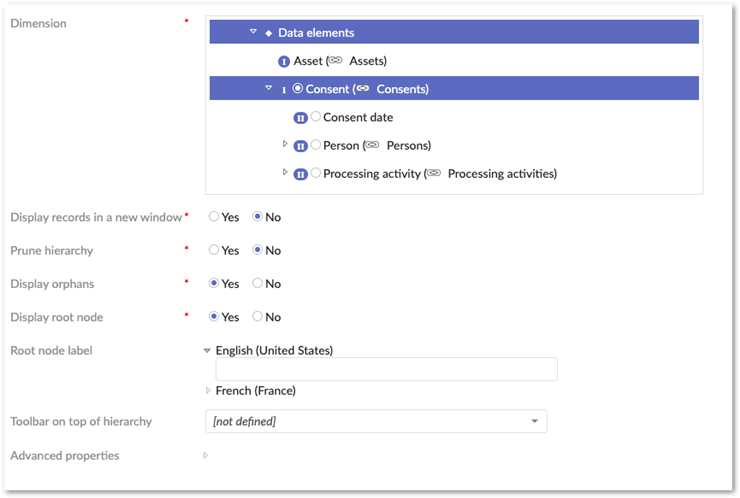
Display records in a new window: If Yes, a new window will be opened with the record. Otherwise, it will be displayed in a new page of the same window.
Prune hierarchy: If Yes, hierarchy nodes that have no children and do not belong to the target table will not be displayed.
Display orphans: If Yes, hierarchy nodes without a parent will be displayed.
Display root node: If No, the root node of the hierarchy will not be displayed in the view.
Root node label: Localized label of the hierarchy root node.
Toolbar on top of hierarchy: Allows you to set the toolbar on top of the hierarchy.
Display non-matching children: In a recursive case, when a search filter is applied, allows the display of non-matching children of a matching node during a search.
Remove recursive root leaves: In a recursive case, when a search filter is applied or if the mode is pruned, removes from the display the root leaves.
Detect cycle: Allow cycle detection and display in a recursive case; the oldest node record will be chosen as the cycle root. Note that this does not work in search or pruned mode.
Select Next to define how you want to display each node of your hierarchy.
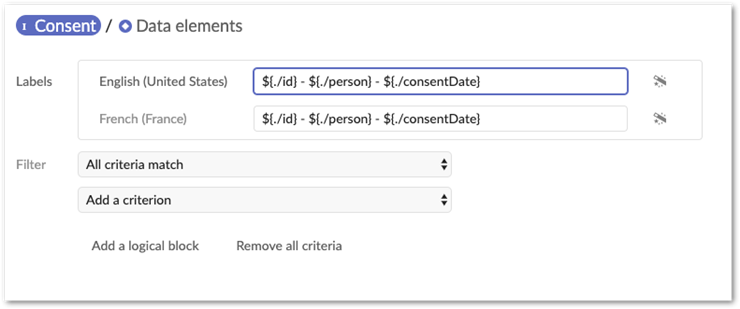 In this view you can:
Switch to node by clicking on the node name.
Define label.
Add a filter.
Finally, select Create to create your view or Create and apply to apply it after creation.