Home page
Overview
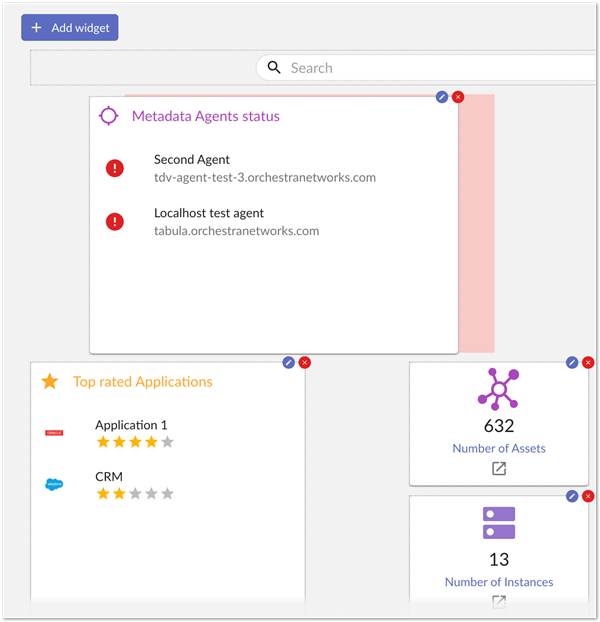
The Home page displays a global metadata view using widgets that allow quick access to services and data.
As shown below, the first time you access the Home page you can choose to:
Use the default home page: Selecting this option displays the default home page, which you can customize later. See customize your home page for more information.
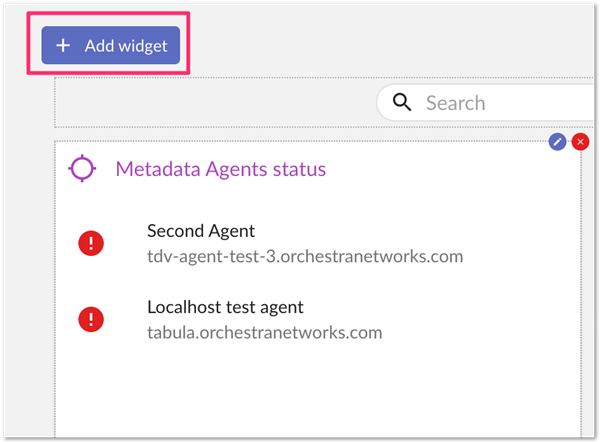
Create your home page: Selecting Configure my home page displays an unpopulated home page and an Add widget button in the top left corner. Use this button to choose from and add available widgets to your home page. Use the Save button to save changes.
Home page widgets
The Home page displays information on widgets. You can create your own widget from a widget type or use a pre-configured widget. The following section describes the types of widgets available.
Widget types
There are multiple widget types available. For example, there is a widget for quick access to search globally, another one for quick access to a specific table. The following sections describe the available widgets.
Global search widget
This widget displays a search bar where you can enter search terms to search using the Global search service. Configuration options are not available for this widget.
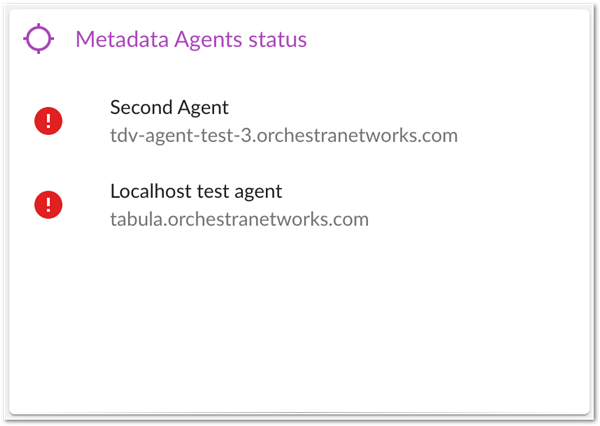
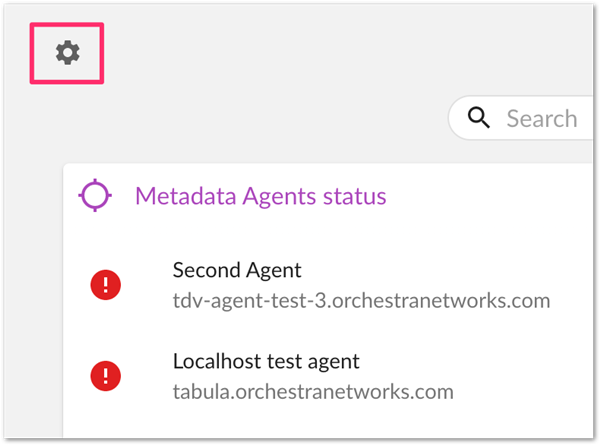
Metadata agent status widget
This widget displays metadata agent status. You can see if an agent is connected and, if not, the reason why. This widget includes the following configuration options:
Title: widget title
Description: widget description
Agent: Optional parameter to limit the displayed agents to one or many selected agents
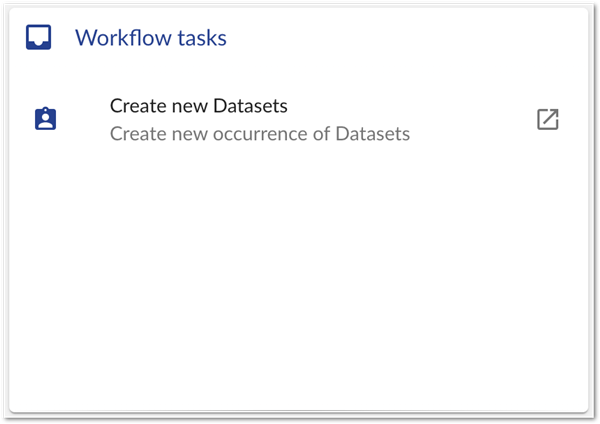
Workflow tasks widget
This widget displays the workflow tasks that are waiting for you or offered to you. From this widget you can click on a task to access the workflow view or the workflow graph view. If a task is offered to you but not already allocated, a pop-up message displays to inform you that it will be allocated to you. Configuration options are not available for this widget.
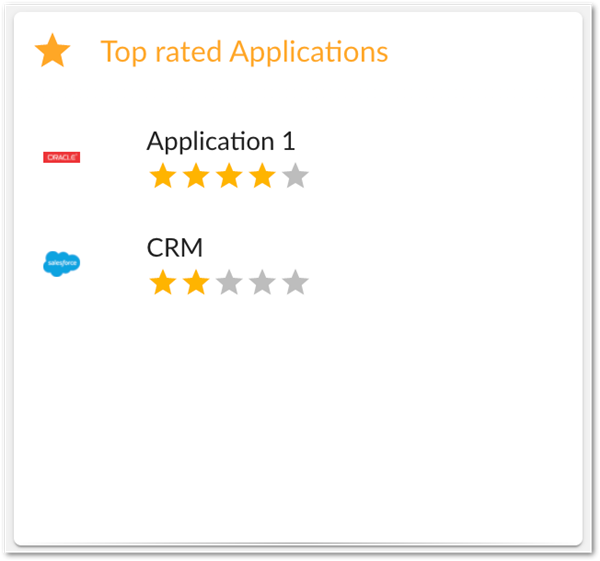
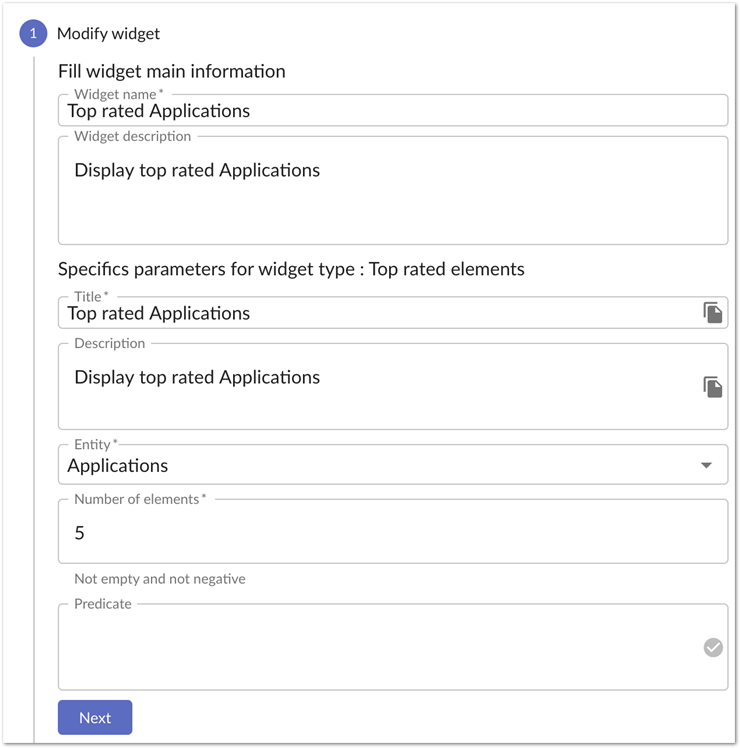
Number of elements widget
This widget displays an entity’s top rated elements. You can click on an element to access it. If no element is rated, this widget displays an empty sign. This widget includes the following configuration options:
Title: widget title
Description: widget description
Entity: select the entity you want to display
Number of elements: number of top rated elements to be displayed
Predicate: Xpath predicate format to filter the selected entity
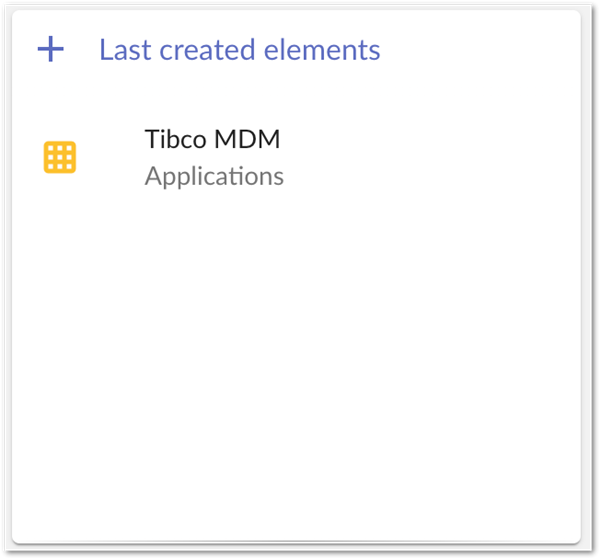
Last created elements
This widget displays last created elements from selected entities. You can access the element by clicking on it. Hover your mouse over an element to display a tooltip that includes the creation time and creator’s user name. This widget includes the following configuration options:
Title: widget title
Description: widget description
Entity: select one or more entities that you want to display
Number of elements: maximum number of elements to display
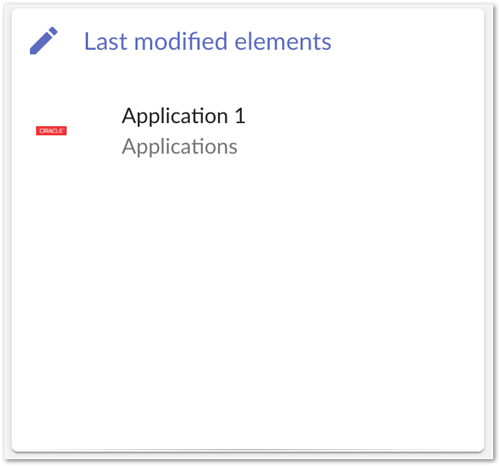
Last modified elements
This widget displays the most recently modified elements from selected entities. You can access the element by clicking on it. Hover your mouse over an element to display a tooltip that includes the modification time and and the user name that made the modification. This widget includes the following configuration options:
Title: widget title
Description: widget description
Entity: select one or more entities that you want to display
Number of elements: maximum number of elements to display by entity
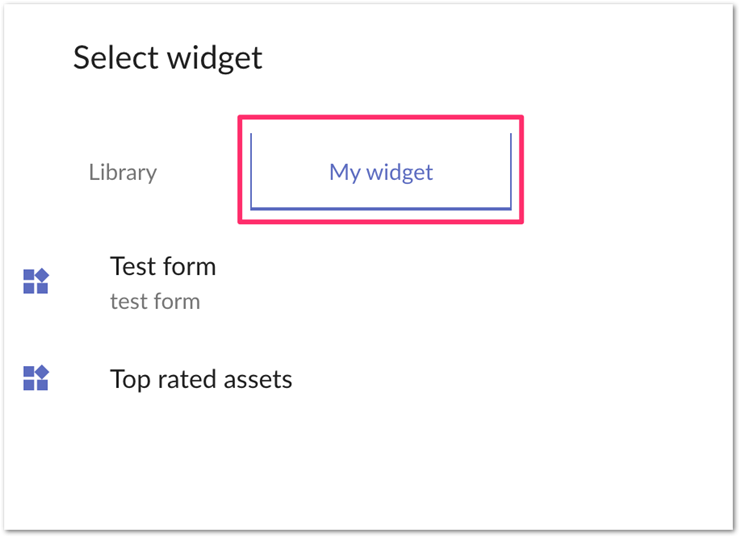
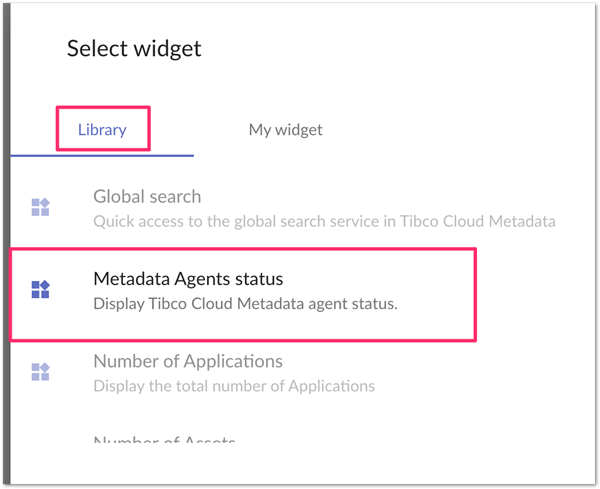
Widget “Library” and “My widget”
On the Add widget dialog you can choose:
The Library tab to display pre-configured widgets or shared widgets.
The My widget tab to display your widgets.
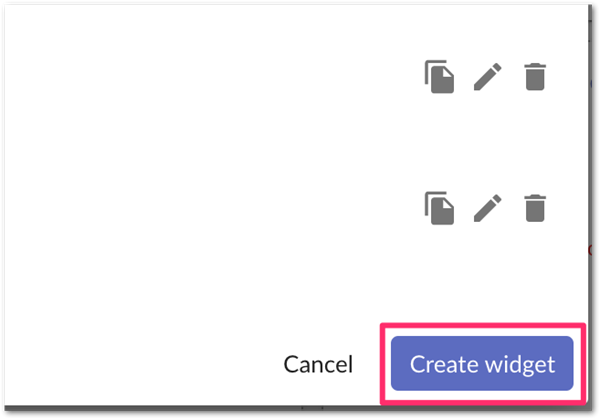
Create/Duplicate/Update/Delete a widget
You can create any widget type you want. You can duplicate an existing widget from your widget library or from the shared ones. You can only update or delete your own widgets.
Create a widget
To create a new widget, click on the gear icon in the top left corner of the home page.
You are now in home page edit mode. Click on Add widget in the top left corner.
A dialog displays that allows you to create a widget. Select Create widget to open the widget configuration wizard and begin the creation process.
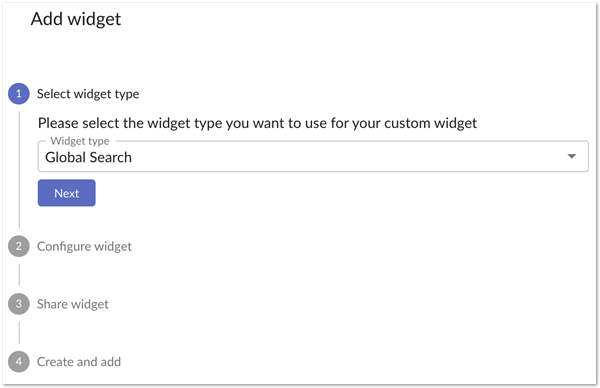
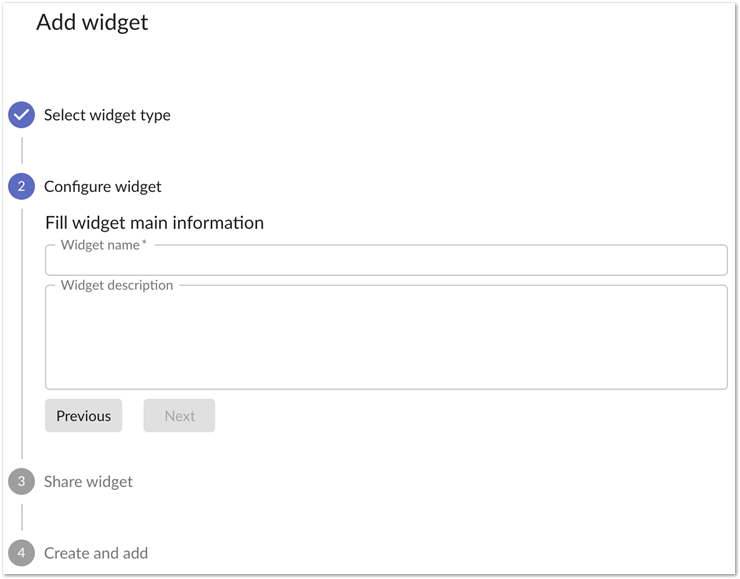
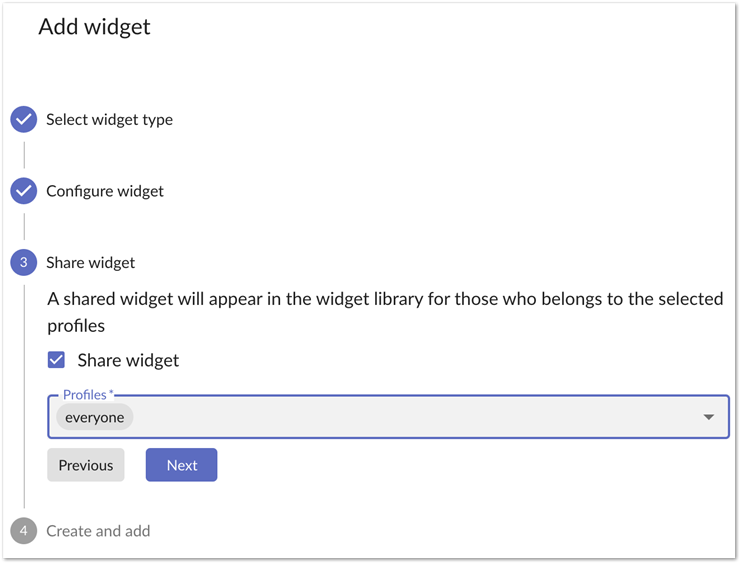
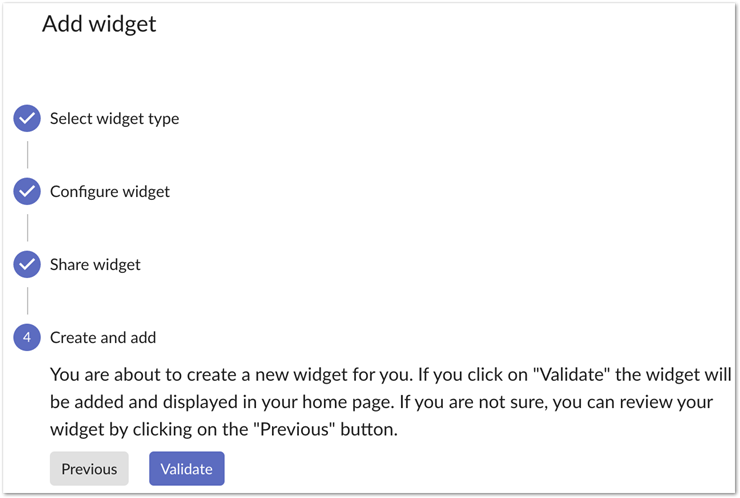
The widget configuration wizard includes the following steps:
Select the widget type.
Configure widget: configure widget values and specific widget type attributes.
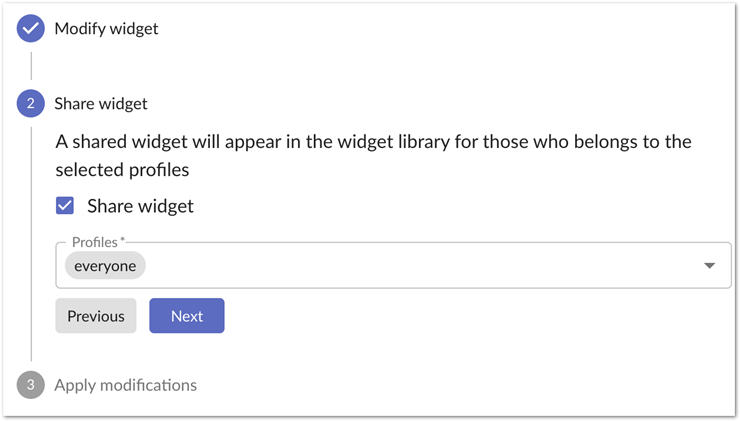
Share widget: configure the widget sharing parameter. A shared widget is available for other users.
Verify widget: verify widget information and process creation.
Note
You must enter all required information at each step to move to the next. The Next button is disabled until you do.
The following sequence of images shows a sample widget creation:
Modify a widget
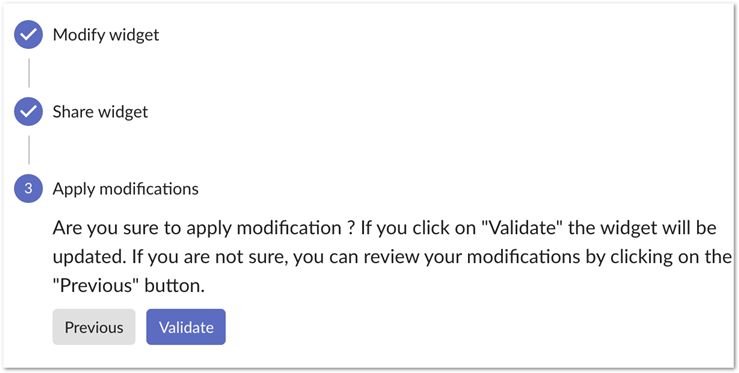
When you modify a widget, a simplified version of the widget configuration wizard allows you to modify: type attributes, the sharing configuration, and verify and apply the changes.
To modify widget:
If the widget you want to edit is on your Home page:
Select the gear icon to edit the Home page.
Select the edit icon on the widget you want to modify.
Complete the steps in the wizard.

If the widget you want to edit is not on your Home page:
Select the gear icon to edit the Home page.
Select Add widget and in the dialog that displays, select the My widget tab.
Select the edit icon on the widget you want to modify.
Complete the steps in the wizard.

The following sequence of images demonstrates the widget modification process.
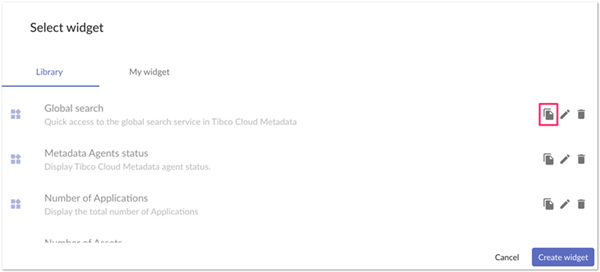
Duplicate a widget
To duplicate an existing wizard:
Select the gear icon to edit the Home page.
Select Add widget.
Choose the desired widget from the library or your collection and select its duplicate icon. The configuration wizard displays.
Complete the steps in the wizard to duplicate the widget and add it to your current home page.
Delete a widget
You can only delete widgets that you have created. To delete a widget:
Select the gear icon to edit the Home page.
Select Add widget.
Select the My widget tab.
Select the delete icon on the desired widget. The widget is deleted after you confirm the action.
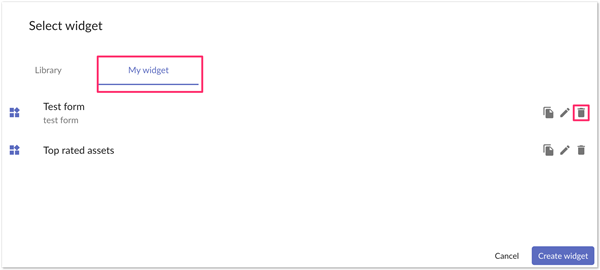
Note: if your widget was shared or was in use in your home page, this action will remove it for you and all other users.
Customize your home page
If you prefer to display a specific widget instead of another you can do it thanks to home page customization.
If you start from the default home page or from a blank one, you can:
Modify widget position
To move a widget:
Select the settings icon.
Select and drag a widget to the desired location.
Save your modifications.
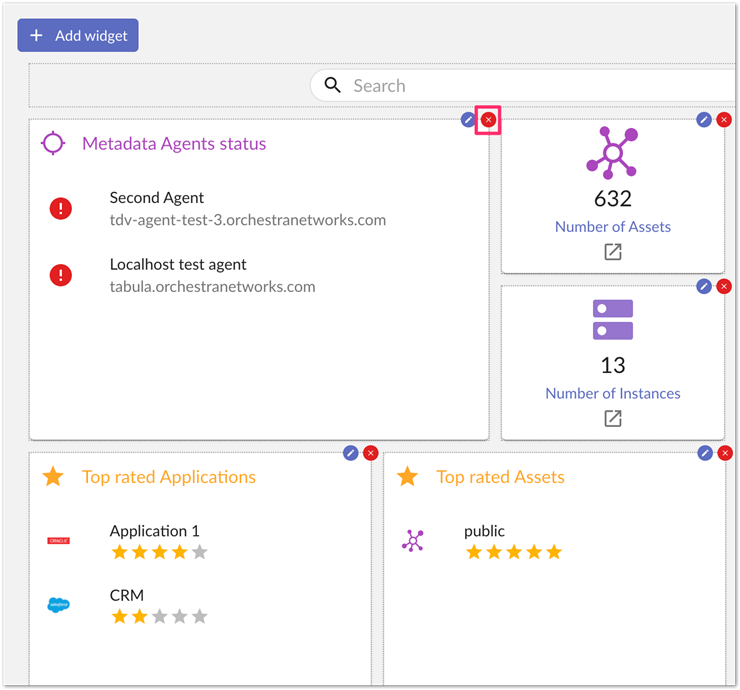
Add/Remove pre-configured widget
To add and remove widgets, enter Home page edit mode by selecting the settings icon.
To remove a widget, select its close icon.
To add a widget:
Select Add widget.
From the Library tab, select the widget you want to add.
Note
Widgets are added to the end of your home page. Once it is added, you can move to the desired location. You can only add a widget that is not already on your home page.
Add/Update/Remove a widget created by you
Use the steps in the previous section, but select the My widgets tab in the Add widget dialog box.